Diagnosing & Fixing PHP Fatal Errors
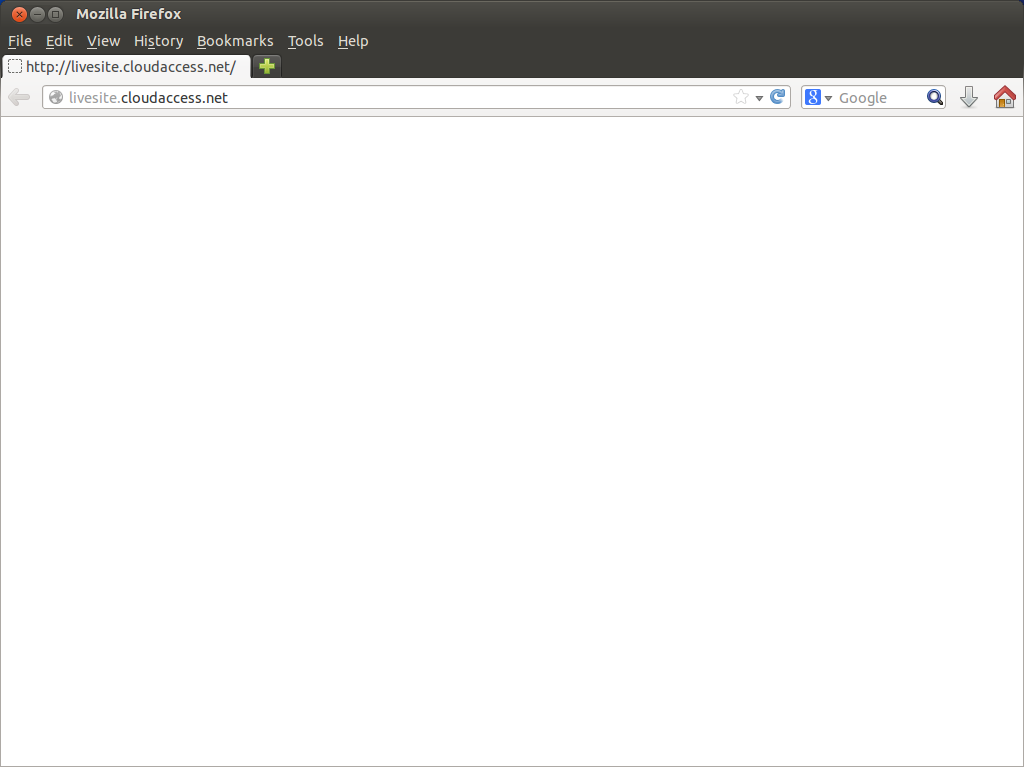
Imagine this horrible hypothetical situation: you’re deep in development mode making changes all over your site. You’re in the zone - nothing can stop you as you move about the options as fast as humanly possible. Your site is going to be a miracle, you’re a genius, ideas keep flowing through your head and you’re going to change the world. After making several changes, installing several extensions, posting multiple articles, you refresh the page to see the changes live only to cry out in pain and anger because your site suddenly looks something like this:
Or this:
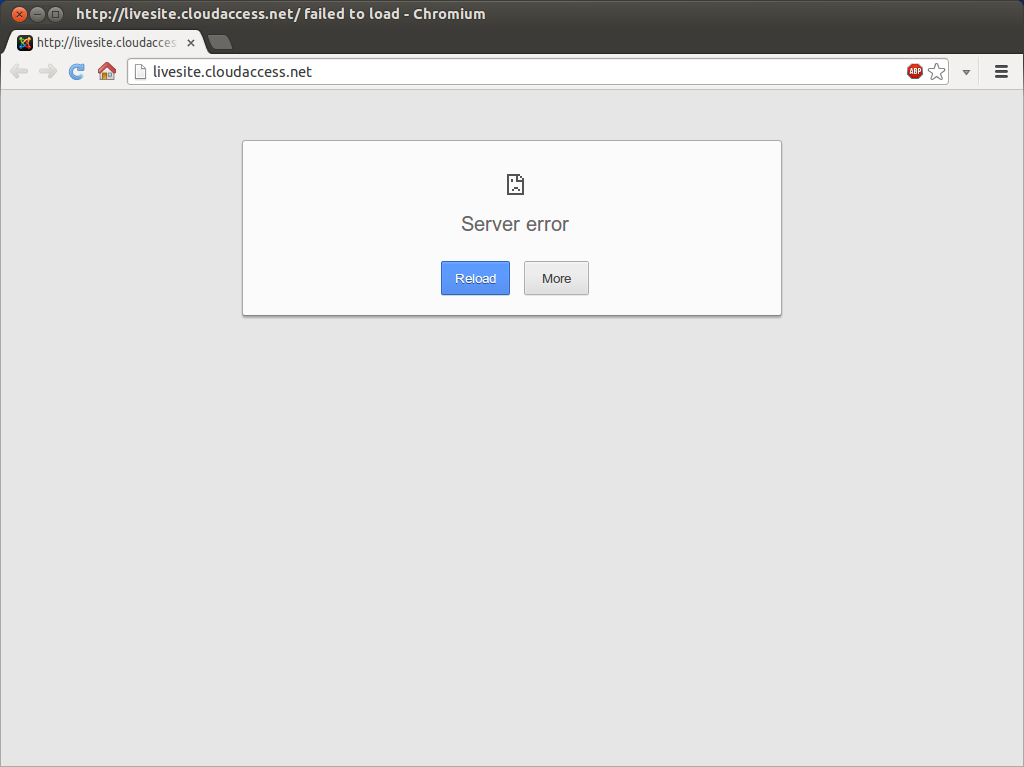
Also known as the dreaded “500 Internal Server Error”.
And because you were so deeply in the zone, you realize you haven’t made a backup in hours. All that hard work is lost! You figure that you’ll either have to start from scratch, or pay some developer a tremendous amount of money just to get your site back.
Well, luckily - with Joomla - that’s often not the case.
What you see before you is something we like to call the “White Screen of Death” - a PHP Fatal Error in disguise. PHP Fatal Errors are coding errors so severe that the server cannot display the site properly - they are usually caused by conflicting or poorly designed extensions, .htaccess misconfigurations and things like that. As a CloudAccess.net tech support specialist, diagnosing and fixing PHP Fatal Errors is my bread and butter - after over 4 years of seeing them, I can usually fix them within 5 minutes. The purpose of this blog post is to arm you with a little knowledge so you can connect the dots (the series of prompts and error messages) and resolve this issue yourself.
You’re probably thinking that, “well, that's just, like, your opinion man,” but it really isn’t rocket science. Joomla has its own internal mechanisms that allow you to find the culprit (usually a conflicting extension) and disable it very easily. Even when the PHP Fatal Error brings down both the front end and back end, there are easy ways to enable those mechanisms and use them to your advantage.
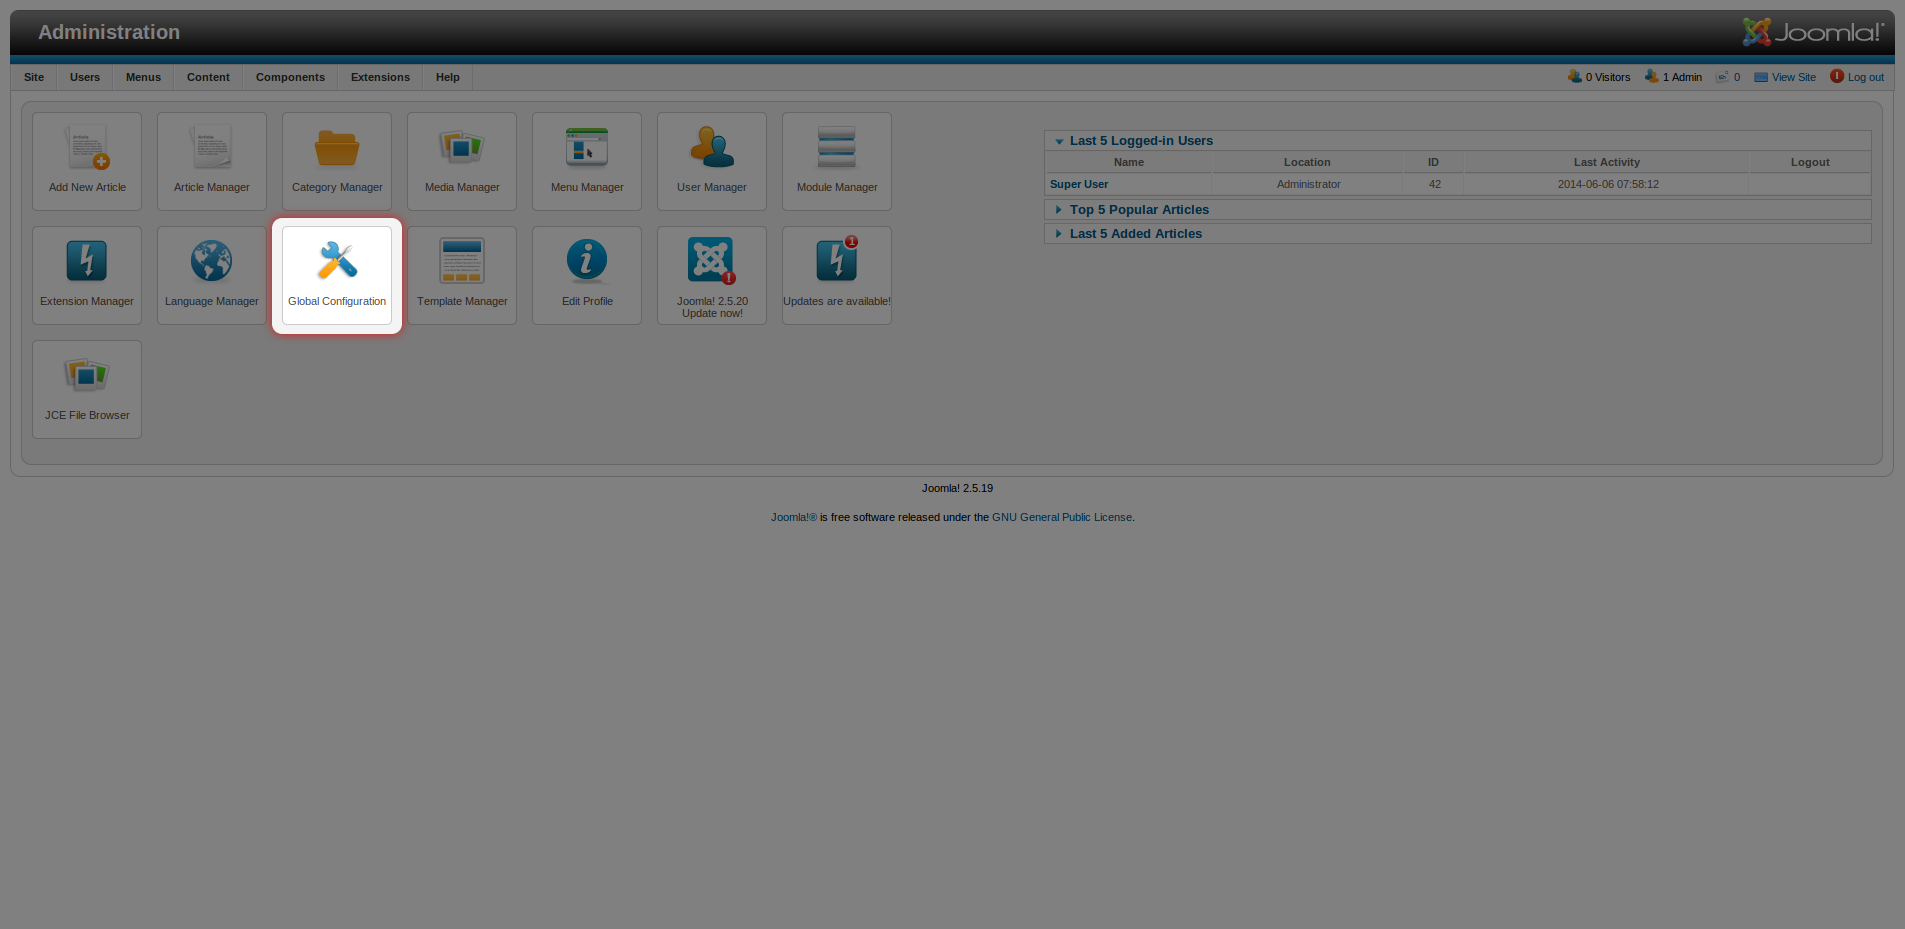
Let’s start off with the easier of the scenarios - when only the front-end is down. You will still have access to the back-end of the site so you can use Joomla’s interface to see what’s wrong. First, go to your site’s back end and open up the Global Configuration area.
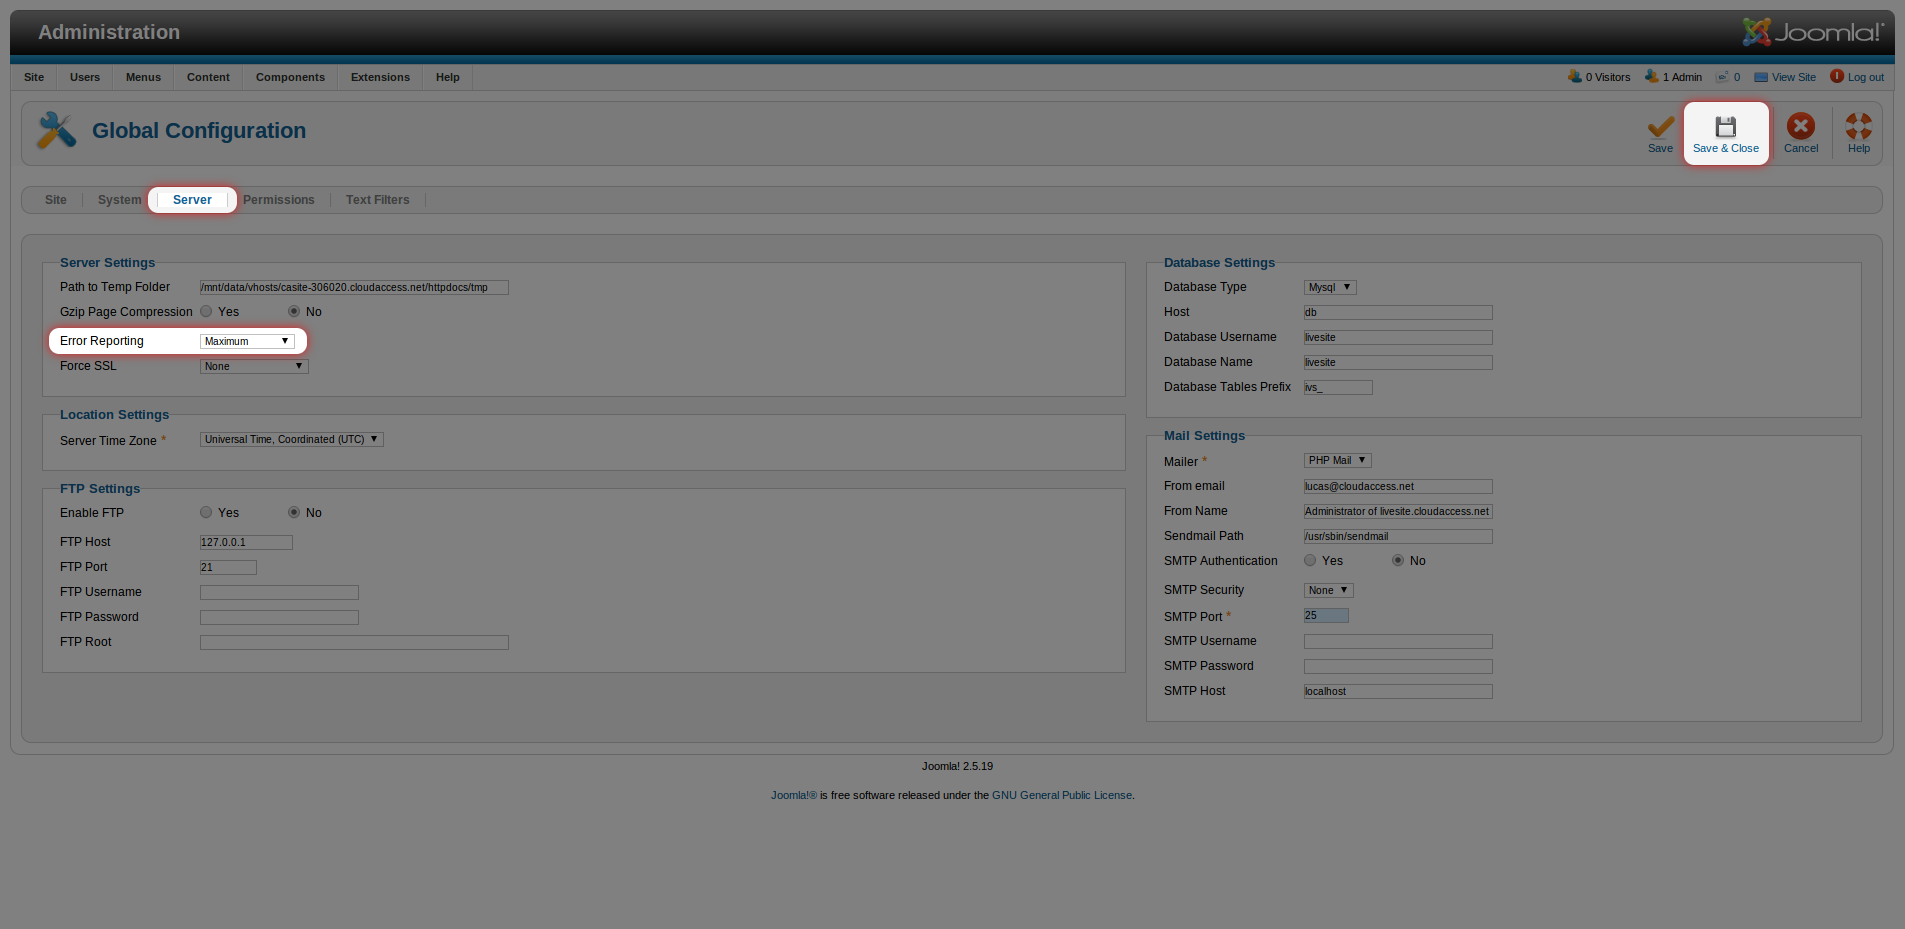
Once inside the Global Configuration area, go to the “Server” tab, select “Maximum” from the “Error Reporting” dropdown and save your changes.
Once you do that, clear your browser’s cache to make sure that those changes are reflected and go to the front-end of your site. There’s a good chance it will look something like the image below.
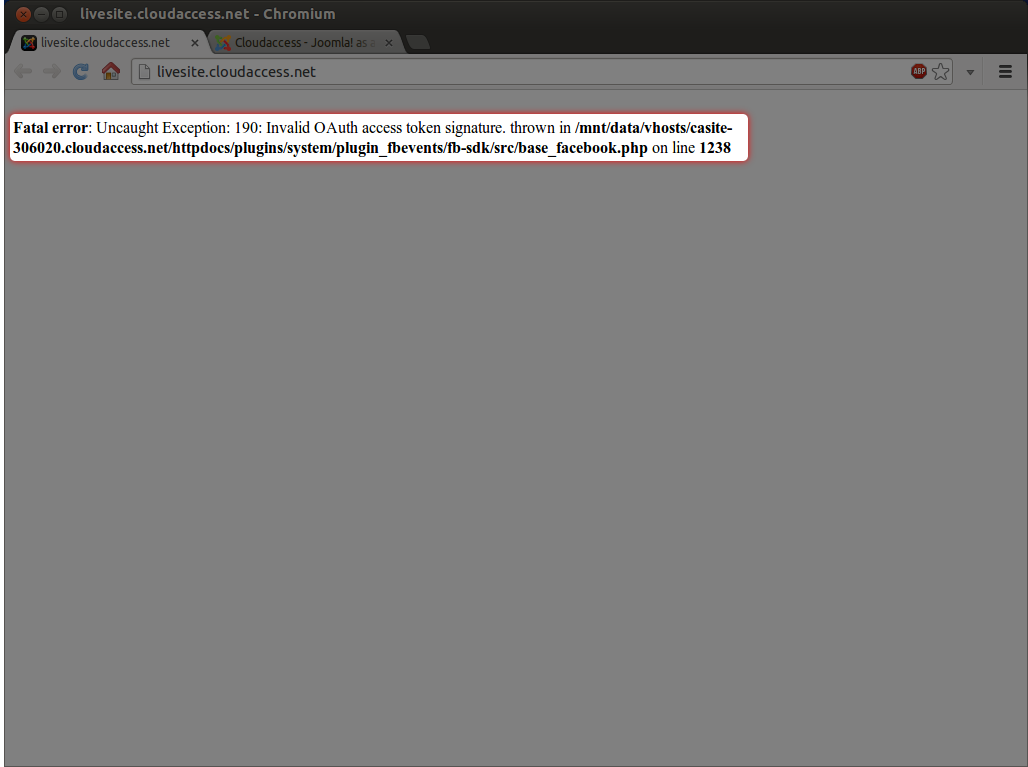
There may be a lot of different errors, but the Fatal Errors are always the ones that bring your site completely down - they are the errors you'll need to focus on. The first part of the error message tells us the technical reason for the error, but that doesn’t interest us. We’re not programmers and it’s not our job to debug the extension. We just want our site back. The second part of the error message is what we're interested in:
This part of tells us which file is generating the error. Unfortunately, deleting that file will not fix the problem - the database entries for the extension will still exist, generating a slightly different PHP Fatal Error. So, we need to disable the extension. But how do we know which one it is?
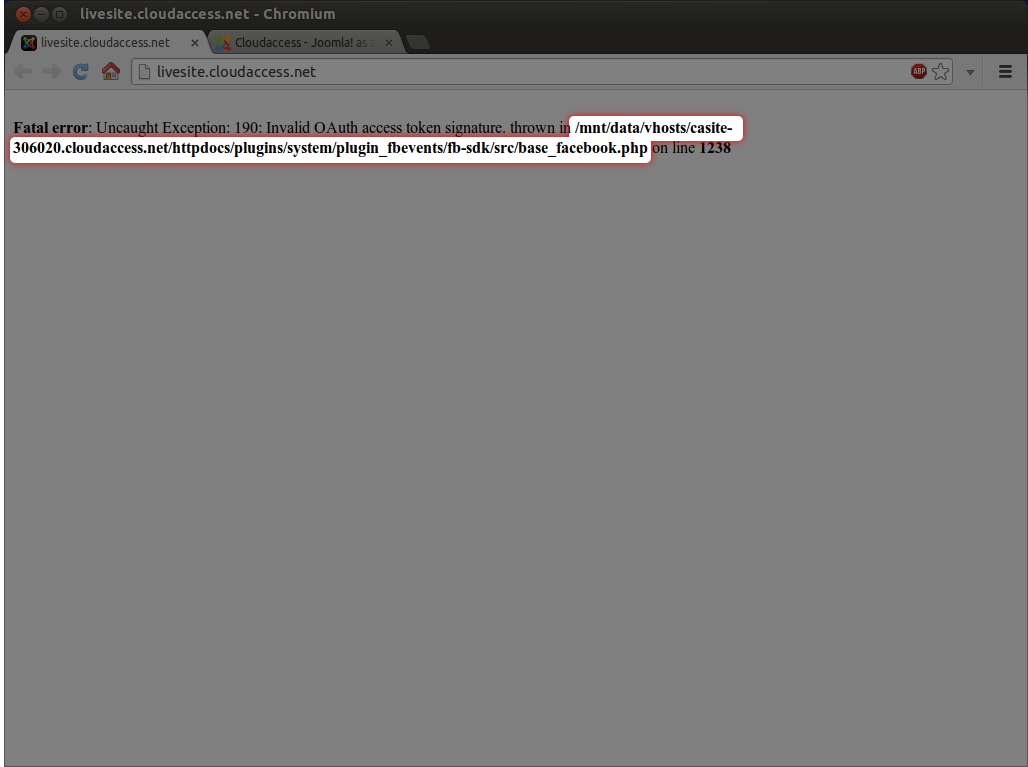
Well, take a look at the file path again. Everything is right there - /mnt/data/vhost/casite-xxxx.cloudaccess.net/httpdocs/ is just the path to your root, so this can be ignored, but what comes after /httpdocs/ is really important. The first folder (/plugins/ in this case) tells us what type of extension it is, the second part (/system/ in this case) tells us what subtype it is, and the third part (/plugin_fbevents/ in this case) gives us an indication of the extension’s name. So, in this case, the error message tells us that the issue is caused by a system plugin whose name has something to do with FB Events. All we need to do is go into the Plugin Manager and disable that plugin.
“OK, hold your horses there, kiddo,” I hear you saying. “What if the back-end is unavailable as well?” It’s more complicated then, but only slightly.
What you will need to do is access your site files, which you can do with an FTP client like FileZilla. If you're a CloudAccess.net client, learn how to locate your FTP login details. Not sure how to use FileZilla to connect to your site? We have a tutorial for that too.
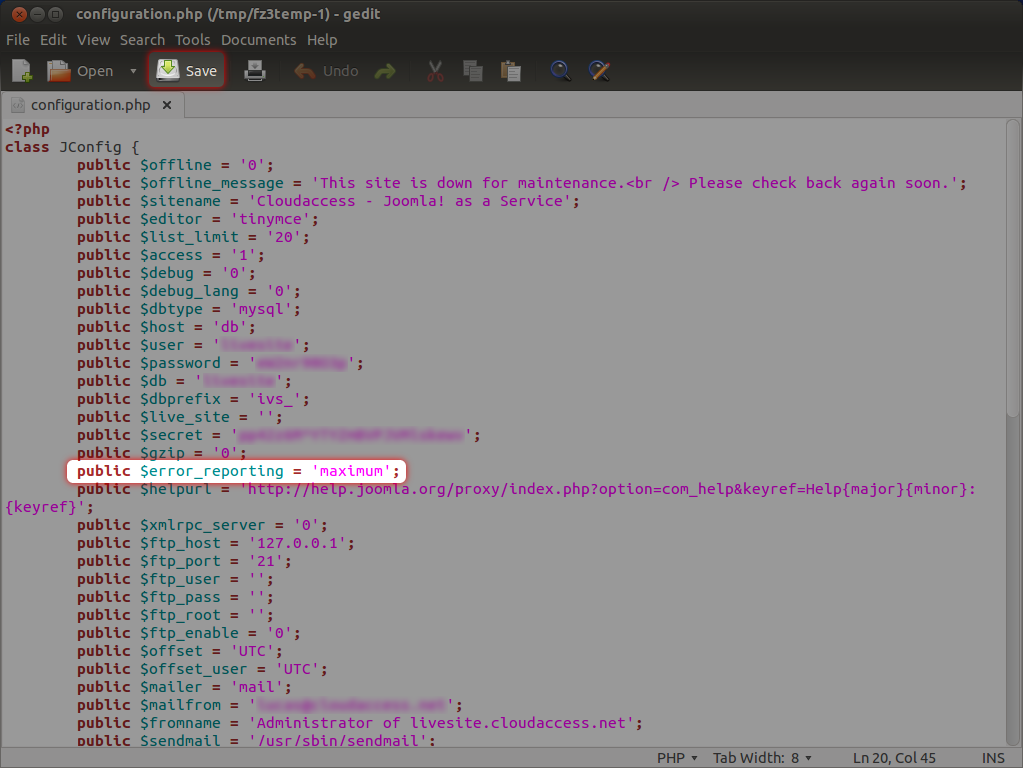
Once you connect to your site via FileZilla, go to the /httpdocs/ directory and locate the configuration.php file, right-click on it and choose the “View/Edit” option.

Now, since Joomla is an open-source application, these files are not encoded anyway and .php files in general are simply text files, so you can open it in pretty much any text editor. We recommend using Notepad or Gedit instead of Microsoft Word. In the file, you will need to locate this string: public $error_reporting = “default”. Once you do, change the “default” value to “maximum”.
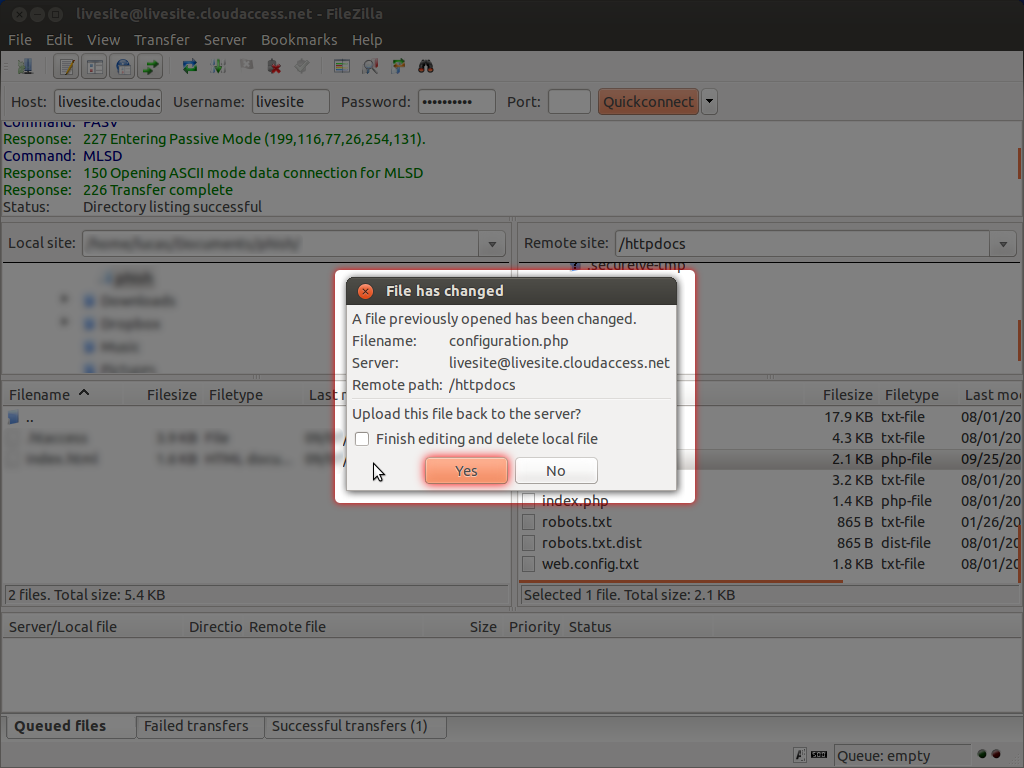
Once you save the file, FileZilla will ask you if you want to upload it and overwrite the file on the server. You should click on “Yes”.
Now we’ve enabled the error reporting by changing the file and we can see the same error message as before. OK, but what now? We still don’t have access to the back-end so we can’t disable the extension … or can we?
Luckily, the database structure for extensions is pretty straightforward in Joomla, so disabling an extension from the database level is not difficult either. Log into your PHPMyAdmin and locate the _extensions table - that’s where all the data is kept.

Now we need to locate the database row which contains the data about this extension. From the error message we know that the folder name is plugin_fbevents, and it’s a good chance that the folder name will be reflected somehow in its database entry. Before we go searching for the row, there is something that can make the process more convenient.
If you have a lot of extensions in your site, the content of this table will be rather extensive, which means two things:
- Not all of these extensions will be shown in the PHPMyAdmin at once.
- Searching through them may be inconvenient.
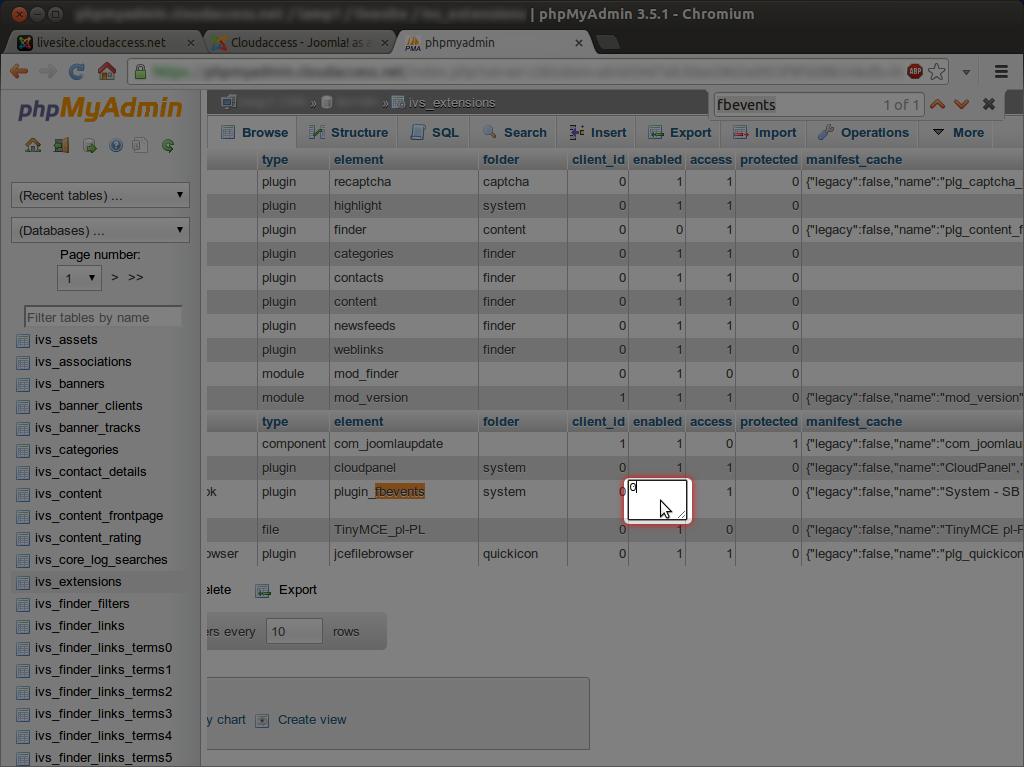
Luckily, we can do something about it. On the top of the list, you will find two useful options - “Show All” and “Headers every _____ rows”. For the purpose of this blog we'll set headers to every 10 rows and click on “Show All”.

Now, we’ll press Ctrl+F on the keyboard and type in “fbevents” to find the row for the extension we’re looking for.
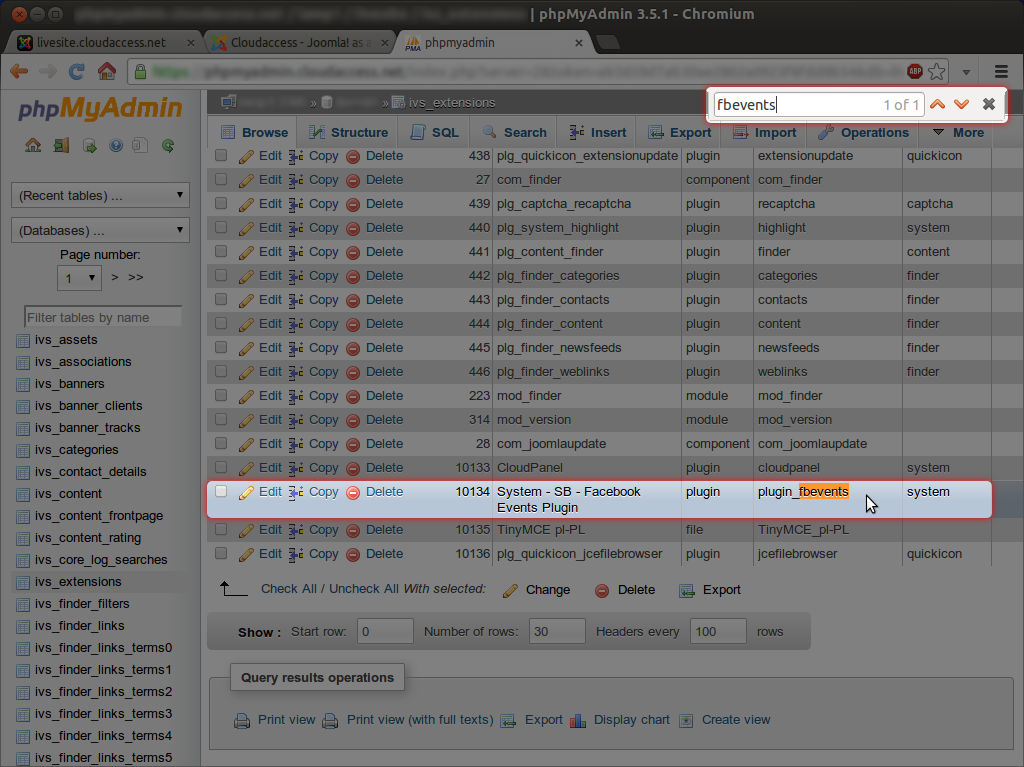
And there's our troublemaker! We can now disable the extension.
You might be asking "why did we chose to show headers every 10 rows?" And the answer isbecause we need it now.Find the “enabled” header and track its value for this extension - I bet it shows “1”. What we need to do is click the “Edit” button next to the row and change it to “0”, which will disable the extension.
Once you do that, the site will be back up and running. Or, if there’s more than one extension causing an error, find the other error message and repeat the process.
And there you have it. I know it looks like a big tutorial, but trust me, reading this will take you much longer than actually fixing the issue. After doing that a few times you will be able to do it with one hand tied behind your back and blindfolded - just like the best of us.
About the author