Drop Down/Sub Menu Item (Joomla 2.5)
Creating a drop down menu, or a sub menu, is a popular way to increase the functionality of your site and to keep your articles organized and presentable. Assuming that you've already created menu items, this article will discuss how to create drop down menu items. It’s very important to note that not all templates support drop down menus items.
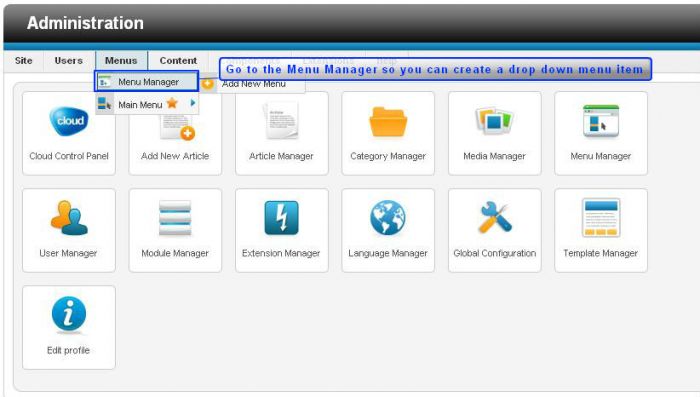
First, log in to the Administration area (the back end) of your site. Once you’re there, open the Menu Manager.
Once inside the Menu Manager, select the menu you’d like to work with. For the purpose of this article, we will work with our "Main Menu".
Once you’re looking at the menu items for the particular menu you’d like to work with, select the “New” button to create a new menu item. In the example images, we’re going to create a drop down menu item for an article on "Hockey Pucks". This will appear under the "Hockey" menu item.
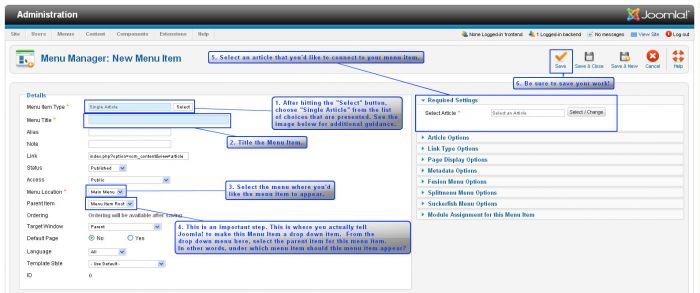
Once in the New menu item, you’ll want to do the following:
- First, select which menu iitem type you’ll work with. For the purpose of this article, we will use a Single Article menu item type. See both images below for guidance.
- Next, title the menu item type.
- Then, select the menu where it should appear.
- Next, under "Parent Item", select the parent item under which the new menu item will appear. This is an important step – this is where you actually tell Joomla to make this a drop down menu item.
- Finally, under required settings, select the article you’d like to connect to your menu item. Don’t forget to save your work.
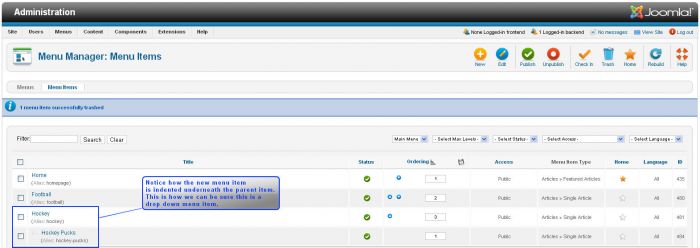
Once you save your work and return to the Menu Manager, you’ll see the new menu you created. Notice how it is indented underneath the parent item. This is how you can be sure it is a drop down menu item.
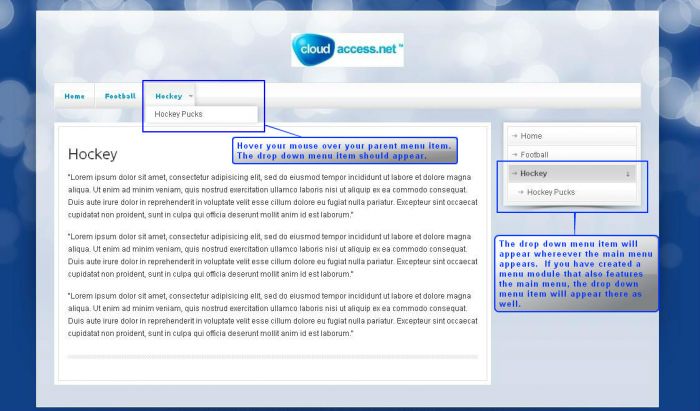
Return to the front end of your site. The drop down menu item should appear underneath the parent item when you hover your mouse over the parent item. If the main menu is active in any other location, the drop down menu item will also appear there.

Do you have suggestions for improving this article?
We take a great deal of pride in our knowledgebase and making sure that our content is complete, accurate and useable. If you have a suggestion for improving anything in this content, please let us know by filling out this form. Be sure to include the link to the article that you'd like to see improved. Thank you!


