- You are here:
-
Additional Resources

-
Search Engine Optimization (SEO)
- Google Search Engine Optimization Starter Guide
JCE: Adding Anchors
Essentially, an anchor acts like a hyperlink within an article so that you can link together titles, subtitles, and headings. This article features anchors. Adding an anchor into an article can be quite useful especially if your article is broken down into different sections or if the article is lengthy. You can click on the subtitles below to be linked to different areas of the article, and there is a Back to Top link on the bottom of the page that is anchored to the beginning of these instructions. There is a feature within the TinyMCE Editor (the default editor your Joomla), and the JCE Editor (an advanced editor that can be installed through the Extension Manager). This article will incorporate screenshots for both editors. Before you begin, visit the Global Configuration area for your site, and determine which editor you're currently using. Then, select the directions below for your editor.
How to Install Anchors with the JCE Editor
How to Install Anchors with the TinyMCE Editor
How to Install Anchors with the JCE Editor
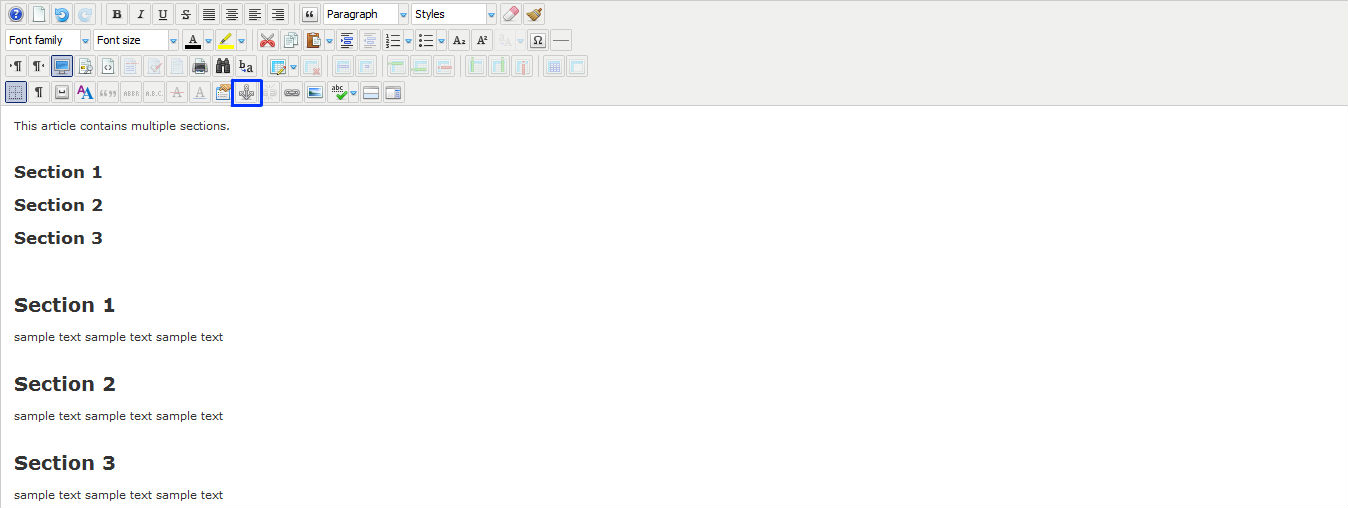
First, after logging into the Administration Area (the back end) of your site, go to your Article Manager, and open up the article where you'd like to add the anchors. Look for the anchor icon within the editor.
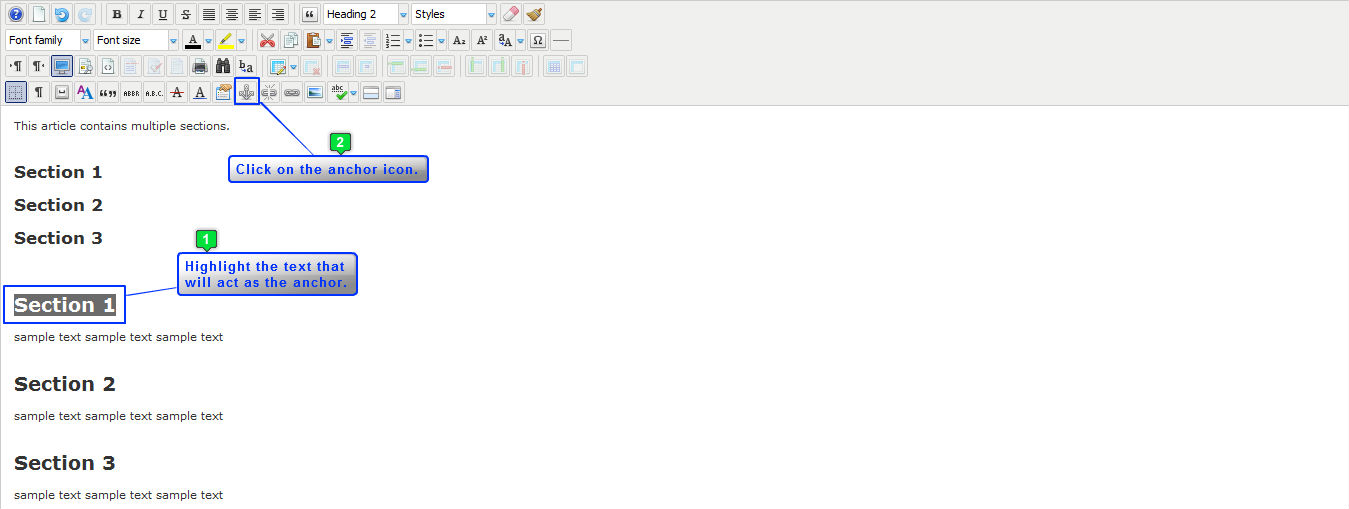
Next, place the anchor where you would like to direct a link. You can accomplish this by highlighting the text that will be the anchor and selecting the anchor icon. For the purposes of this how to, we have created an article that will feature three links in the introduction. These three links will link to anchors throughout the article. The first anchor that we will create is for Section 1. Please see the screenshot below for guidance.
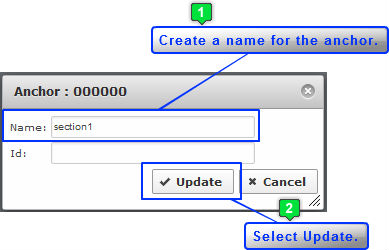
Once you've highlighted the text, and clicked on the anchor icon, a window will open up for you to create a name for the anchor. It's important to name anchors logically so you can easily create the link later. After creating the anchor name, select "Update".
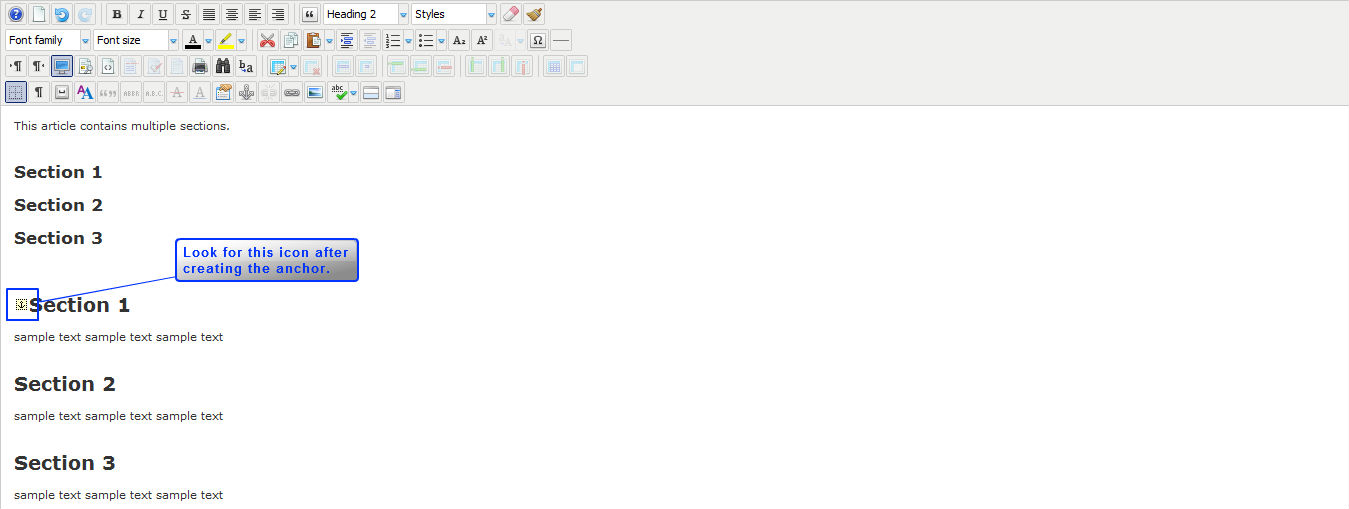
After selecting "Update", look for the small anchor icon next to the text you highlighted.
To link text in a different area in your article to the anchor that you just created, highlight the text that will be the link, and click on the chain link icon in the editor.
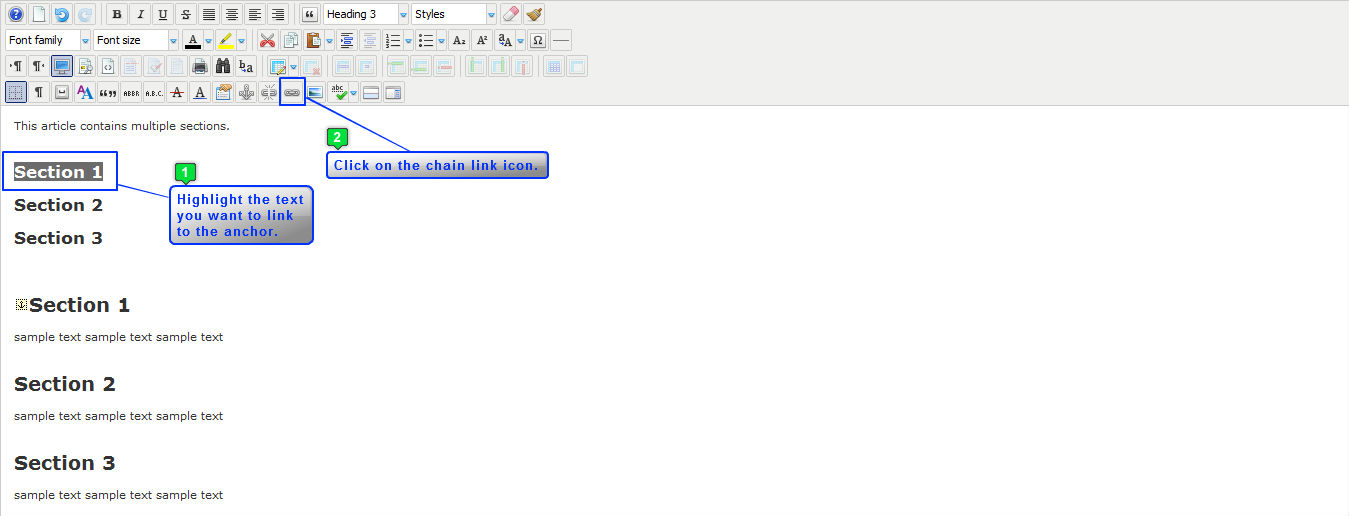
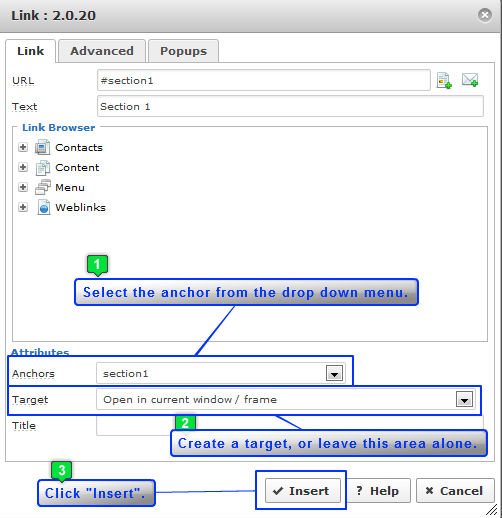
A window will open that will allow you to link this text to the anchor that you created. Select the appropriate anchor from the drop down menu. You can select a target for the anchor or leave this area alone. When you're done, select "Insert". The link is now active. Directly next to the chain link icon is an unlink icon. If you ever want to remove a link, simply highlight the link and click on this unlink icon.
Repeat the process as needed for the rest of the article, save your work, return to the front end of your site, hit refresh, and your link will be active. Test it out to see if the link goes to the anchor you created.
Back to Top
How to Install Anchors with the TinyMCE Editor
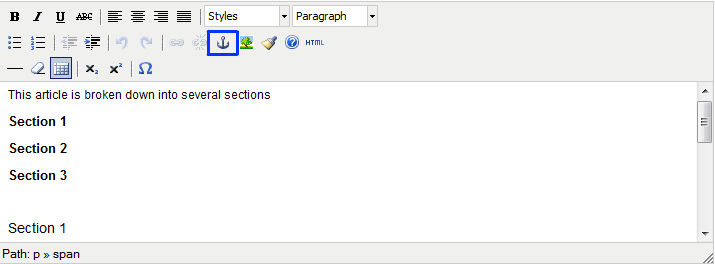
First, after logging into the Administration Area (the back end) of your site, go to your Article Manager, and open up the article where you'd like to add the anchors. Look for the anchor icon within the editor.
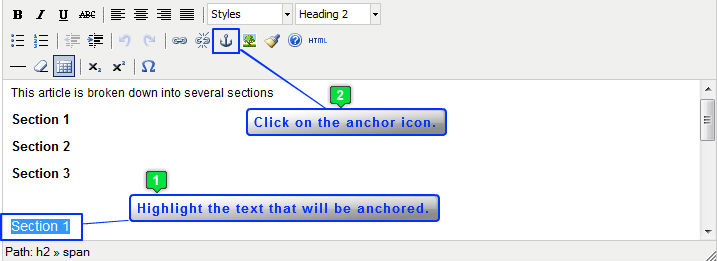
Next, place the anchor where you would like to direct a link. You can accomplish this by highlighting the text that will be the anchor and selecting the anchor icon. For the purposes of this how to, we have created an article that will feature three links in the introduction. These three links will link to anchors throughout the article. The first anchor that we will create is for Section 1. Please see the screenshot below for guidance.
Once you've highlighted the text, and clicked on the anchor icon, a window will open up for you to create a name for the anchor. It's important to name anchors logically so you can easily create the link later.
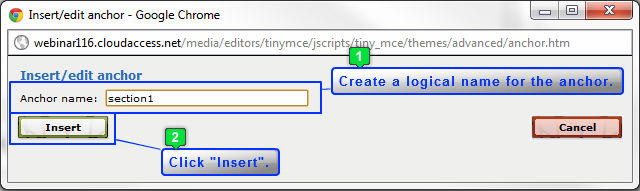
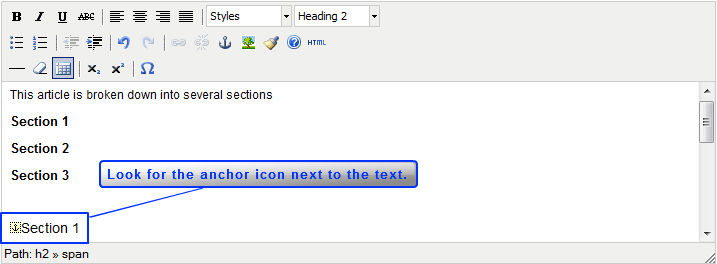
After selecting "Insert", you'll notice an anchor icon appear next to the text that you highlighted.
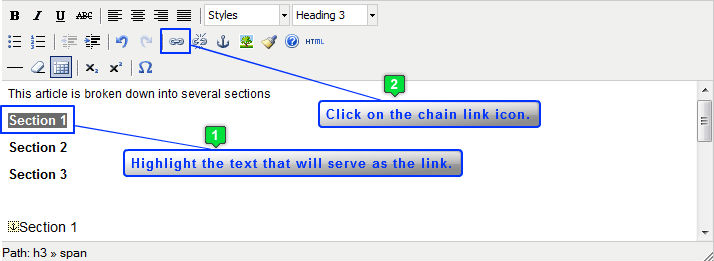
To link text in a different area in your article to the anchor that you just created, highlight the text that will be the link, and click on the chain link icon in the editor.
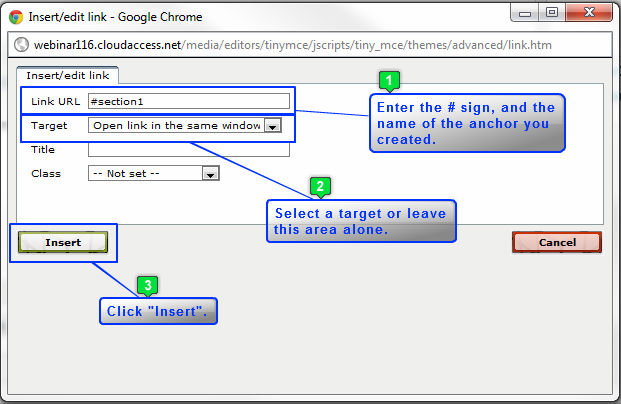
A window will open that will allow you to link this text to the anchor that you created. In the "Link URL" field, you must first enter the # sign and then the name of the anchor that you created. You can select a target for the anchor or leave this area alone. When you're done, select "Insert". The link is now active. Directly next to the chain link icon is an unlink icon. If you ever want to remove a link, simply highlight the link and click on this unlink icon.
Repeat the process as needed for the rest of the article, save your work, return to the front end of your site, hit refresh, and your link will be active. Test it out to see if the link goes to the anchor you created.
Back to Top
Knowledgebase

100% FREE
Joomla & WordPress
Hosting
- Launch Instantly
- Free Subdomain
- Free Training
- Free SSL
- 500MB Space
- 1CPU/1GB RAM
- FTP Access
- MySQL Access

Do you have suggestions for improving this article?
We take a great deal of pride in our knowledgebase and making sure that our content is complete, accurate and useable. If you have a suggestion for improving anything in this content, please let us know by filling out this form. Be sure to include the link to the article that you'd like to see improved. Thank you!