Importing a Site
To import a site to the CloudAccess.net platform, log into your Cloud Control Panel™(CCP) and follow the steps below. The process described below works for any LAMP-based application. If you have any questions about whether or not we can host and/or support your application, please submit a support ticket.
Step #1: Choosing the Application
Step #2: Selecting an Import Method
Importing Archived Site Files & a Database SQL File from your Computer
Importing a JPA File from your Computer
Importing Archived Site Files & Database SQL File from the Internet
Importing a JPA File from the Internet
Managed Migrations
Step #3: Choosing Extraction Location
Importing the Site to a New Sub-domain
Importing the Site to an Existing Product
Step #4: Finishing Up
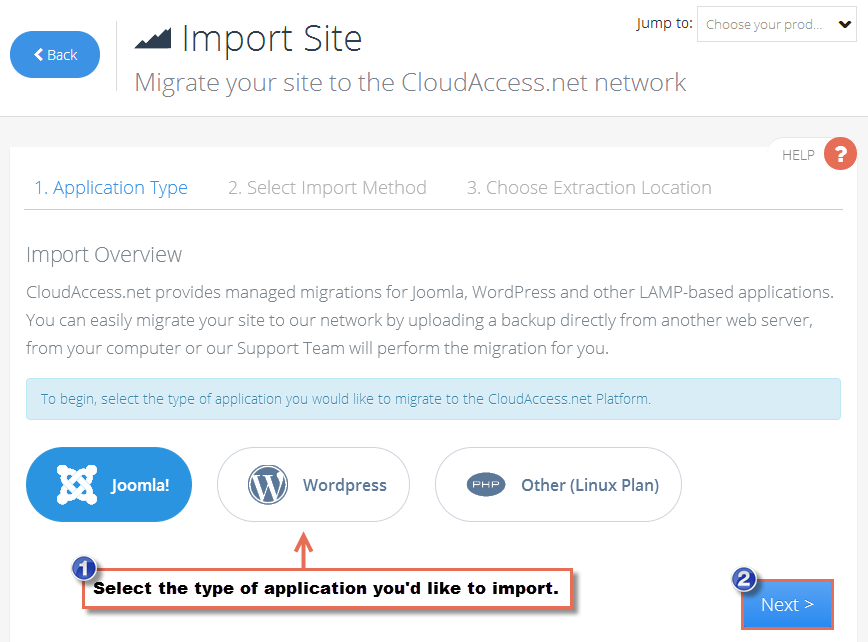
Step #1: Choosing the Application
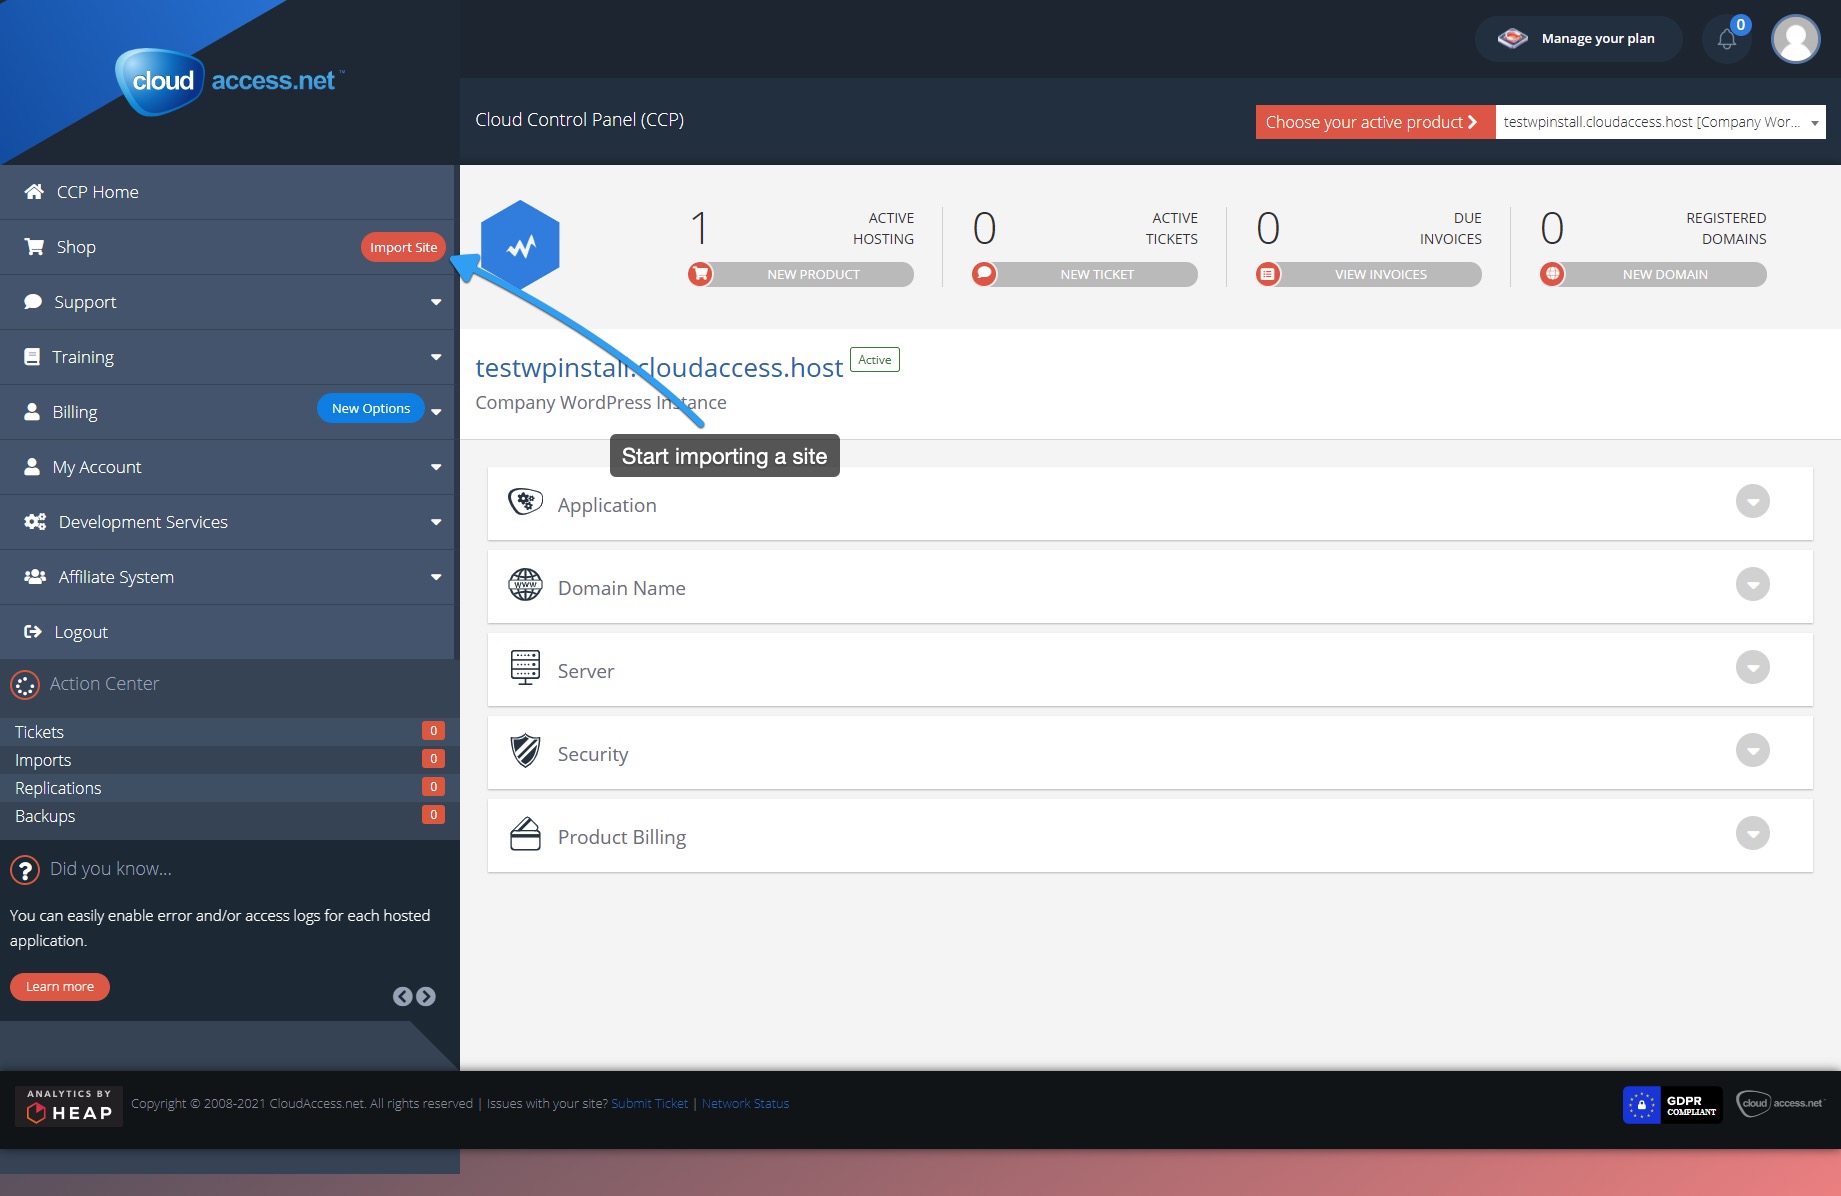
After logging into your CCP, click on the "Site Import" button in the side menu.
In the "Import Site" area, select which type of application you'd like to import and click on the "Next" button.
Back to Top
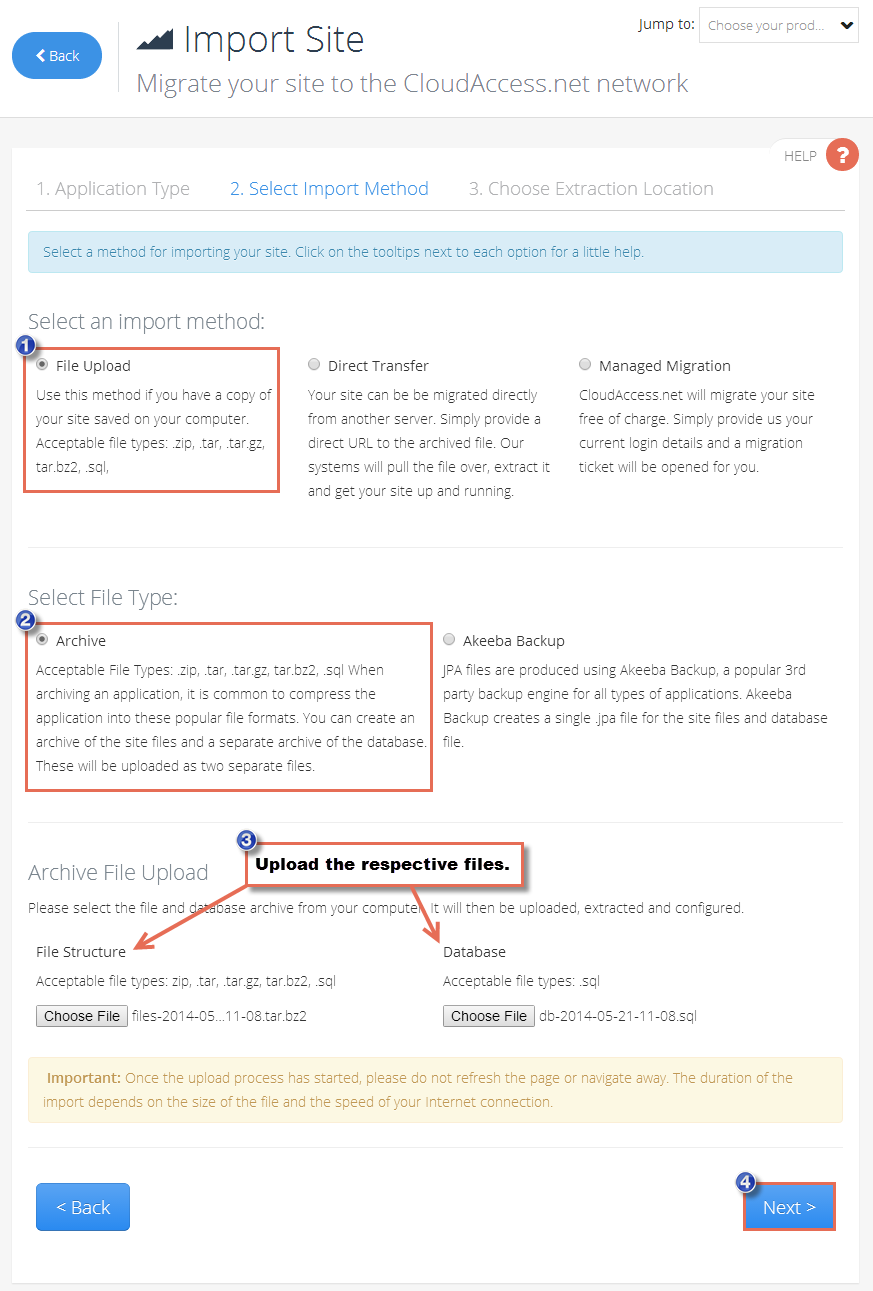
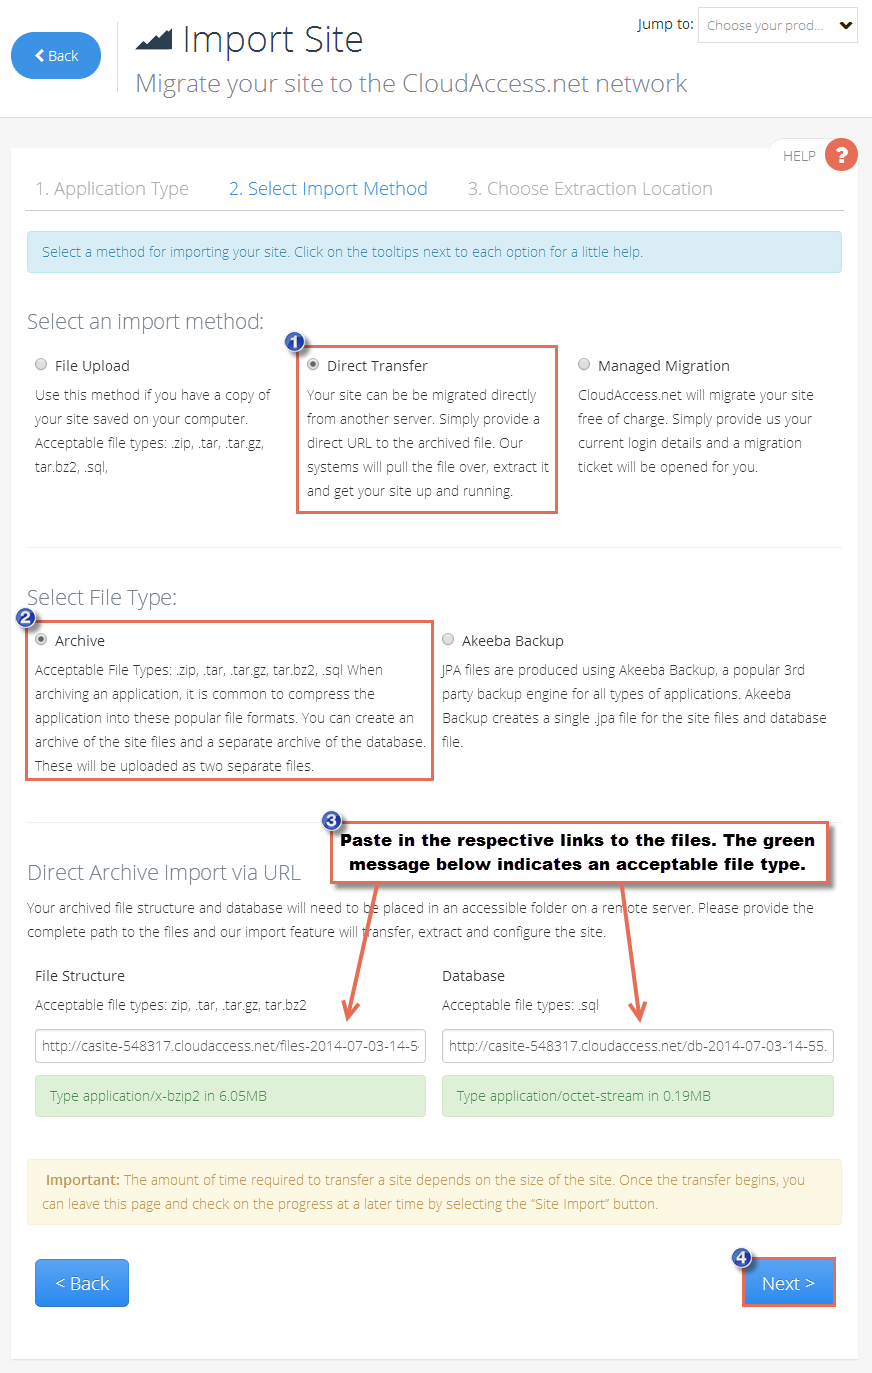
Step #2: Selecting an Import Method
Importing Archived Site Files & a Database SQL File from your Computer
To upload website files and a database .sql file from your computer select "File Upload" as your import method. Next, select "Archive" as your file type. Under the "Archive File Upload", upload your site file archive and your SQL file by clicking on the "Choose File" button for each option. Acceptable file types include .zip, .tar, .tar.gz, tar.bz2 and we can only accept .sql files for your database. Once each file is uploaded, click on the "Next" button. Once you're done, you can skip to the Choosing Extraction Location section of this article.
Importing a JPA File from your Computer
To upload a .jpa file from your computer, select "File Upload" as your import method. Next, select "Akeeba Backup" as your file type. Under the "JPA File Upload" section, upload your .jpa file by clicking on the "Choose File" button. Once the fle is uploaded click on the "Next" button. Once you're done, skip to the Choosing Extraction Location section of this article.

Importing Archived Site Files & Database SQL File from the Internet
To upload separate website files and a database .sql file from the Internet, select "Direct Transfer" as your import method. Next, selet "Archive" as your file type. Under the "Direct Archive Import via URL" area, paste in the separate site files link and the .sql file link. Acceptable file types include .zip, .tar, .tar.gz, tar.bz2 and we can only accept .sql files for your database. Once each file is uploaded, click on the "Next" button. Once you're done, skip to the Choosing Extraction Location section of this article.
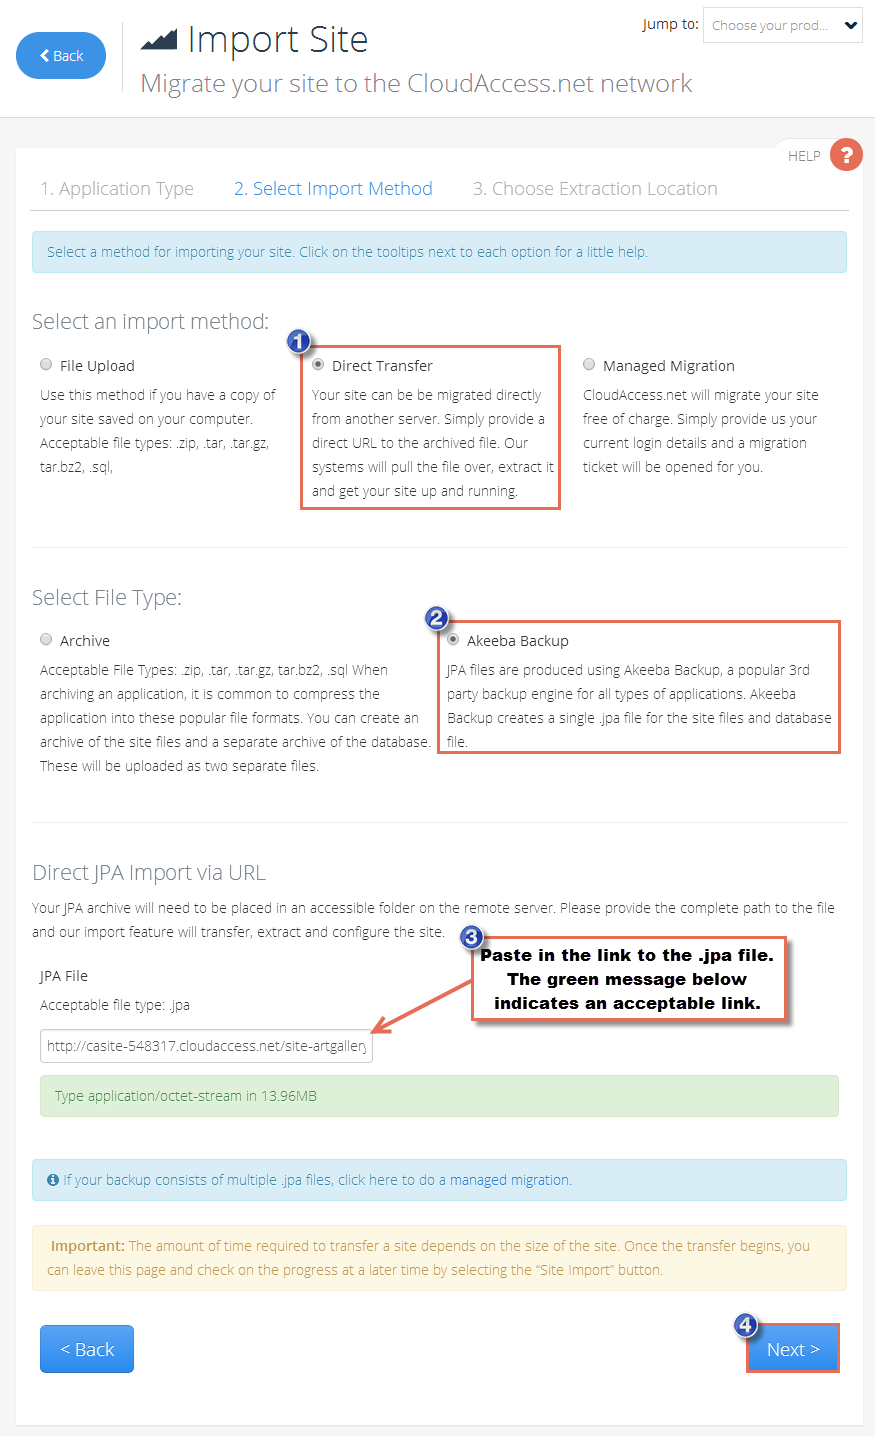
Importing a JPA File from the Internet
To upload a .jpa file from the Internet, select "Direct Transfer" as your import method. Next, select "Akeeba Backup" as your file type. Under the "Direct JPA Import via URL" option, paste in the downloadable link to the .jpa file. To be sure the file is downloadable, first paste the link into your web browser and search for it. It should start the download process on your computer. If you're sure the link you provided is downloadable, click the "Next" button. Read Step #3 below to continue.
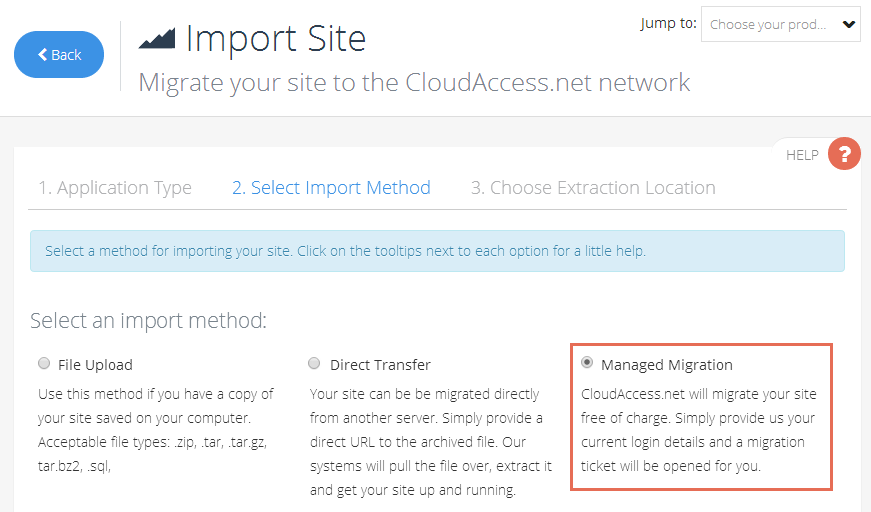
Managed Migrations
If you'd like to have a CloudAccess.net support team member help you with a managed migration of a site, select "Managed Migration" as your import method. You'll be redirected to a page where you can provide us information about the site you'd like to import and a support ticket will be created automatically.
Back to Top
Step #3: Choosing Extraction Location
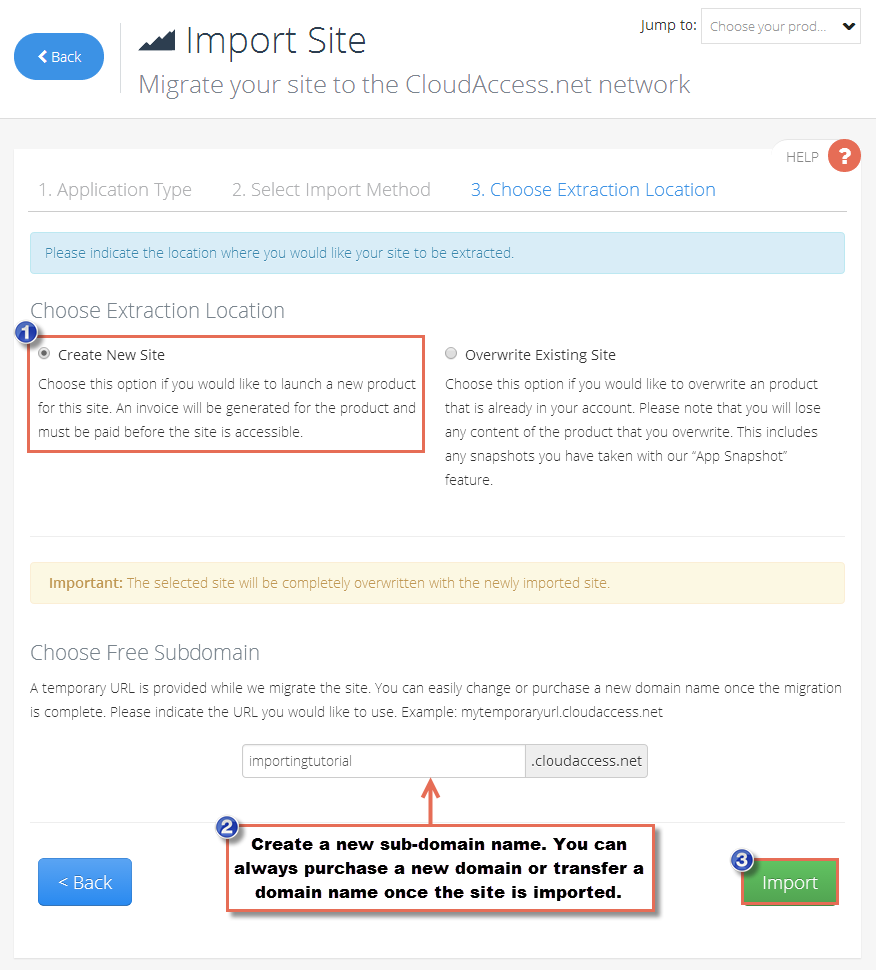
Importing the Site to a New Sub-domain
If you'd like a new product launched on our platform, select "Create New Site" as you choose an extraction location. You'll be required to create a new sub-domain for the site you're importing. You can always purchase a new domain or point an existing domain name to the site once it's imported. Click on the "Import" button once you're done.
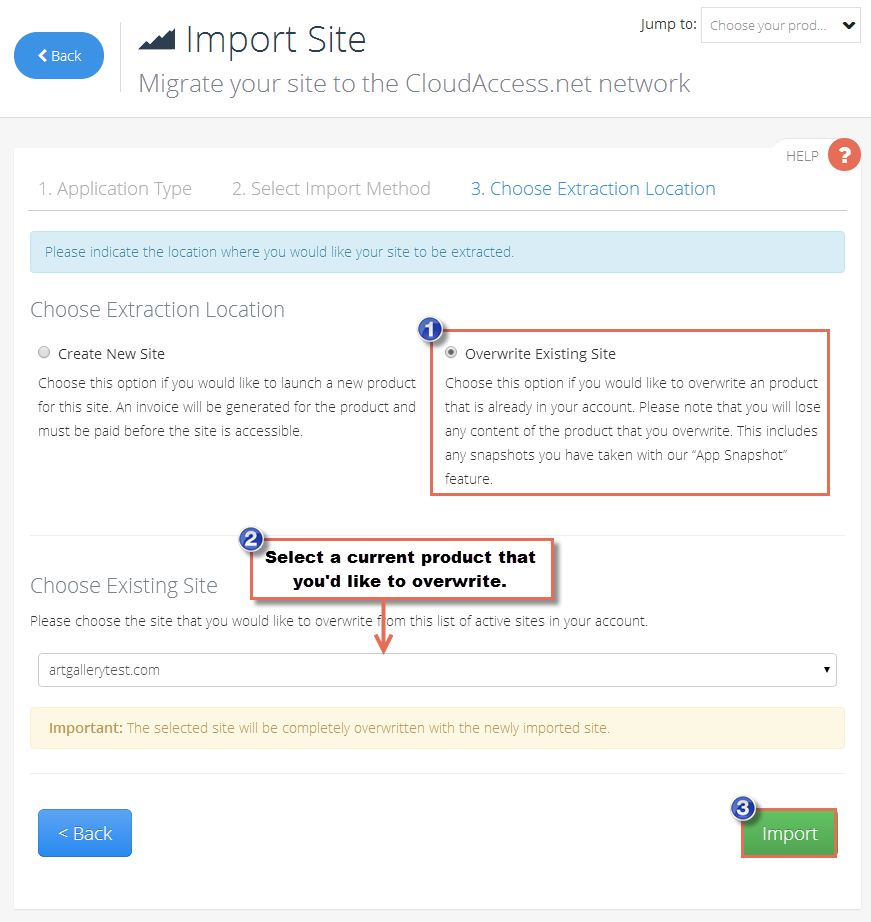
Importing the Site to an Existing Product
To import the site and overwrite an existing application, select "Overwrite Existing Site" as you choose an extraction location. Please note that all existing content of the site you're overwriting will be permanently erased. This includes any backups you've taken with the App Snapshot feature of the CCP. Once you're done, click on the "Import" button.
Back to Top
Step #4: Finishing Up
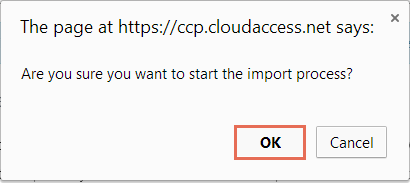
Regardless of the mode or type of your import, once you select the "Import" button in Step #3, you'll be asked to verify that you'd like to start the import process. Select "OK" to proceed. You'll see a series of messages letting you know that the import is processing. Please don't navigate away during the import process.
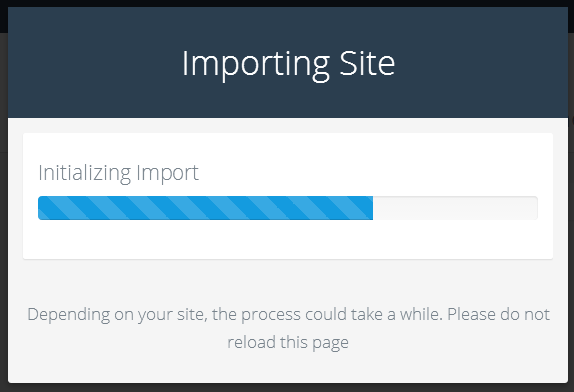
Once you start the process you'll see a message letting you know that the import is initializing. Please don't navigate away from this page.
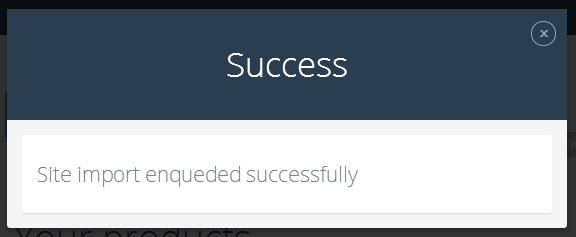
Once you see the screen below, you're safe to navigate away while we complete the process.

The import may take some time to complete based upon the size of the site.
Once you receive the message above letting you know that your import is complete, the domain will not be available and you won't be able to manage the application through your CCP until you pay your invoice. It isn't possible to import a site as a demo trial site. You can always submit a support ticket to inquire about the status of your import. Visit the "Invoices" area of the CCP to pay any outstanding invoices.