- You are here:
-
Additional Resources

-
Tips and Tricks
- Common htaccess Rules
JCE: Inserting an Image
There is a core Joomla function that will enable you to insert an image, but the Image Manager provided by the Joomla Content Editor (JCE) increases the functionality of what is possible with your images. This tutorial will illustrate how to insert an image using the JCE and will explain some of the basic functions of the Image Manager offered by the JCE. This process is the same whether you're inserting an image into an article or custom HTML Mmodule.
How to Access the Image Manager
How to Insert an Image
Additional Functions of the Image Manager
How to Access the Image Manager
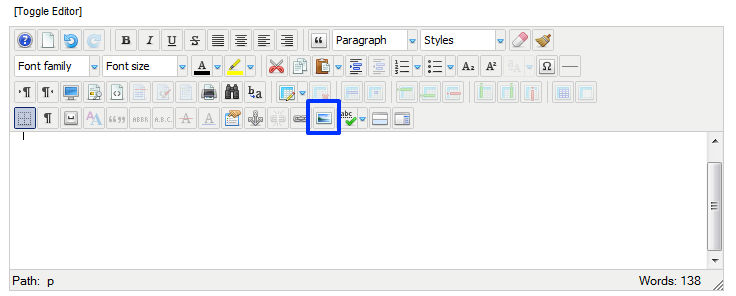
The Image Manager can be accessed through the picture frame button within the JCE.
How to Insert an Image
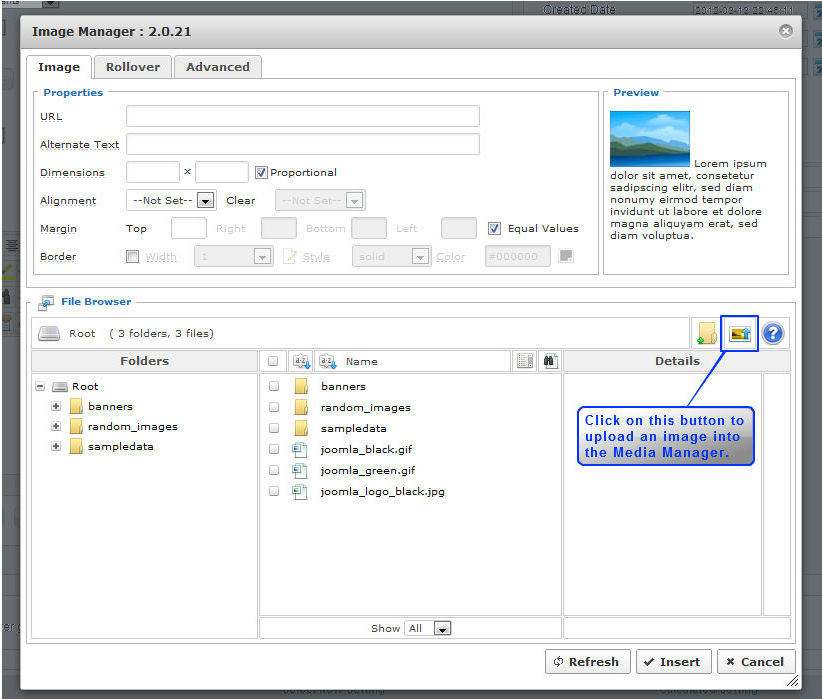
The Image Manger will give you access to images in your Media Manager, but it will also allow you to upload an image from your computer into your Media Manager. To upload an image to the Media Manager using the JCE, click on the upload button.
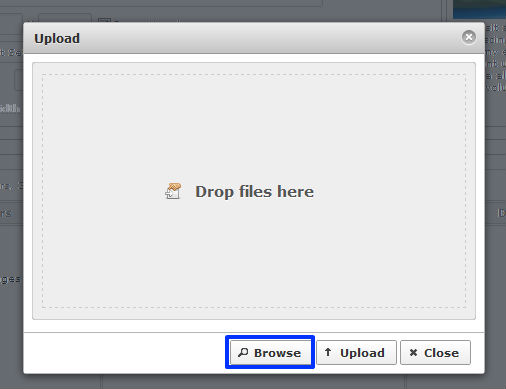
In the Upload window, click on the Browse button to find an image on your computer.
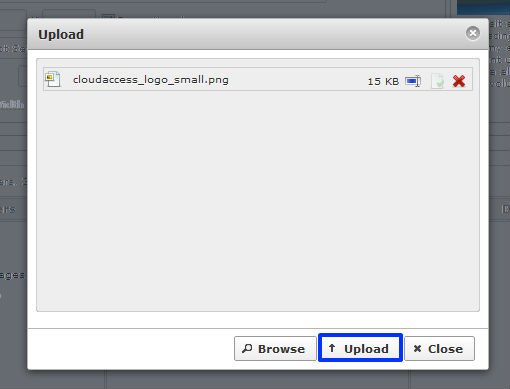
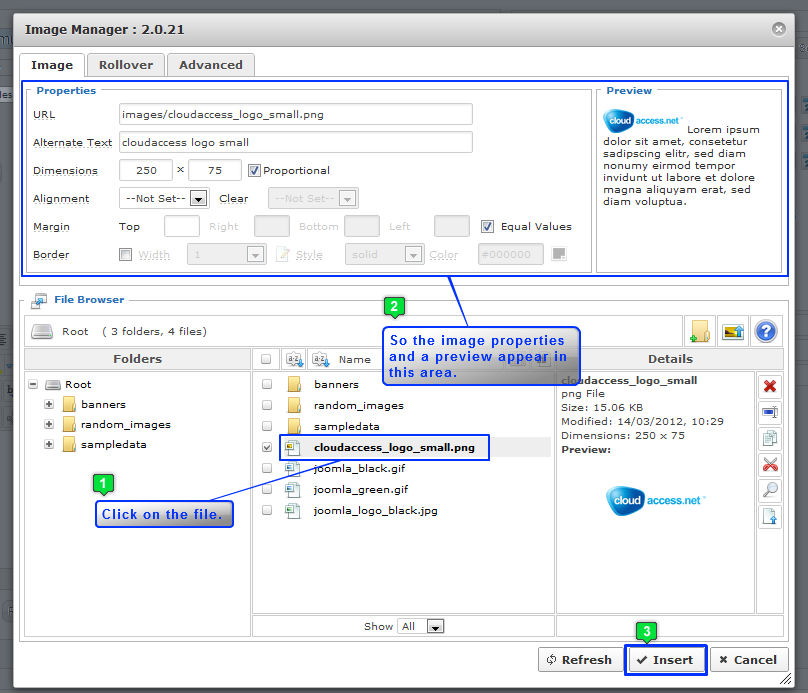
Find the image on your computer, select it, and once the file appears in the Upload window, click on the Upload button.
You'll see the file appear in the Media Manger, and you'll see a preview of the image in the Details area. The image isn't ready to insert into the article or module yet, however. You must click on the file so that the Properties area in the Image Manager is populated with the image details. Once the Properties area has the URL and Alternate Text for the image and the image appears in the Preview area, you can click on the Insert button at the bottom of the Image Manager to insert the image into the Article or Module.
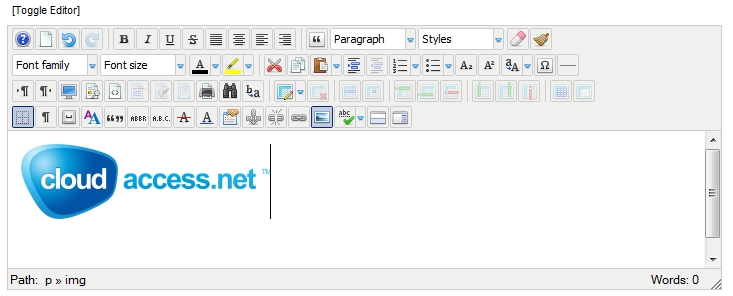
You're image will be inserted into the article text area of the article or the custom output area of the module.
Back to Top
Additional Functions of the Image Manager
Once an image and text is inserted into the article or custom HTML module, you can explore some other features of the JCE.
Editing the dimensions of an image
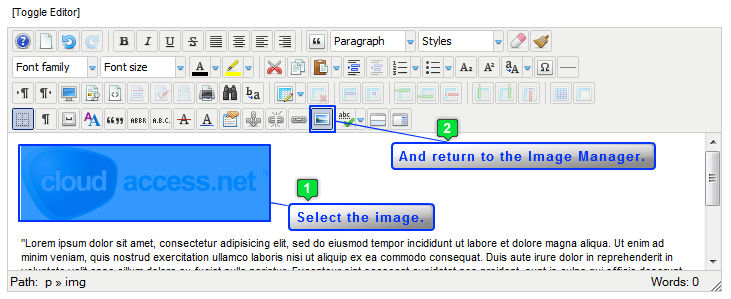
Although it is best practice to edit the dimensions of the image before getting it into the article or module, you can edit the dimensions using the JCE. First, select the the image that you'd like to work with and return to the Image Manager.
Even though you can edit the dimensions here, you should not use this for editing the dimensions greatly. The reason being, Joomla is not an image editing software. Even though you are editing the image to fit the module, it is not changing the size of the actual stored image. For example: I upload a 1000 x 1000 pixel image but my module is only 200 x 200 pixels. I can edit this though the editor to make it look the right size in my module but when the page is loading, it still loads a 1000 x 1000 pixel image because that is what is on file. This could create some unnecessary slowness as your page loads onto computers or other devices. It is best practice edit your images prior to uploading them into your Joomla website.
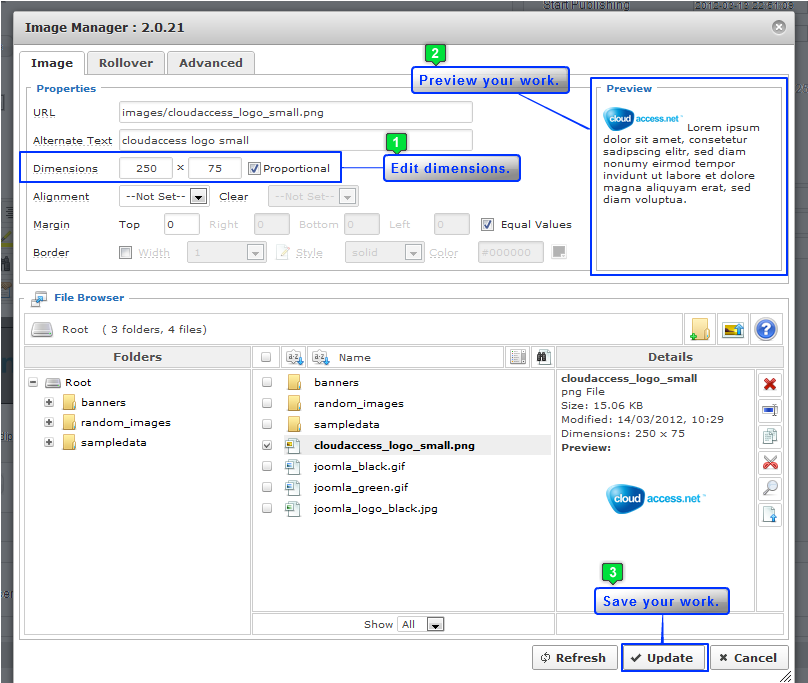
Using the Dimensions tools, you can edit the dimensions of your image. You can elect to have the text wrap the image to the left, right, top, middle, or bottom. Once you make your selection, the preview window will give you a peek at what your changes will look like. Be sure to click on the Update button to save your work.
You'll be returned to the article text or custom output area to view the updated image and text.
Wrapping text around an image
First, select the the image that you'd like to work with and return to the Image Manager.
Using the Alignment tools, you can wrap text around an image. You can elect to have the text wrap the image to the left, right, top, middle, or bottom. Once you make your selection, the Preview window will give you a peek at what your changes will look like. Be sure to click on the Update button to save your work.
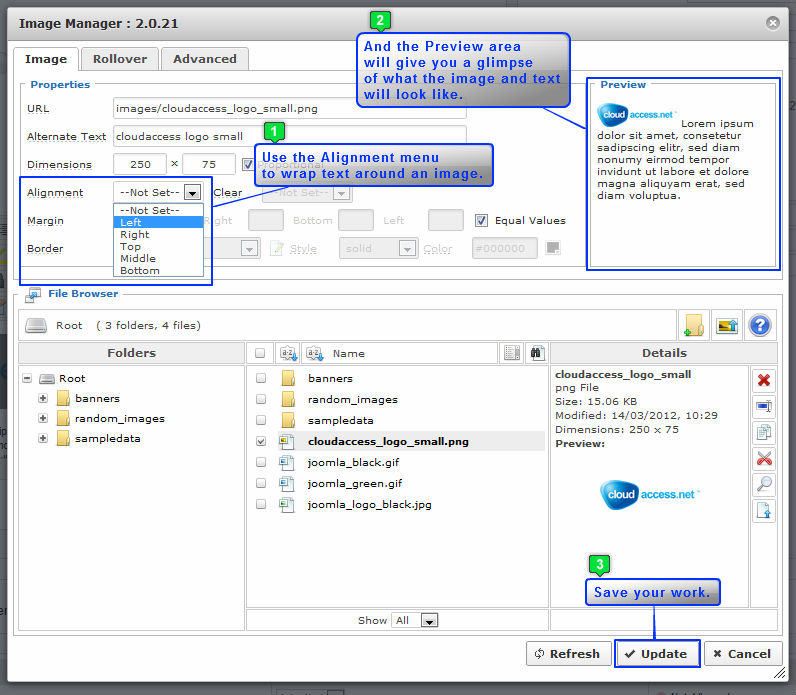
You'll be returned to the article text or custom output area to view the updated image and text.
Adding padding around an image
First, select the the image that you'd like to work with and return to the Image Manager.
Using the margin tools, you can specify the space (in pixels) that you'd like to add around the image. This will offer a little space between your image and the text that you've wrapped. You can elect to keep equal values around all sides of the image, or you can choose different distances around each side of the image. Be sure to click on the Update button to save your work.
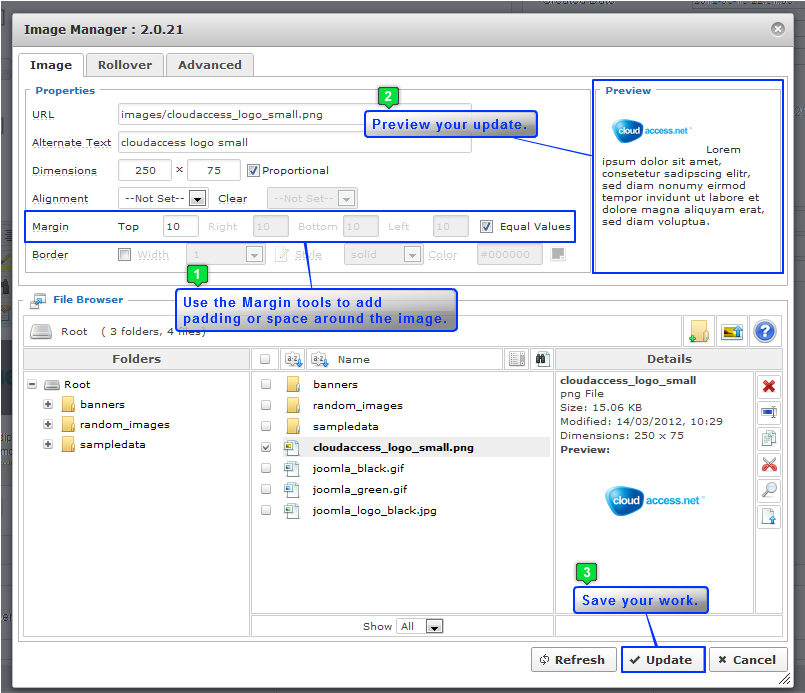
You'll be returned to the article text or custom output area to view the updated image and text.
Creating a border around an image
First, select the the image that you'd like to work with and return to the Image Manager.
Using the Boarder tools, you can add a border around the image. You do have width, style, and color options. The Preview area will allow you to preview your border. Be sure to click on the Update button to save your work.
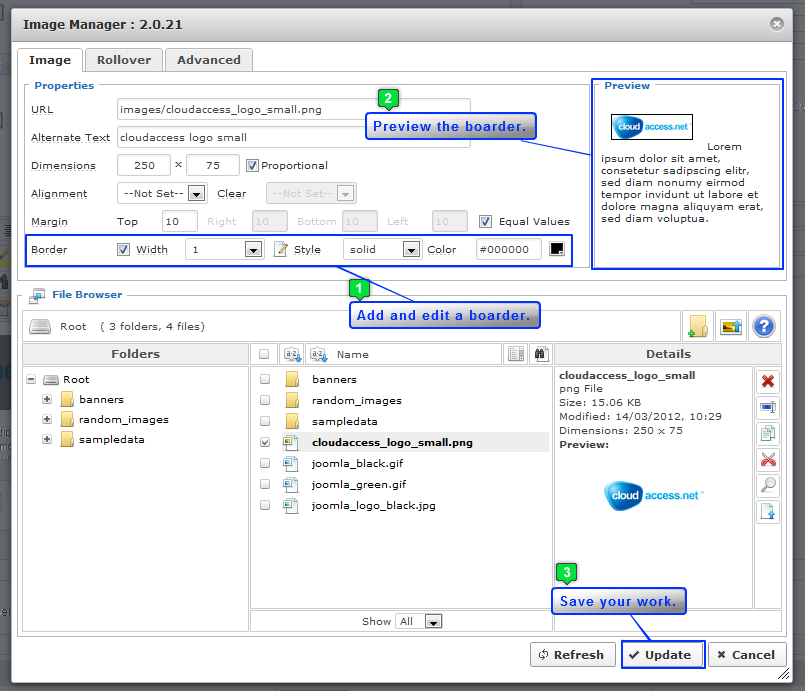
You'll be returned to the article text or custom output area to view the updated image and text.
Back to Top
Knowledgebase

100% FREE
Joomla & WordPress
Hosting
- Launch Instantly
- Free Subdomain
- Free Training
- Free SSL
- 500MB Space
- 1CPU/1GB RAM
- FTP Access
- MySQL Access

Do you have suggestions for improving this article?
We take a great deal of pride in our knowledgebase and making sure that our content is complete, accurate and useable. If you have a suggestion for improving anything in this content, please let us know by filling out this form. Be sure to include the link to the article that you'd like to see improved. Thank you!