- You are here:
-
CloudMail

-
Using CloudMail
- Purchasing additional CloudMail disc space
CloudMail User Management
Adding a new user account for your CloudMail service is an easy process and can be accomplished one of two ways- through the Cloud Control Panel™(CCP) or the CloudMail interface.
Managing CloudMail Users in the CCP
Managing Users through CloudMail
Managing CloudMail Users in the CCP
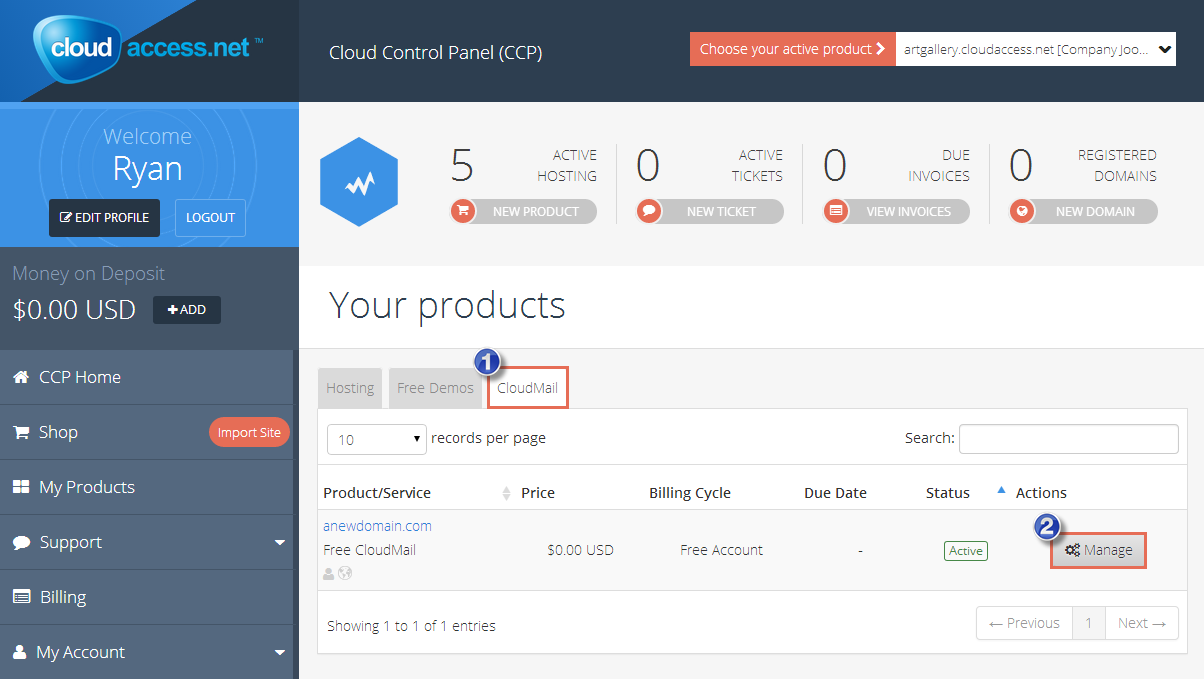
Once logged into the CCP, click on the "CloudMail" tab under "Your products". Next, select the "Manage" button for the CloudMail service that you'd like to work with.
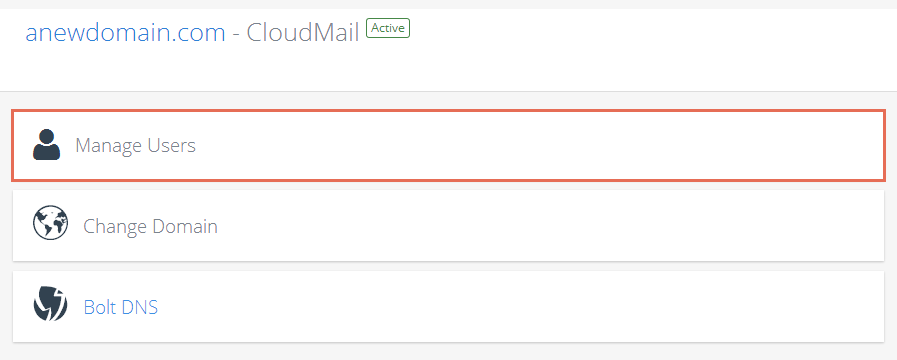
In the next window, click on "Manage Users"
In the "CloudMail User Management" area, enter the information for the new user and click on the "Add New User" button. You can also update or remove existing users in this area.
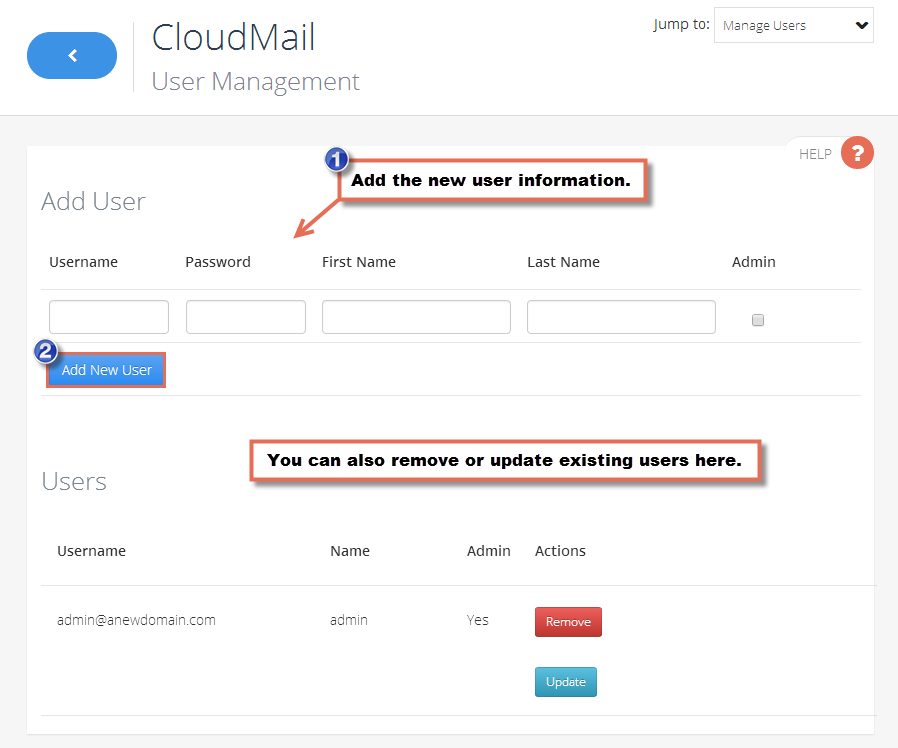
Please note, once you create the user, the user still needs to log into CloudMail to activate their account. Update: Only non-admin accounts may be removed from within the CCP. Admin accounts can only be removed by logging into the CloudMail interface as an Administrator and removing the user.
Back to Top
Managing Users through CloudMail
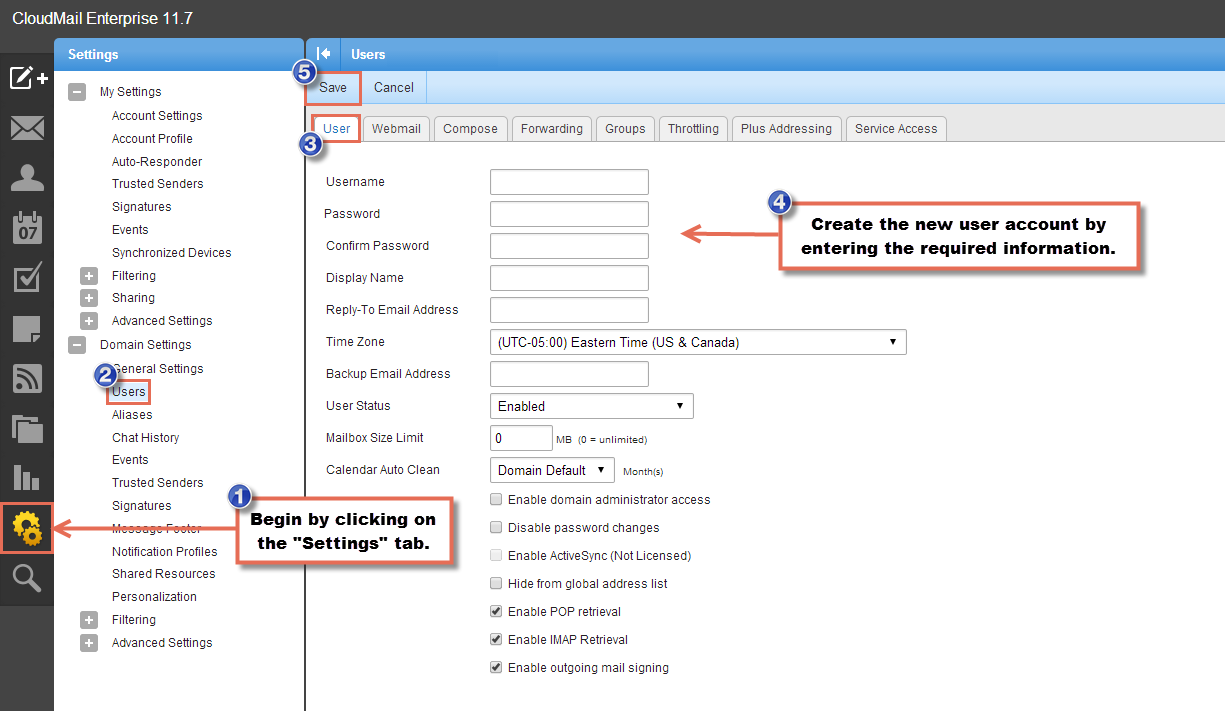
Once logged into your CloudMail account, click on the "Settings" tab on the left hand side of the interface. Under the "Settings" menu, select "Users". Under the "User" tab, enter all the required information for the new account. Be sure to save your work and your new account will be created.
Back to Top
Knowledgebase

100% FREE
Joomla & WordPress
Hosting
- Launch Instantly
- Free Subdomain
- Free Training
- Free SSL
- 500MB Space
- 1CPU/1GB RAM
- FTP Access
- MySQL Access

Do you have suggestions for improving this article?
We take a great deal of pride in our knowledgebase and making sure that our content is complete, accurate and useable. If you have a suggestion for improving anything in this content, please let us know by filling out this form. Be sure to include the link to the article that you'd like to see improved. Thank you!