- You are here:
-
Joomla! Tutorials

-
Joomla! 2.5
-
Module Manager
- Embedding HTML Code (Joomla 2.5)
Tutorial #6: Creating Categories (Joomla 2.5)
Once you've launched a site and installed a template, the next step is to create content for your site. This article explains how to create categories, the first step in the process.
Connecting the Dots
How to Create Categories
Connecting the Dots
There is an order of operations to understand as you develop content on your site. This is very much like connecting the dots. The first step (the first dot) must be a category. Categories are folders that exist primarily in the back end of your site. They exist to help you stay organized. The second step is to create an article. Users will see articles on the front end of your site and there are number of ways to feature articles on your site. The final step is to create a single article menu item to feature the article on your site.
How to Create Categories
To create a category, log into the back end of your site and click on the "Category Manager" icon.
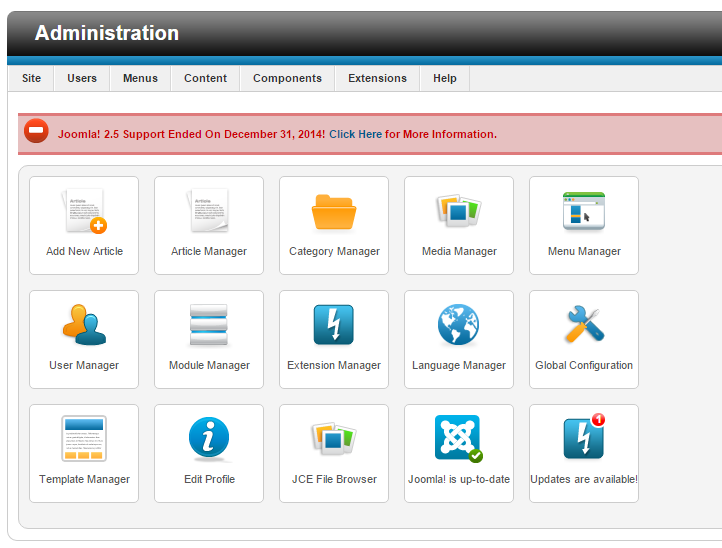
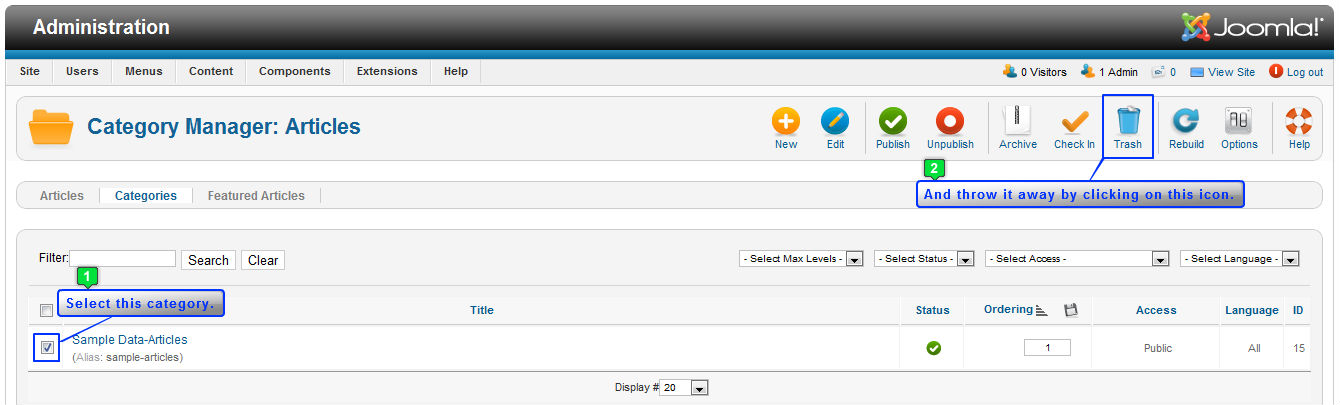
The file folder icon makes a lot of sense for the Category Manager. Categories are like folders that exist primarily in the back end. It's a way to save information logically and you can create infinitely many categories. Notice how there is one "Sample Data-Articles" category that has already been created. Even though you've cleared all content, Joomla is smart enough to know that it has to keep some sample data to work correctly. Because we'll be creating a custom category, delete this category by selecting it and clicking on the Trash button in the toolbar to throw it away.
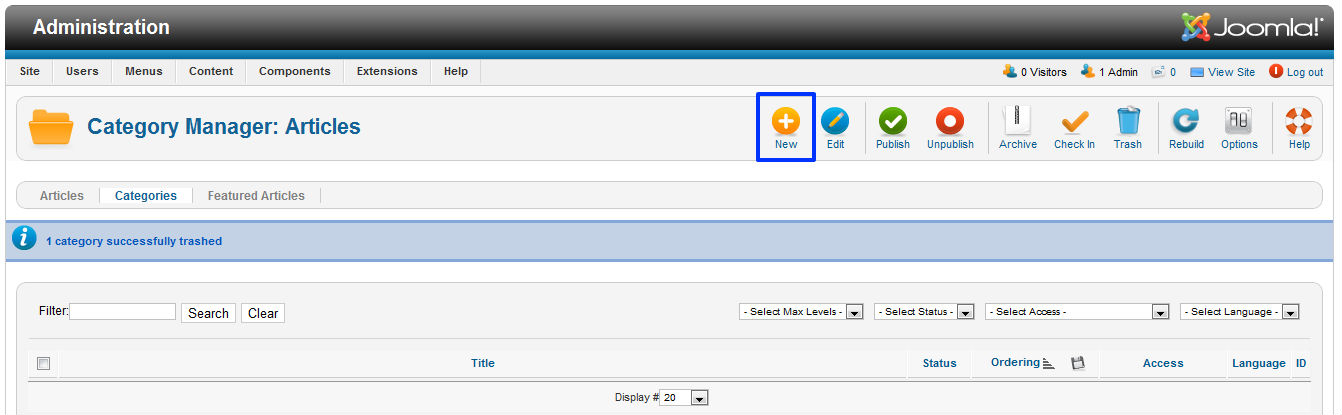
You will receive a blue message letting you know that you successfully deleted the category. To create a new category, select the New button in the toolbar.
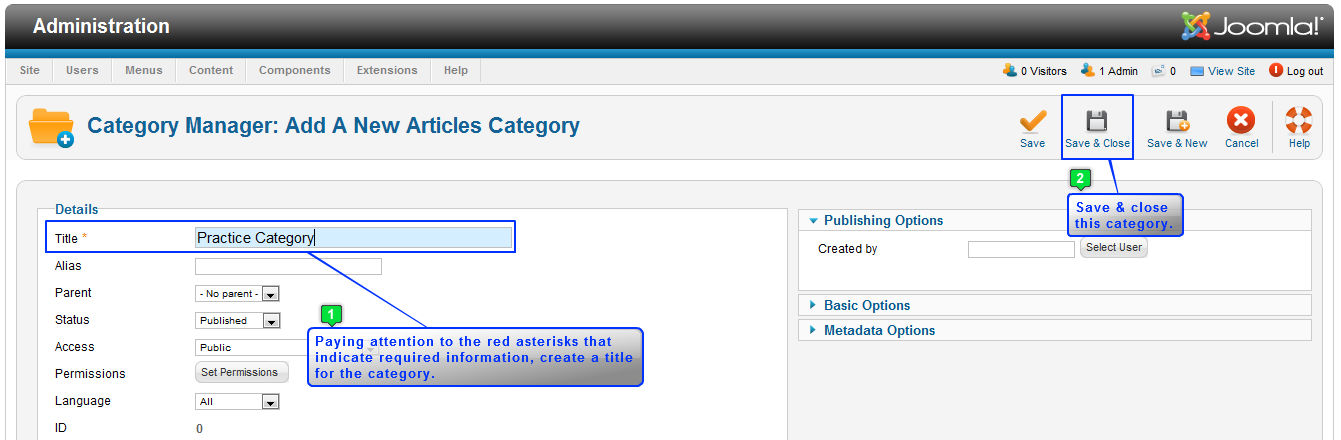
Whenever you are creating something like a category, article, menu item or module, pay attention to the red asterisks. These asterisks indicate required information. As you create an category, you'll notice that there is only one asterisk. The title is the only information needed to successfully create a category. There are many other useful functions available, and you should learn these functions. Create a title for the category. The "Save" button will let you save the category, but the category will stay open for you to work. The "Save & Close" button will save the category and send you back to the Category Manager, and the "Save & New" button will save the category and open up a new category for you to create. Make a title for this category and select "Save & Close".
Your Category Manager will now display the category that you created. Remember that you can create infinitely many categories in the back end of your site. Once you've successfully created an category, the next step is to create an article.
Knowledgebase

100% FREE
Joomla & WordPress
Hosting
- Launch Instantly
- Free Subdomain
- Free Training
- Free SSL
- 500MB Space
- 1CPU/1GB RAM
- FTP Access
- MySQL Access

Do you have suggestions for improving this article?
We take a great deal of pride in our knowledgebase and making sure that our content is complete, accurate and useable. If you have a suggestion for improving anything in this content, please let us know by filling out this form. Be sure to include the link to the article that you'd like to see improved. Thank you!