- You are here:
-
Joomla! Tutorials

-
Joomla! 3
-
Menu Manager
- Drop Down/Sub Menu Item (Joomla 3)
Inserting an Image into an Article (Joomla 1.5)
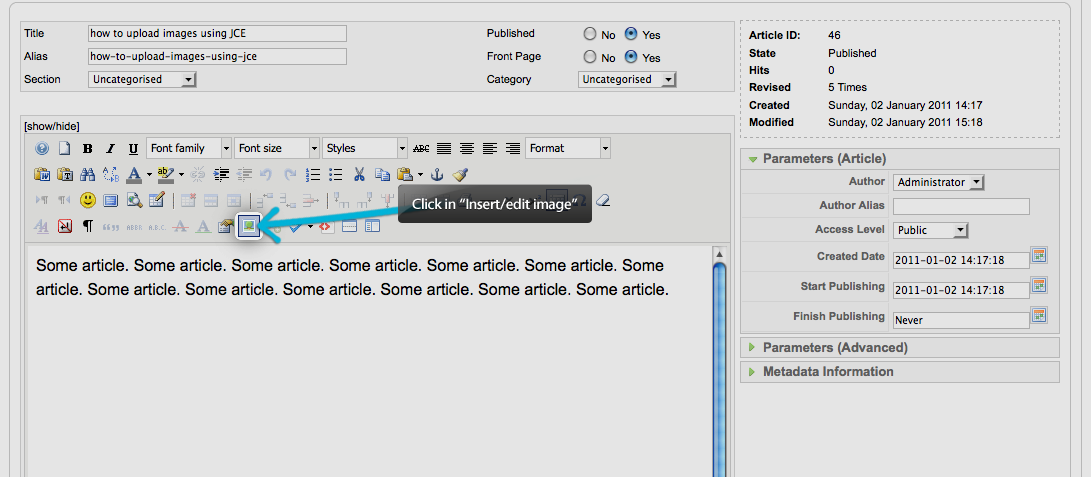
To begin, click the icon with a photograph of a green tree (Insert/edit image).
It will open a window with JCE Image Manager. Before you can upload images, you'll have to choose how to store them. At the bottom of the Image Manager, there is a place to manage this.
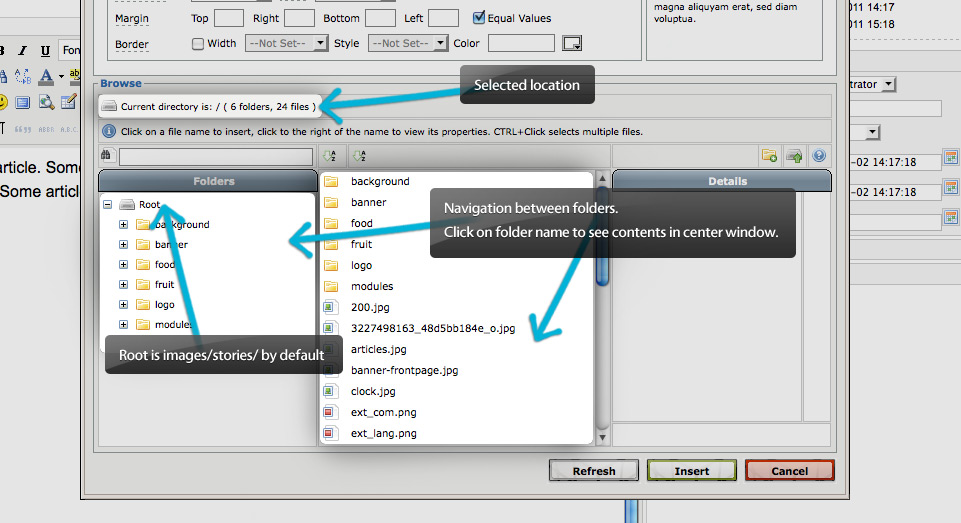
After selecting the location for the files hit the upload icon.
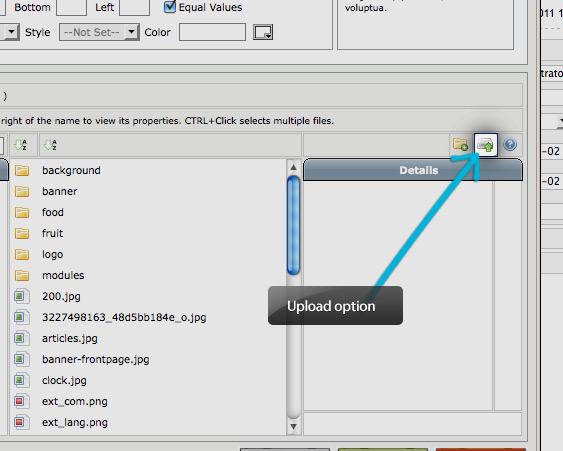
Now you will see the upload manager.
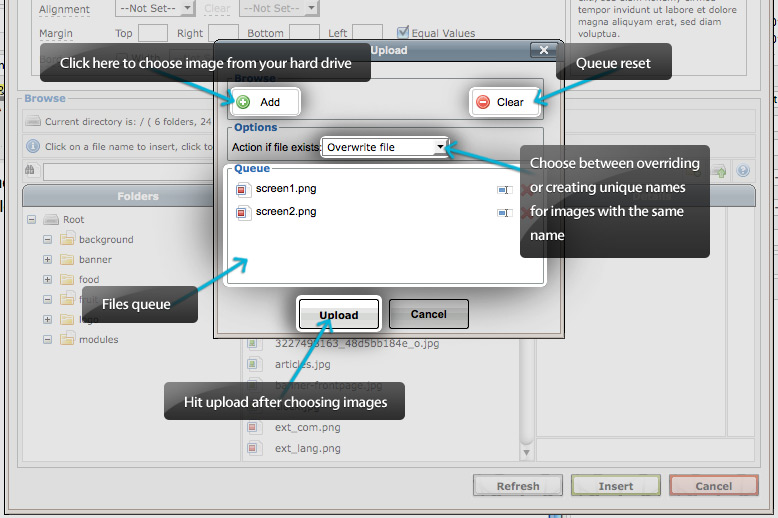
Click on the "Add" button, select a picture from the disk and confirm. You can repeat this step if you want to submit more pictures. Selected images are shown in the queue at the bottom of the window. When you finish adding images, click "Upload" and wait until all images will be marked with a green icon.
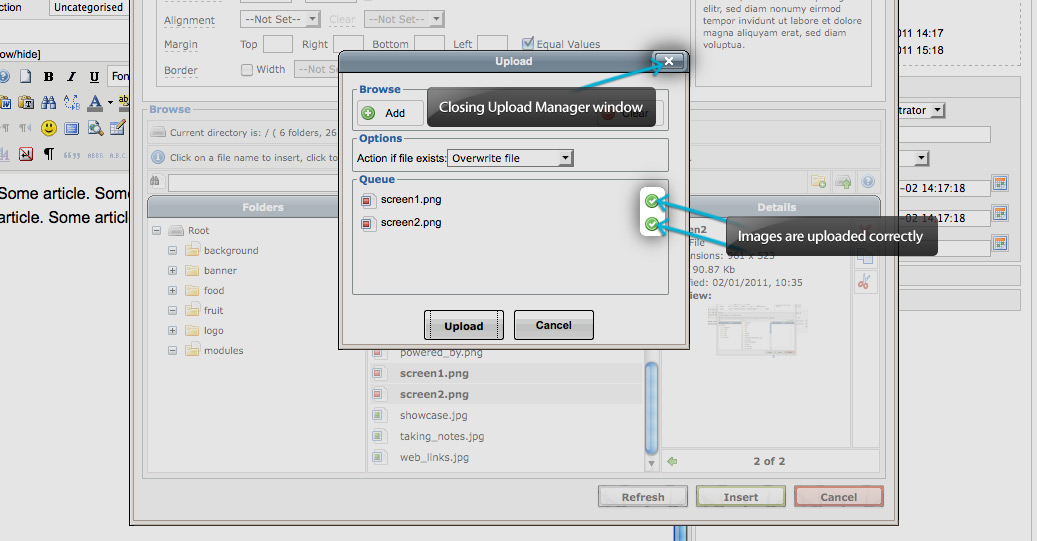
When images are sent we can close the window manager and image upload manager with an cross icon. The upload process will be complete at this point. Click on the file name of the image you want to add. You will see the selected image s details appear in the upper area of the Image Manager. Here you can also write an alternative tag, set the alignment, or add padding/margin around the image. When finished, click the "Insert" at bottom.
Knowledgebase

100% FREE
Joomla & WordPress
Hosting
- Launch Instantly
- Free Subdomain
- Free Training
- Free SSL
- 500MB Space
- 1CPU/1GB RAM
- FTP Access
- MySQL Access

Do you have suggestions for improving this article?
We take a great deal of pride in our knowledgebase and making sure that our content is complete, accurate and useable. If you have a suggestion for improving anything in this content, please let us know by filling out this form. Be sure to include the link to the article that you'd like to see improved. Thank you!