- You are here:
-
Joomla! Tutorials

-
Joomla! 2.5
-
Module Manager
- Embedding HTML Code (Joomla 2.5)
Banner Module (Joomla 2.5)
Joomla 2.5 features a Banner component to help users create and edit Banner ads that can feature products and product details, advertisements, affiliate marketing ads, or many other pieces of information relevant to a site. Banners also allow users to display rotating linkable images on different pages of their site, although this is not considered a photo gallery or image rotator extension. This article is broken down into the following sections to help understand and create a Banner in Joomla 2.5:
The Structure of the Banner Component
Creating a Client, Category, and Banner
Creating a Banner Module
The Structure of the Banner Component
To fully understand how a banner is created, it's important to understand each step of the process. Each client that is created can be associated with one or several categories, and an infinate amount of banners can exist within each category. For example, a banner component structure for a shoe store might look like the following:
Client = Shoe Store
Categories = Men's, Women's
Men's Banners = men's work boots, men's dress shoes, men's athletic shoes
Women's Banners = women's work boots, women's dress shoes, women's athletic shoes
Back to Top
Creating a Client, Category, and Banner
For the purposes of this document, we will be creating a banner ad for the shoe store example listed above. We are using the Cloudbase 2.0 template created by CloudAccess.net and we will featuring the banner in the "Showcase" module position.
After logging into the the back end of your site, the first step in creating a banner is to create the client. To do so, go to Components > Banners > Clients.
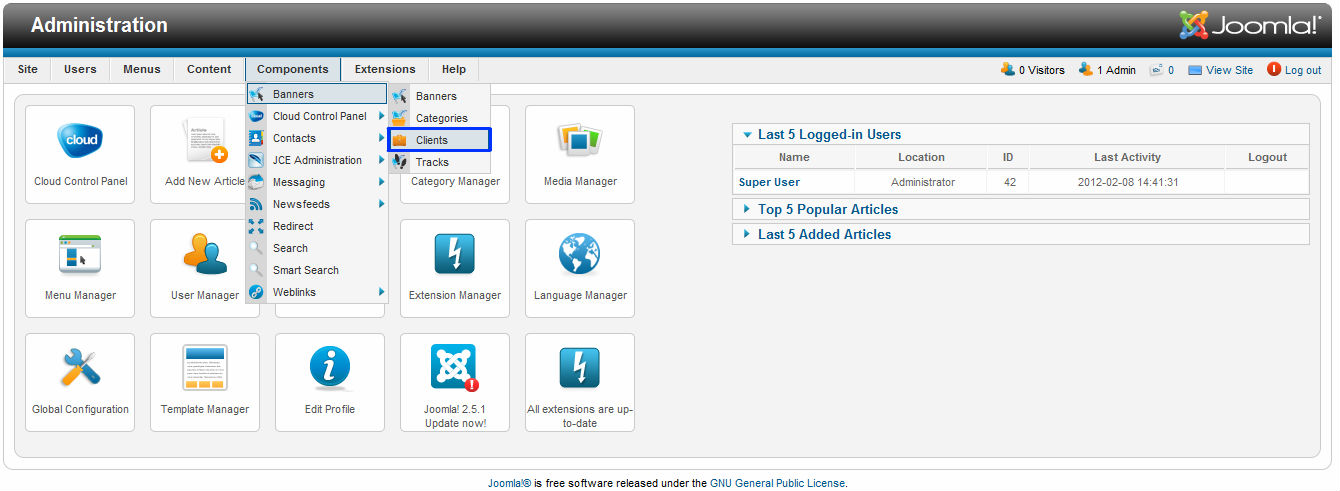
Next, select the "New" button to create a new client.
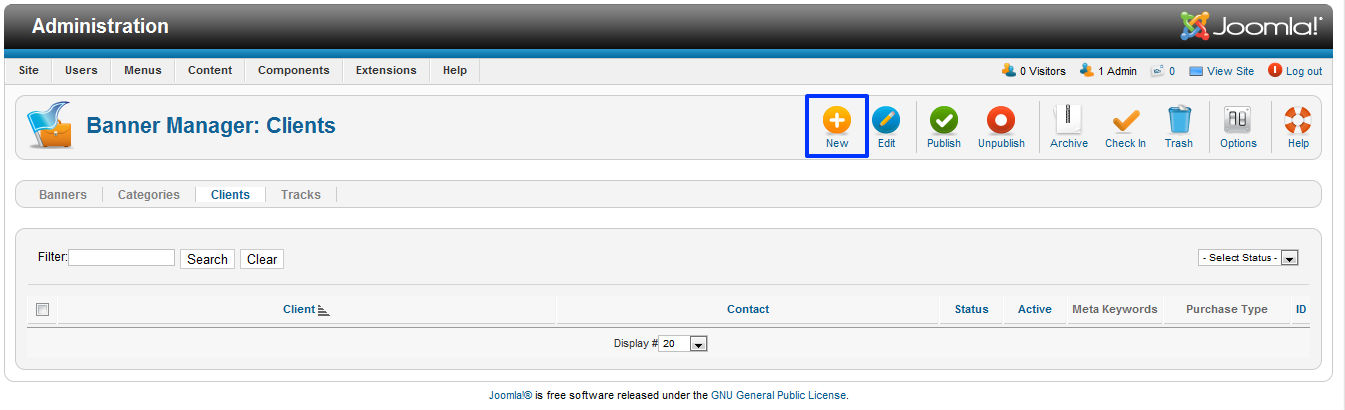
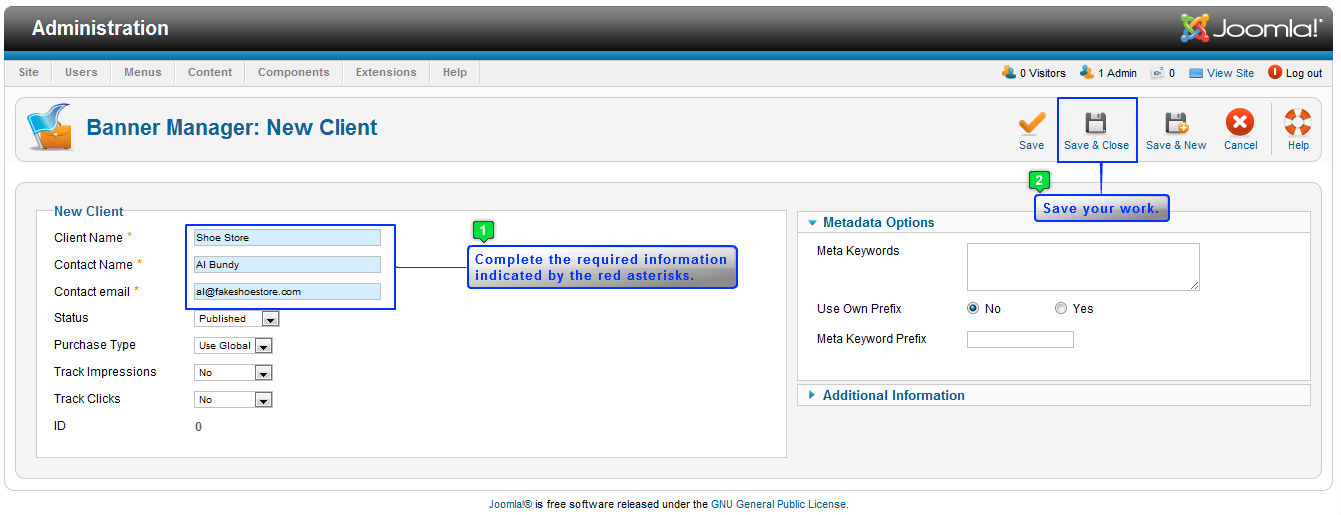
In the "New Client" area, create the details for the client as indicated below. Be sure to save your work when finished.
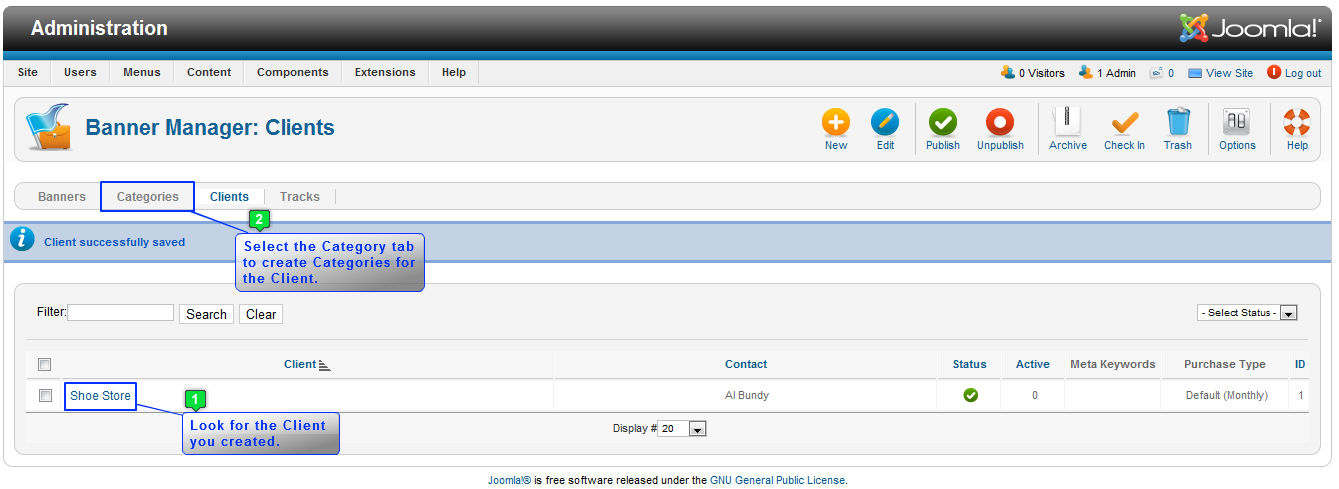
Once saving your work, return to the "Banner Manager: Clients" page. You will see the client that you created. The next step is to go create categories for the client, and you'll do this by going to the "Categories" tab.
Select the "New" button to create a new category
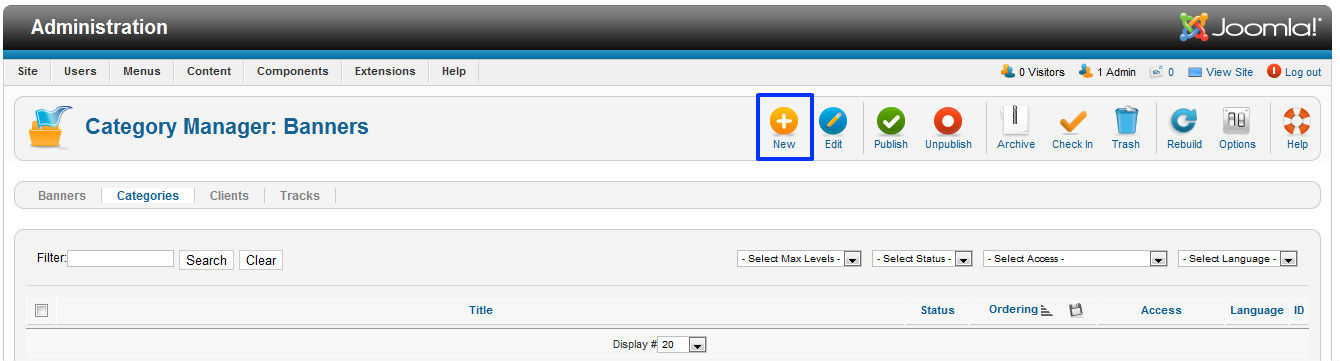
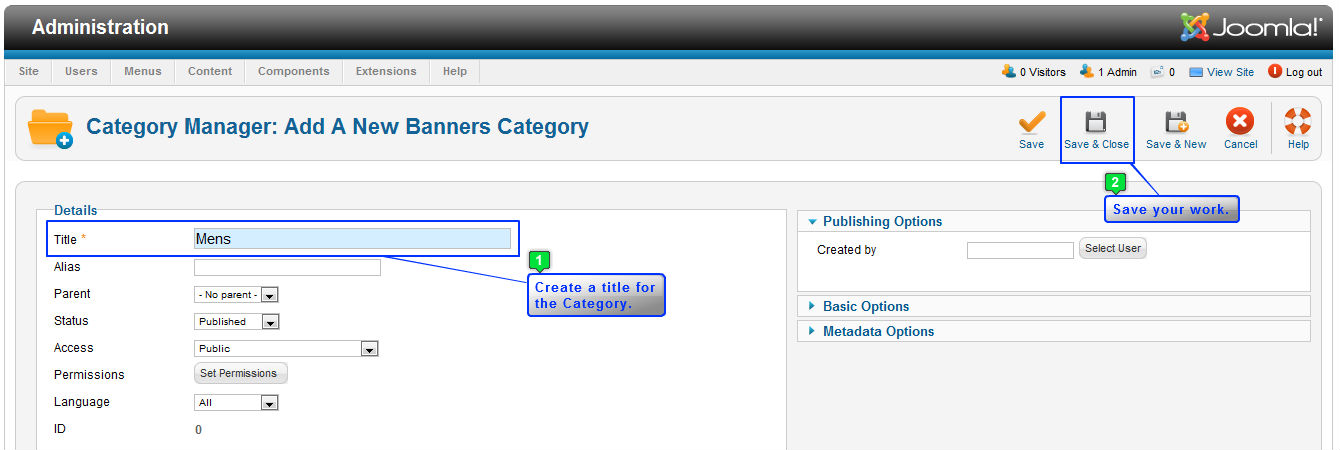
Inside the "Add a New Banners Category" area, look for the red asterisks. In this area, there is only one piece of information that is required to successfully create a category: the title. There are other useful functions here that are worth learning about, but the title is only piece of information that is needed. Once creating a title, save your work.
At this point, return to the "Category Manager: Banner"s area, look for the category you created, and select the "Banners" tab to create a banner.

Select the "New" button to create a new banner.
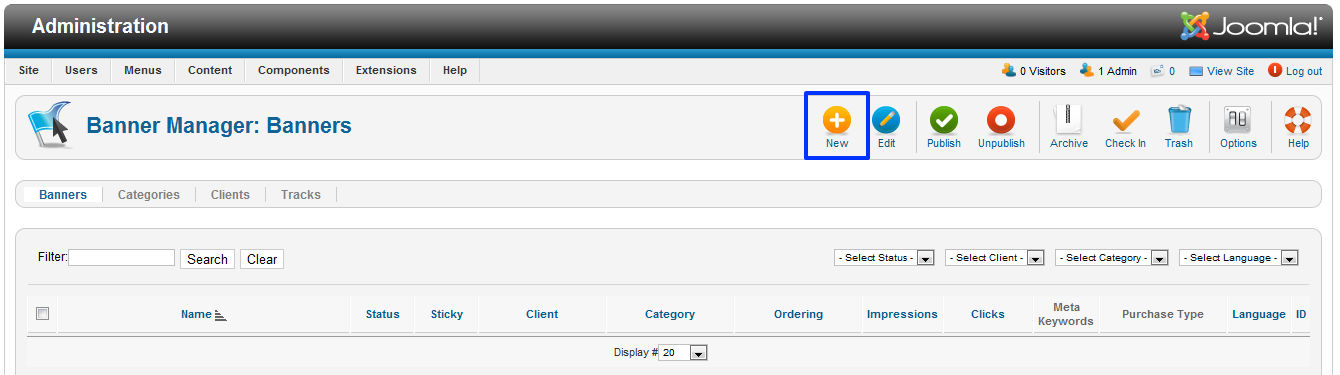
Again, paying attention to the red asterisks, create a name for the banner, and select the category for the banner. You should also select either "Image" or "Custom" for the "Banner Type". If you select "Image" select an image to incorporate into the banner. If you select "Custom", there are additional pieces of information to include like a piece of custom HTML code. With either choice, there is an area to add the "Click URL", the site that the banner will lead to if it is selected by a user. These are the only required pieces of information; a lot of additional features exist that are worth learning. Once you created the banner, save your work.

Back to Top
Creating a Banner Module
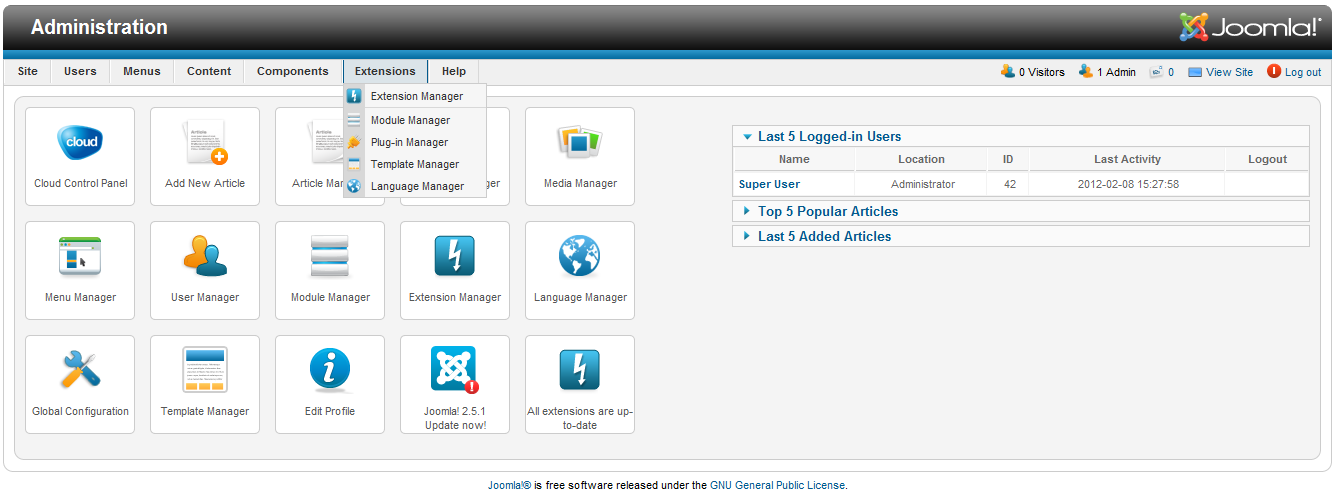
After creating the client, category, and banner, the next step is to create the Banner Module. Do so by returning to the control panel, and going to Extensions > Module Manager.
Select the "New" button to create a new module.
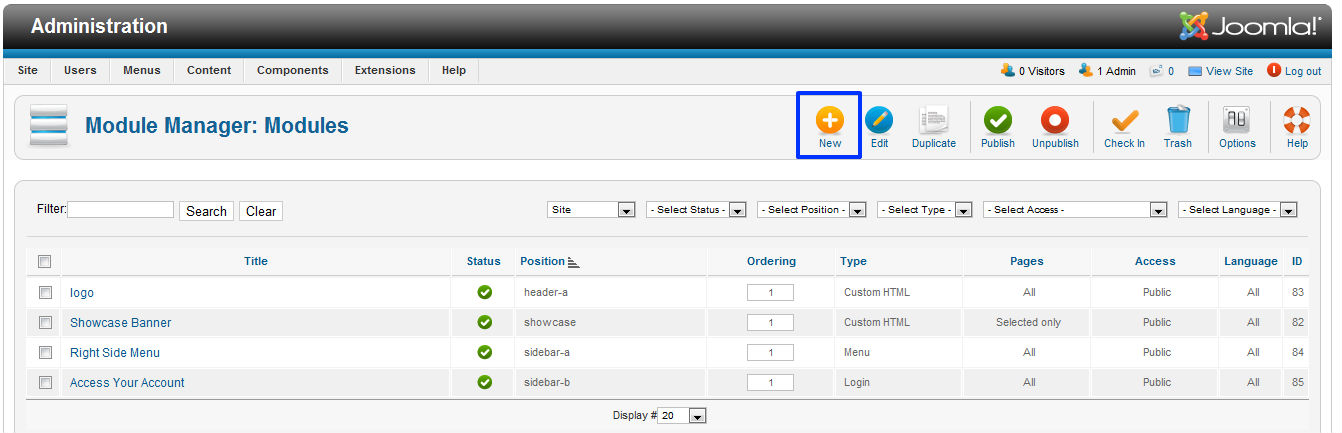
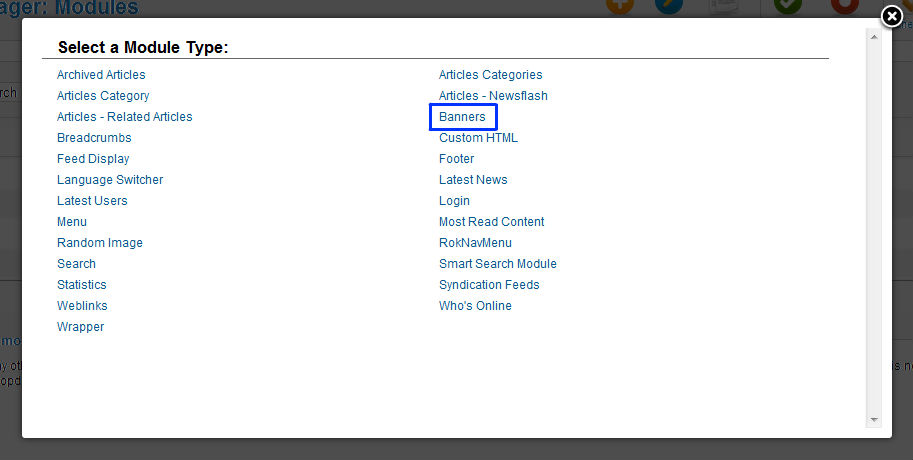
You'll be prompted to select a module type. Select "Banners" from the list that appears.
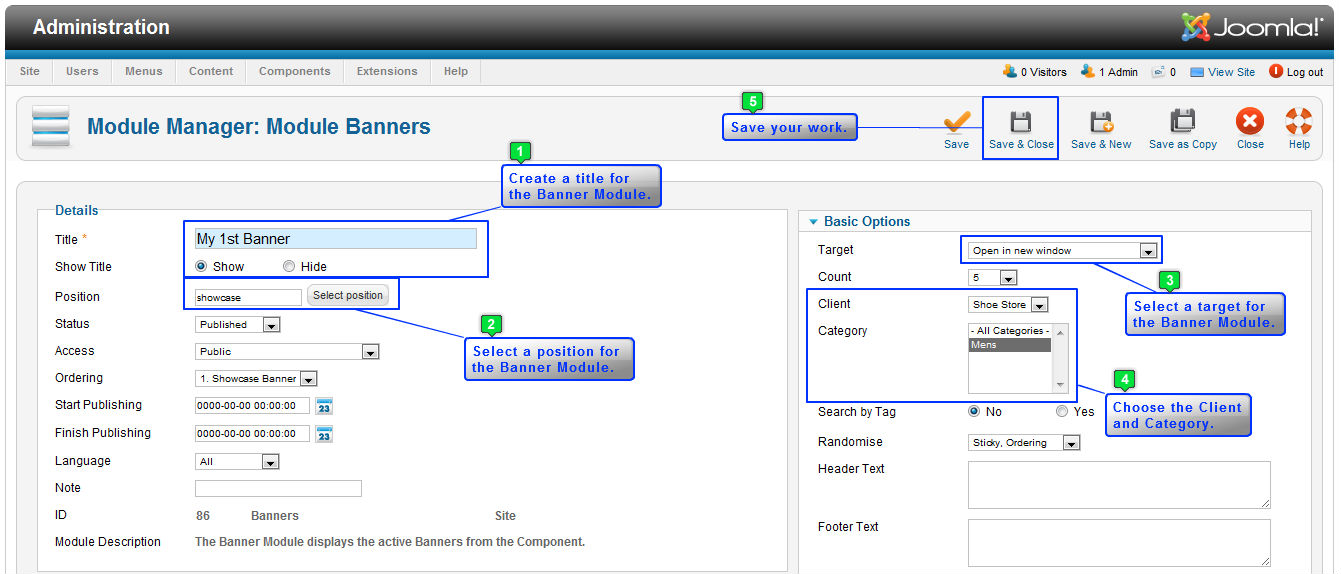
To create the module, add a title for the module, determine whether you'd like to show or hide the title, and select a module position. You'll also want to select the banner you created in the "Basic Options" area. First, select the target for the banner module link (if active), select the client from the drop down menu, and select the category from the list available. Be sure to change the status to "Published" and save your work when you're done.
Return to the front end of your site, hit refresh, and your banner should appear in the position and on the pages you selected.
Back to Top
Knowledgebase

100% FREE
Joomla & WordPress
Hosting
- Launch Instantly
- Free Subdomain
- Free Training
- Free SSL
- 500MB Space
- 1CPU/1GB RAM
- FTP Access
- MySQL Access

Do you have suggestions for improving this article?
We take a great deal of pride in our knowledgebase and making sure that our content is complete, accurate and useable. If you have a suggestion for improving anything in this content, please let us know by filling out this form. Be sure to include the link to the article that you'd like to see improved. Thank you!