- You are here:
-
Joomla! Tutorials

-
Joomla! 2.5
-
Menu Manager
- Single Contact Form (Joomla 2.5)
Media Manager Overview (Joomla 2.5)
The Joomla 2.5 Media Manager supports a variety of different file types that can be displayed or utilized within the site. This article explains how to access the Media Manager and illustrates few basic concepts that any site administrator should know about.
Accessing the Media Manager
Creating Folders within the Media Manager
Uploading Files into the Media Manager
Deleting Files from the Media Manager
Accessing the Media Manager
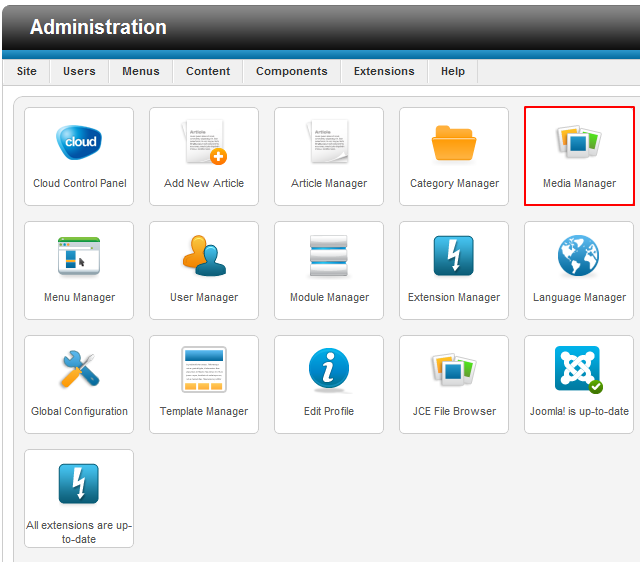
To access the Media Manager, click on the Media Manager icon after logging into the Administrative area (the back end) of your site.
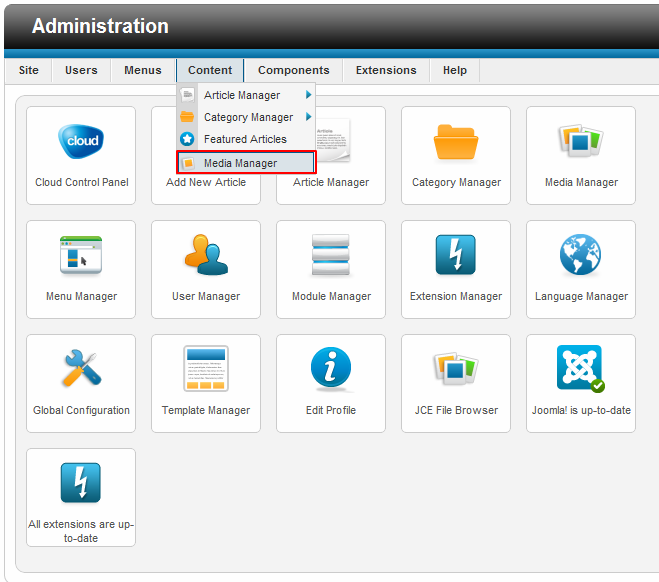
You can also access the Media Manager from the "Content" tab in the main menu.
There are two views of the Media Manager - the "Thumbnail View" and the "Detail View" - accessible through the tabs once you've entered the Media Manager.
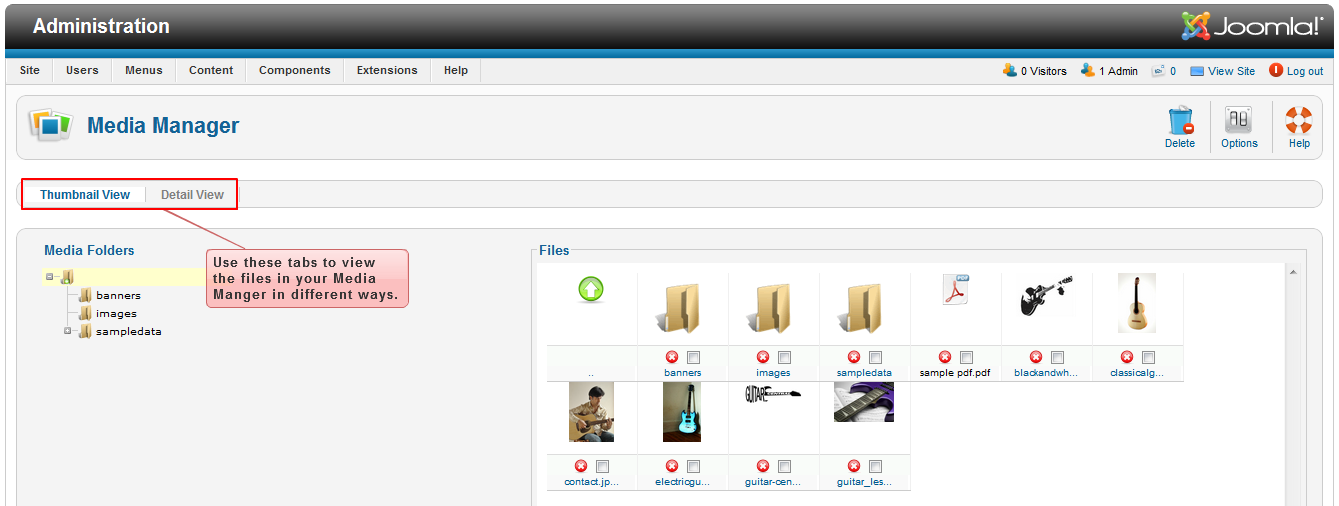
You can elect to see a large thumbnail of the media or a smaller thumbnail with dimensions and the file size. Please note that there will typically be a few images pre-installed into your Joomla! 2.5 site.
Back to Top
Creating Folders within the Media Manager
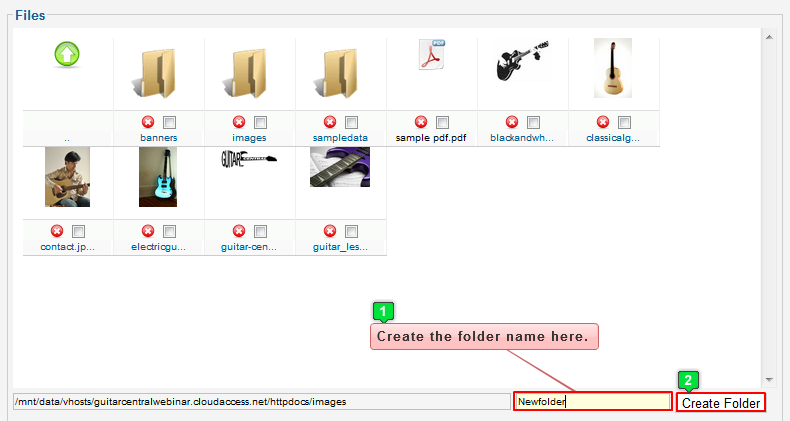
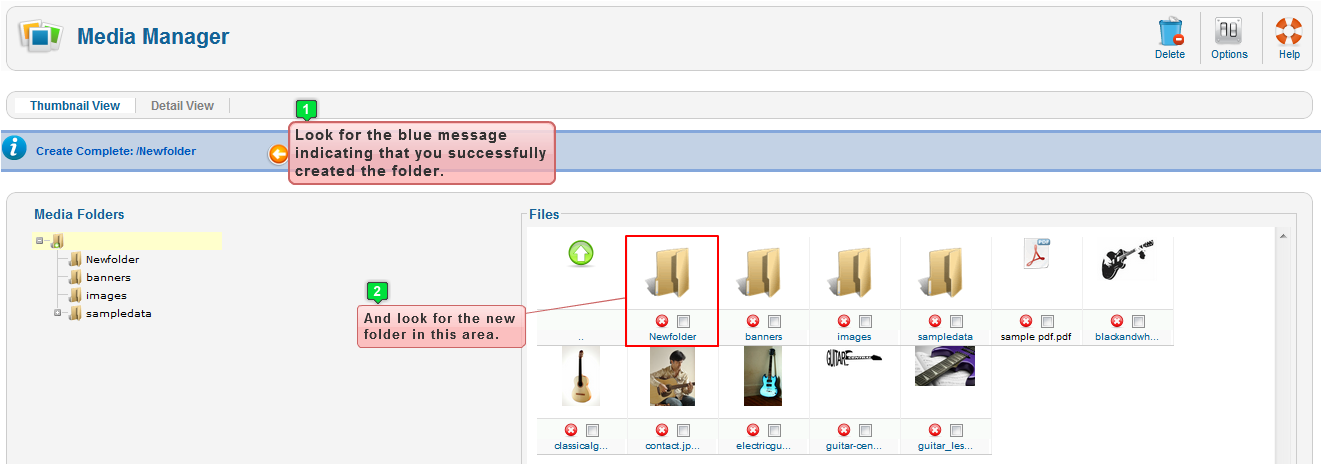
You can always upload an file into the images folder (the default folder) in the Media Manager, but if you can also create folders within the Media Manager to keep your files a little more organized. To create a folder, find the field next to the "Create Folder" button, type the folder's name into the field (keep in mind that there cannot be any spaces within the folder s name), and click on the "Create Folder" button.
Once you're done, you'll receive a blue message indicating that you successfully created the folder, and you should see the folder's name in the "Files" area.
Back to Top
Uploading Files into the Media Manager
Joomla will recognize almost every file type. To upload a file using the Media Manager, first select which folder you would like your file to be placed in when it is uploaded. The default folder that Media Manager uses is the images folder. You can select a folder from the list of media folders or from the "Files" area of Media Manager. Once you have selected the folder that you will upload the file to, click the "Choose File" button in the "Upload files" section.
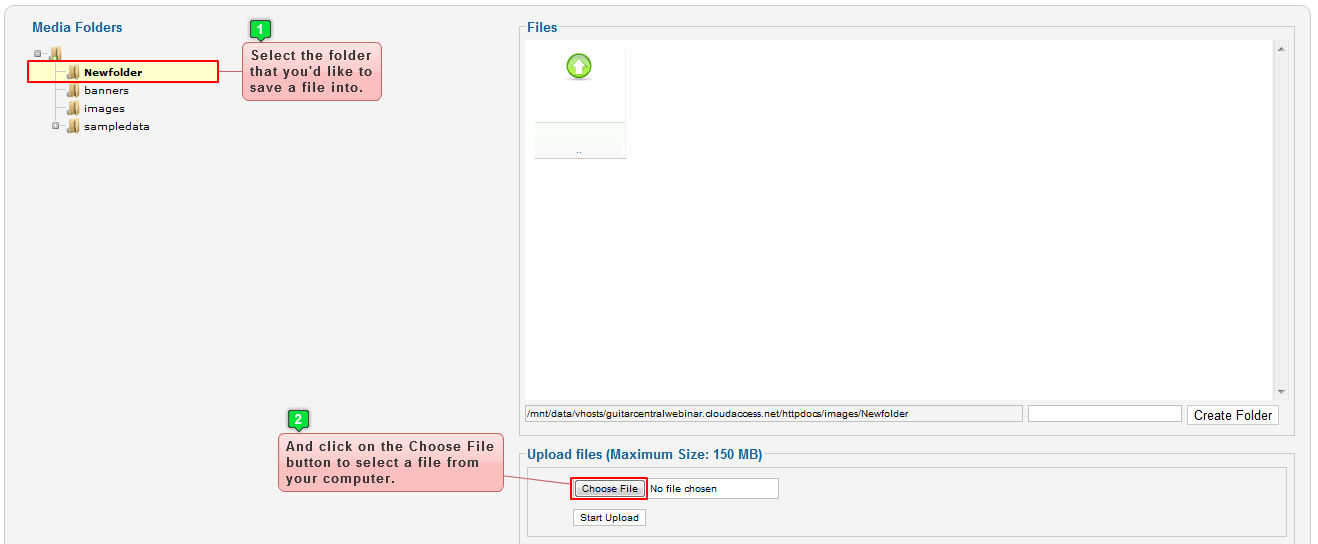
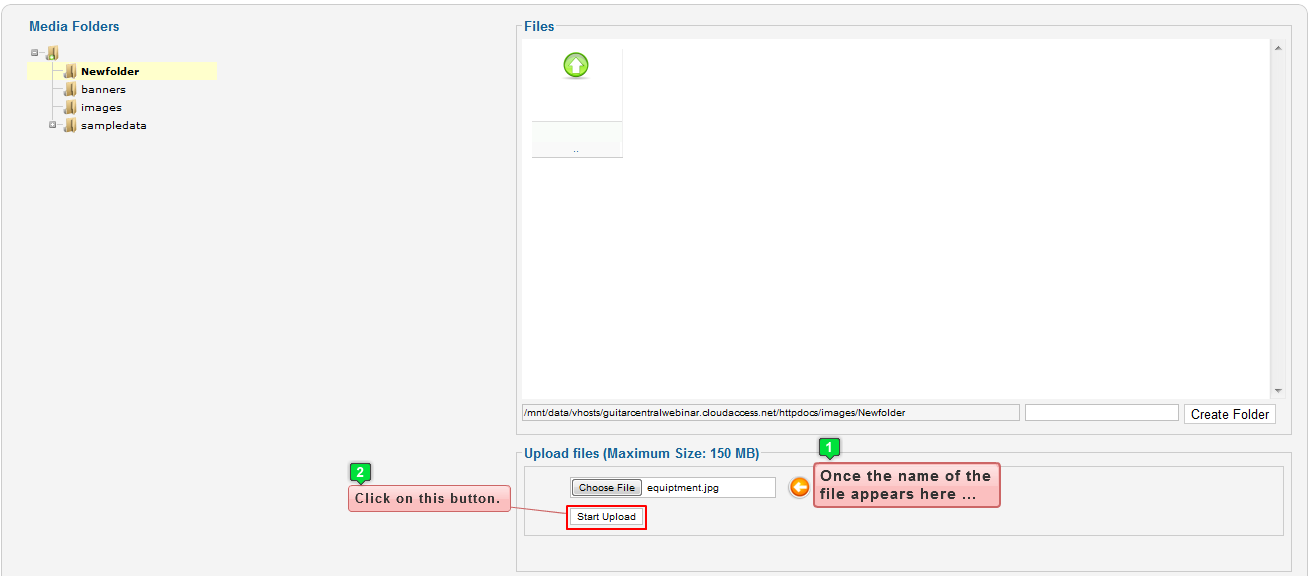
In the file box that pops up, locate the file that you want to upload on your computer, select it, and click the "Open" button. Once the name of the file appears in the window next to the "Choose File" button in the Media Manager, click the "Start Upload" button.
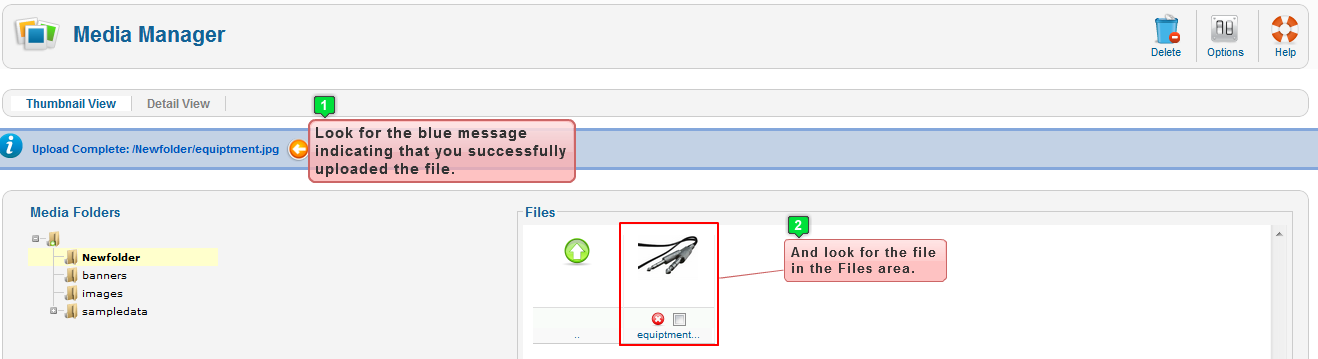
You will receive a blue message indicating that you successfully uploaded a file and the file will appear in the "Files" section of the Media Manager.
Back to Top
Deleting Files from the Media Manager
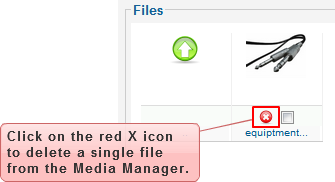
You can also remove a file from the Media Manager. To delete a file, simply click on the red X icon underneath the file in the "Files" section.
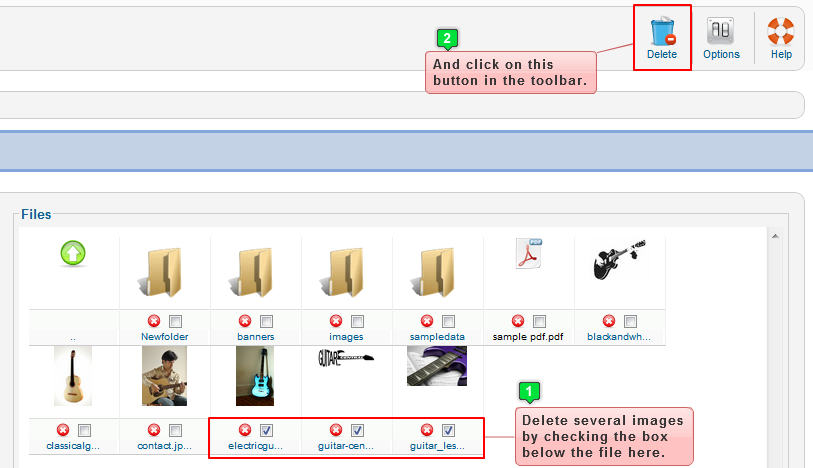
You can also delete multiple files at once by checking the boxes underneath the desired files and then clicking the "Delete" button in the upper-right corner of the page.
Be very careful when deleting files using the Media Manager, as any files that you delete will be permanently erased.
Back to Top
Knowledgebase

100% FREE
Joomla & WordPress
Hosting
- Launch Instantly
- Free Subdomain
- Free Training
- Free SSL
- 500MB Space
- 1CPU/1GB RAM
- FTP Access
- MySQL Access

Do you have suggestions for improving this article?
We take a great deal of pride in our knowledgebase and making sure that our content is complete, accurate and useable. If you have a suggestion for improving anything in this content, please let us know by filling out this form. Be sure to include the link to the article that you'd like to see improved. Thank you!