- You are here:
-
Joomla! Tutorials

-
Joomla! 2.5
-
Module Manager
- Embedding HTML Code (Joomla 2.5)
Cloudbase 2.0 - Adding Google Analytics
The best way to check the site’s traffic is to setup a Google Analytics account and connect it to your Joomla site. This article contains details on how to accomplish that using the Cloudbase 2.0 template and instructions that may work for other templates.
An Overview of Google Analytics
Inserting the Google Analytics Tracker ID in the Cloudbase 2.0
Inserting the Google Analytics Tracker ID in another Template
An Overview of Google Analytics
Google Analytics is very easy to use, and once you insert the Tracker ID and save your work, it will start to work automatically. There are different tasks to perform based upon which Template you re using, but the first step for everyone will be the same: setting up a Google Analytics account.
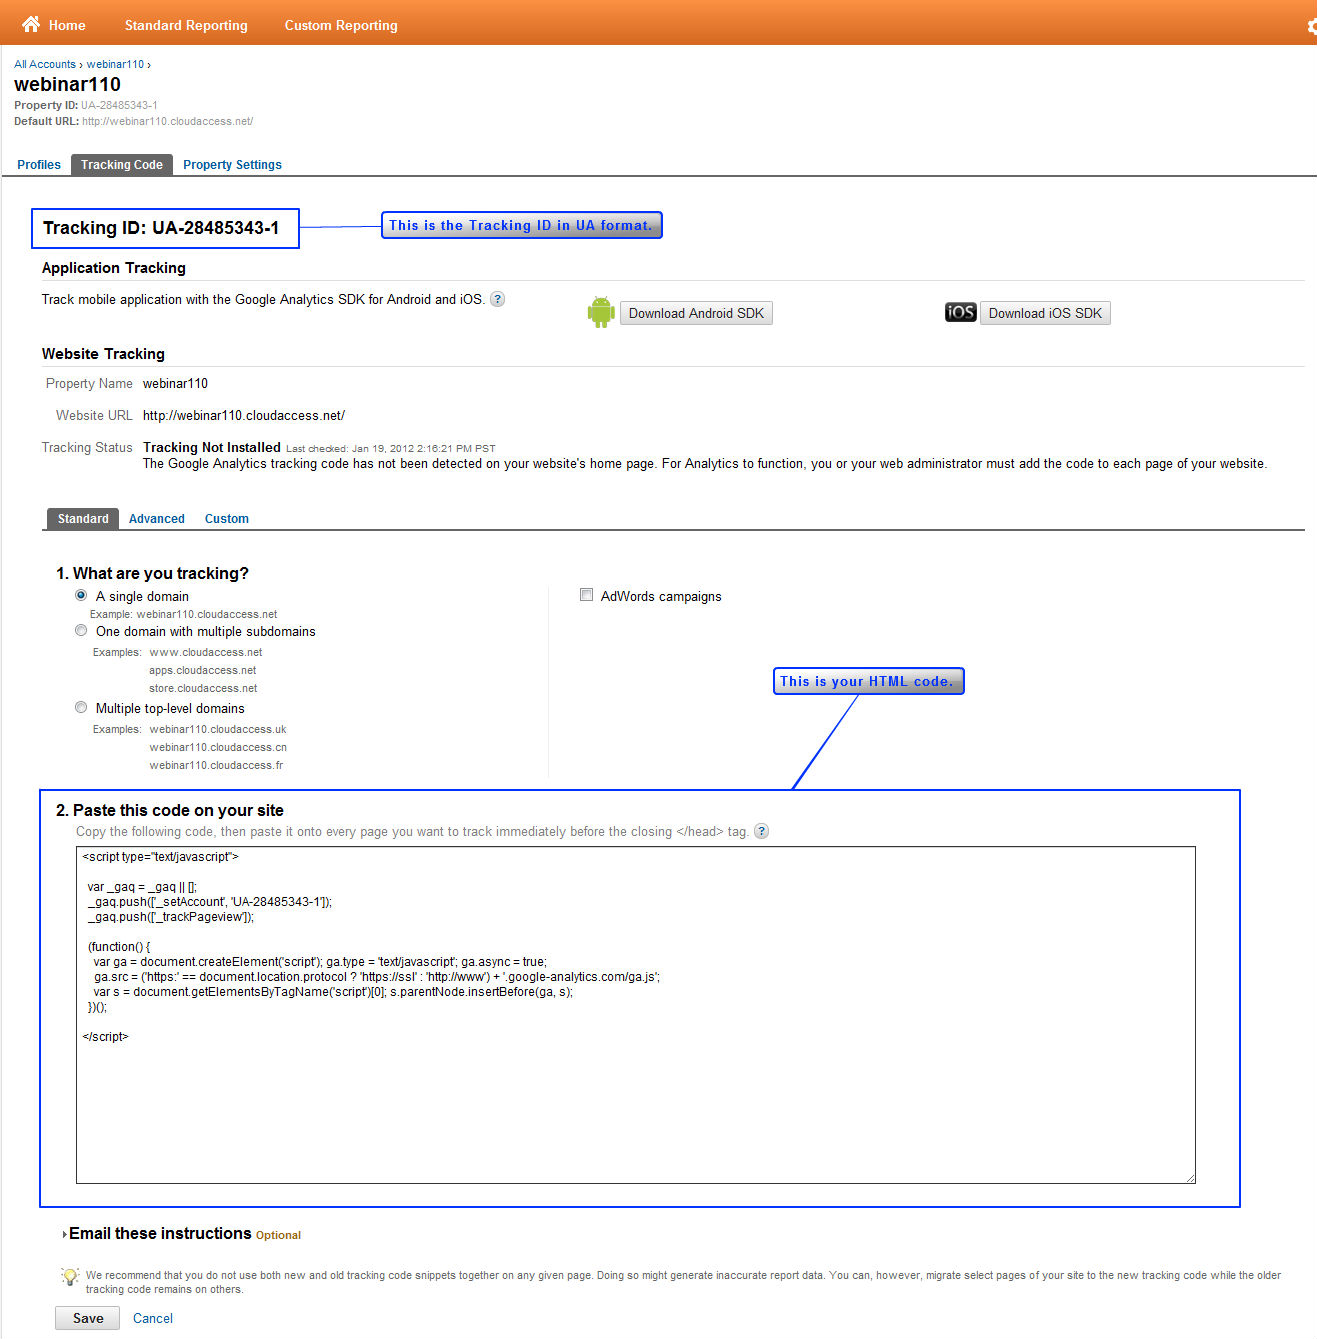
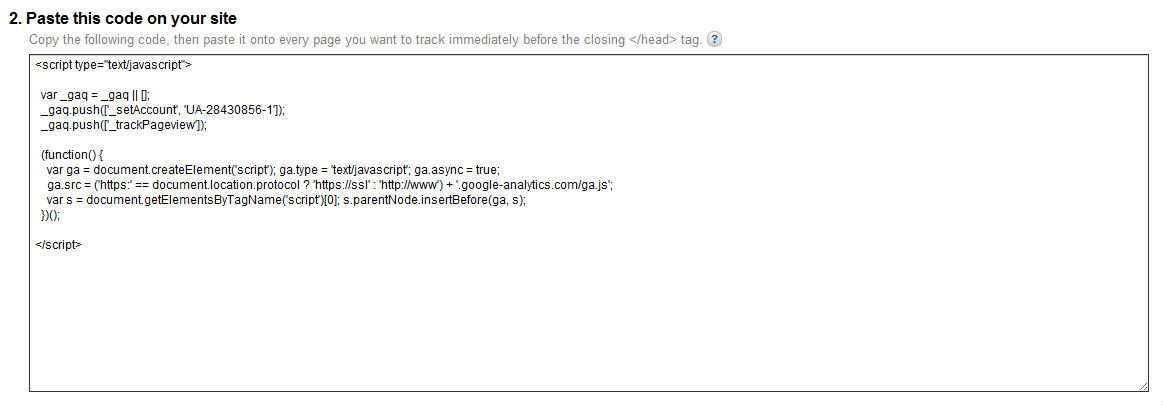
First, go to the Google Analytics site to setup an account. There, find your Tracking ID (also called the Web Property ID) and a piece of HTML code. The Tracking ID is a UA-123456-7 format. Keep the Tracking ID and the code handy. Depending on which type of Template you're using, you'll need one or the other. We suggest that you simply keep that site open until your work is done. The screenshot below offers a sample of the Tracking ID and HTML code given once a Google Analytics account is opened.
At this point, figure out which type of template you're using. At CloudAccess.net we've tried to make things very easy, and so we've included an area for you to insert the Tracker ID into the template settings. It's important to note that CloudAccess.net templates are based on the Gantry framework, and templates using the Gantry framework will typically allow users to insert the Tracker ID in the Administration area (the back end) of your site. There are two sets of instructions in the rest of this article - follow the instructions for the template you're using.
Back to top
Inserting the Google Analytics Tracker ID in the Cloudbase 2.0
Once you've established your Google Analytics account, and you've determined that you are using a CloudAccess.net Template, go to your Template Manager.
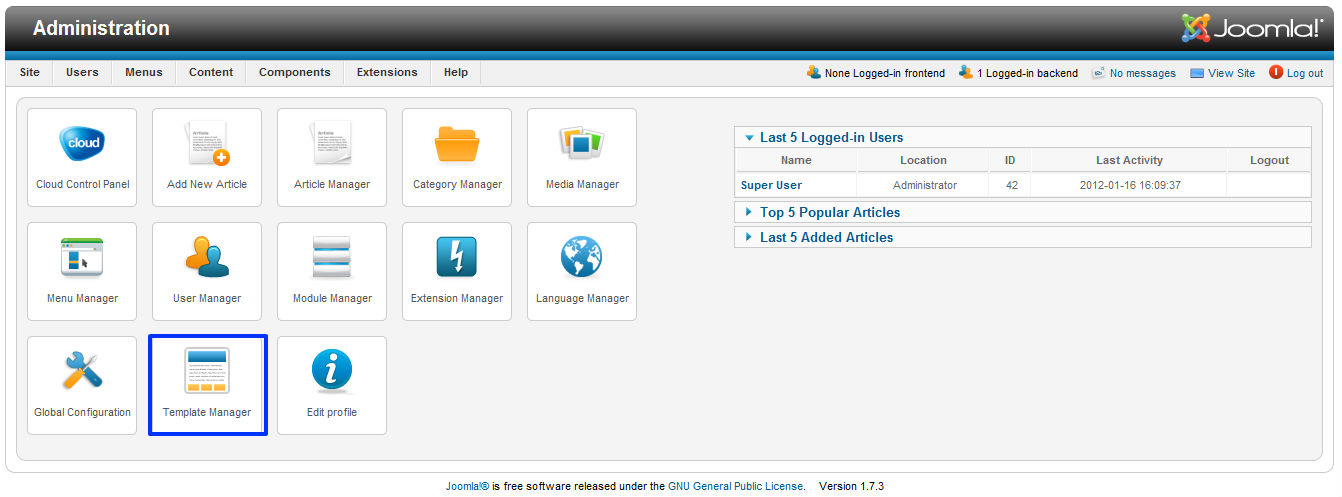
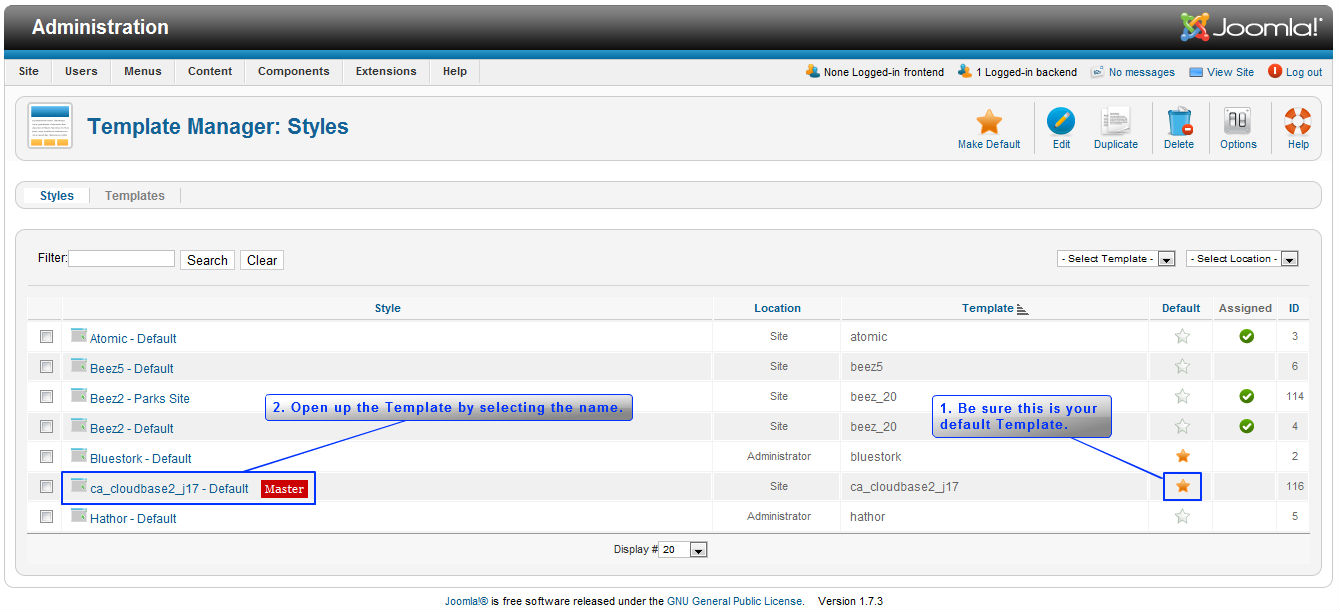
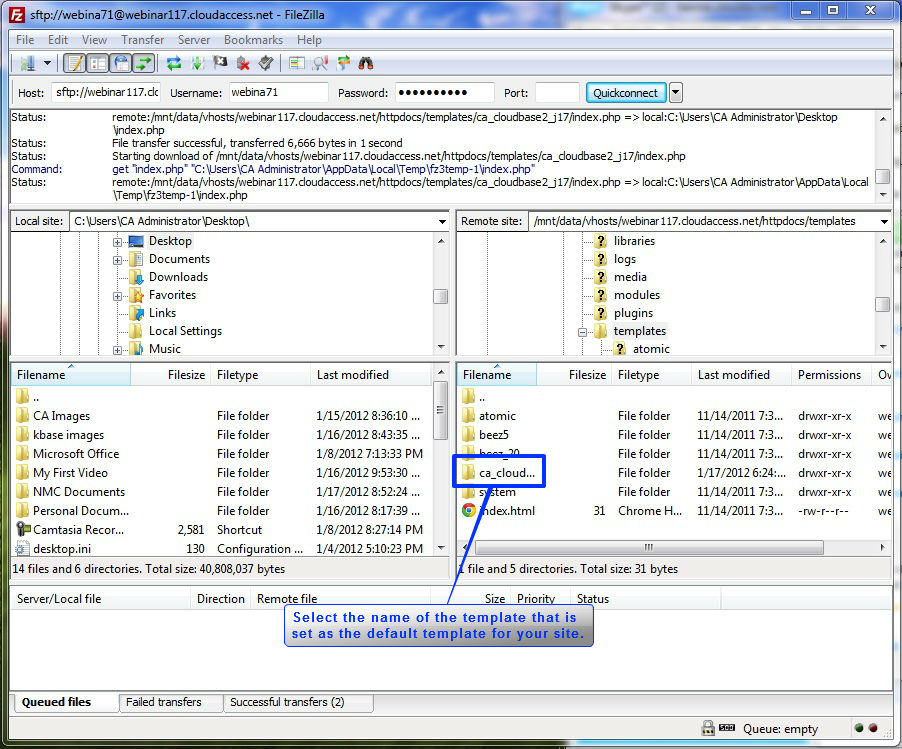
Next, select the name of the template that is currently set as your default template.
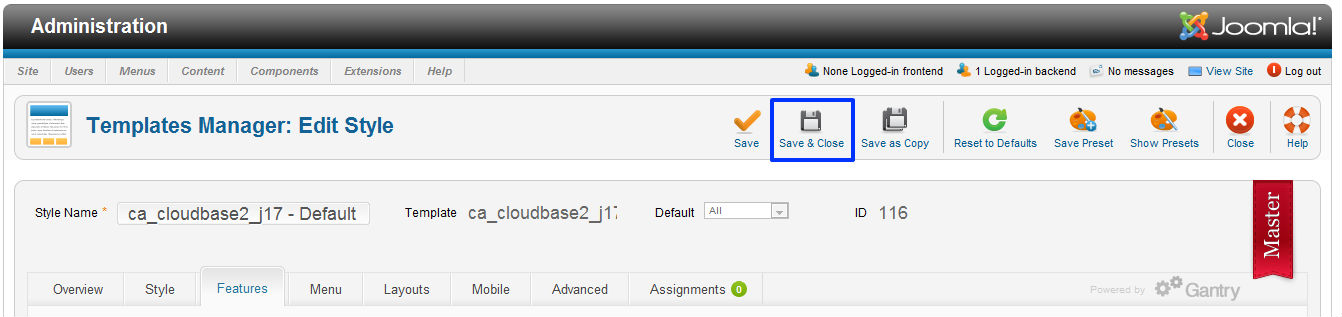
Inside the "Template Manager: Edit Styles" area, select the "Features" tab.
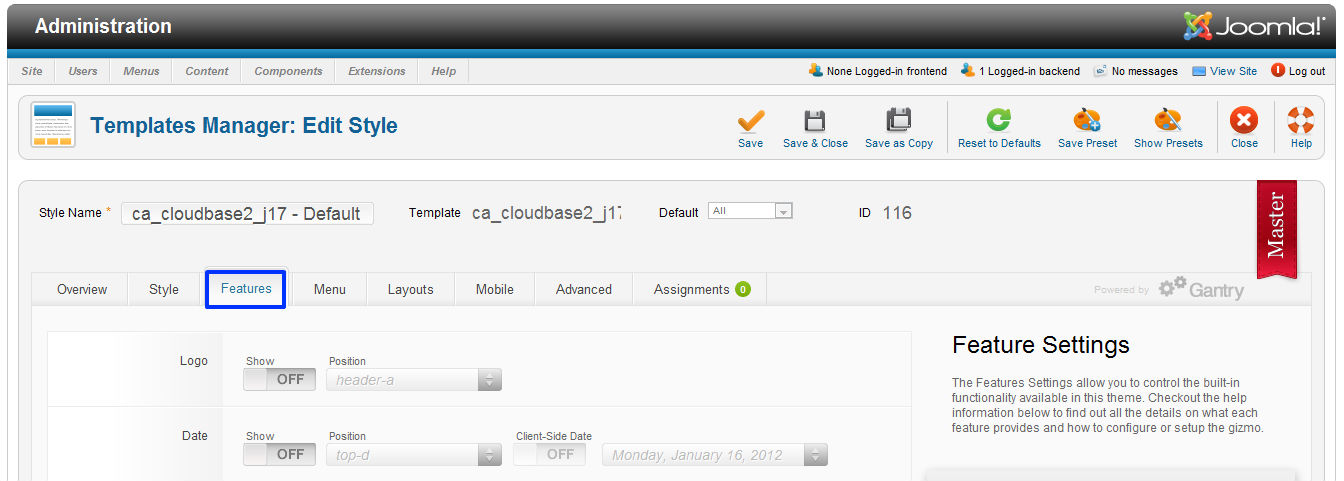
Scroll down to the "Google Analytics" field. Be sure that the function is enabled by moving the Enable switch to "ON", and insert the UA Code (the Tracking ID) into the field. Scroll back up, and select "Save & Close" to save your work and exit the Template Manager.
Your site should now connected to your Google Analytics account. Using your account, you can now monitor the traffic that visits your site.
Back to top
Inserting the Google Analytics Tracker ID in another Template
Although the template you're currently using may not feature an easily accessible place to enter your Tracker ID supplied by Google Analytics, you can still manually insert the Tracker ID using file transfer protocol (FTP). After creating your Google Analytics account, follow the steps below to insert the Tracker ID in a non-Gantry template. After establishing a Google Analytics account, Google will give you an HTML code to insert into your template. Please see the screenshot below to view a sample code given by Google Analytics.
Copy the code. Go back to your FTP directory. and find and open the httpdocs file for your site.
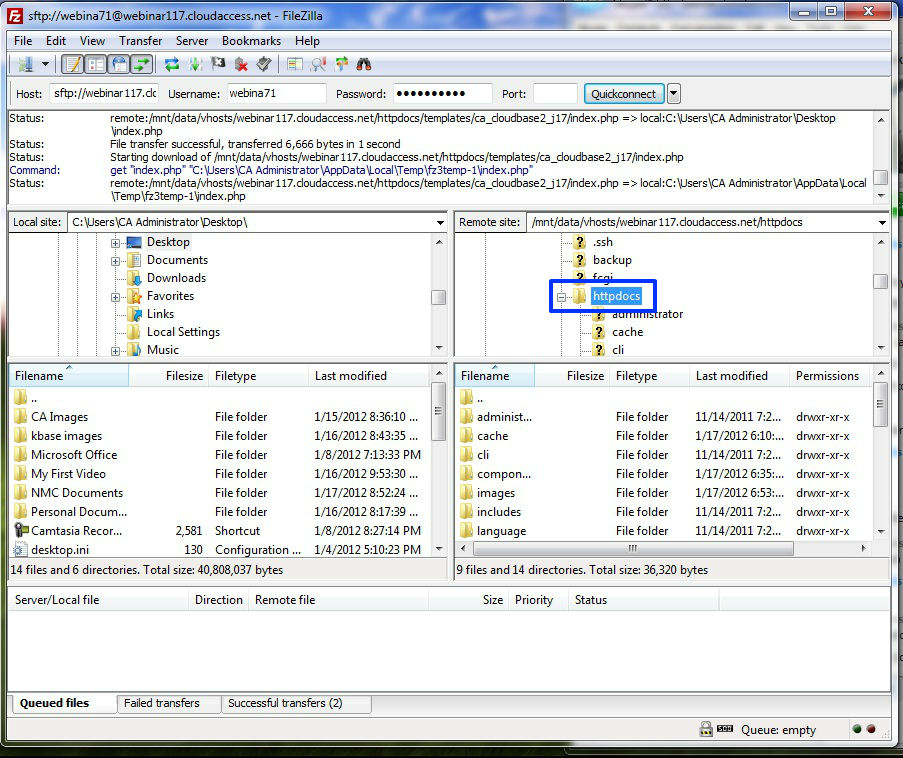
Once inside the httpdocs file, find and open the templates file.
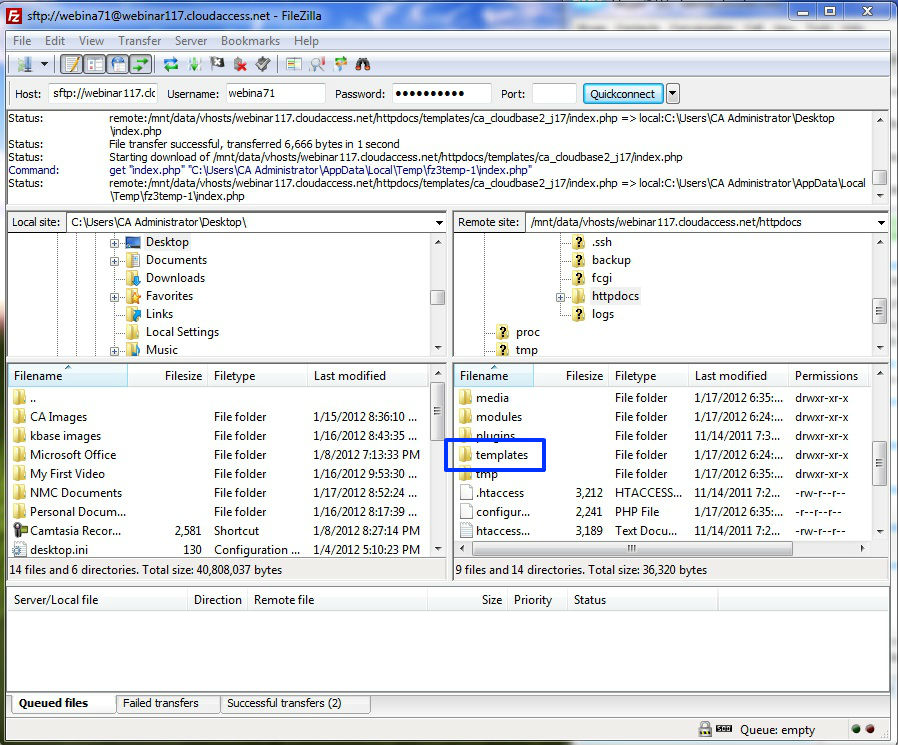
Once inside the templates file, find and open the template that is set as your default template for the site in your Joomla application. Please note that if you're using multiple templates for multiple pages, you'll have to apply for multiple Google Analytics accounts and repeat this process for each template that you're using. If you're using one template for the entire site, you'll only have to do this procedure once.
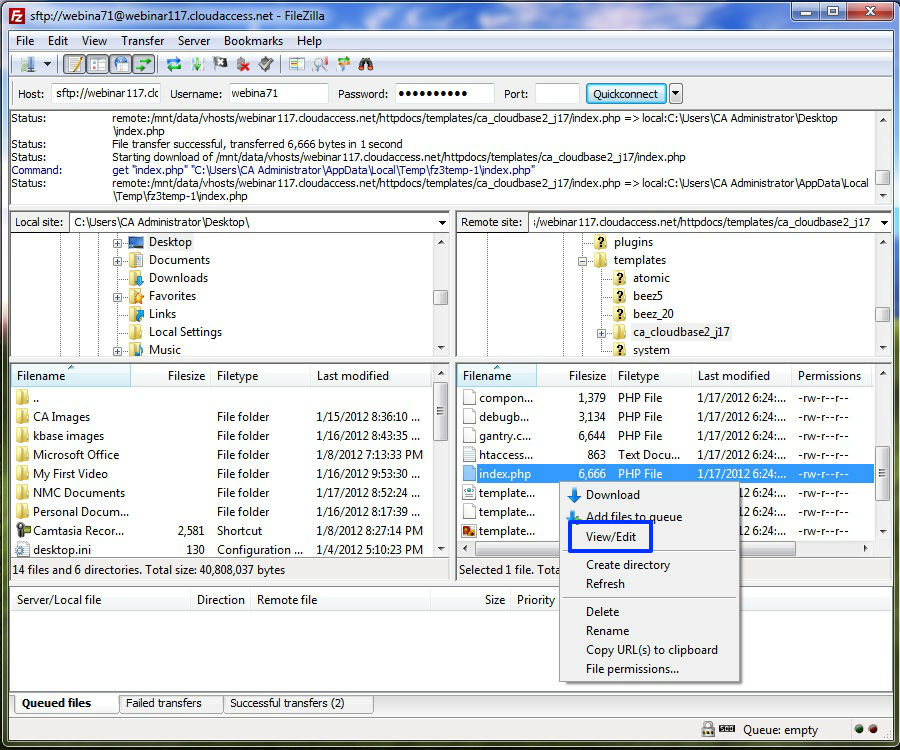
Once inside the default template file, locate the index.php file. Why the index file? By placing the code in the index file, it will render for all pages in your site as long as that's the template you're using for each page. As mentioned above, if you are featuring different templates, you'll have to repeat this process for every template. Open the index.php file by right-clicking on it and selecting the "View/Edit" option.
Your index.php file will open in a new window. We highly recommend that you backup this file on your disk before proceeding. If you make a mistake, you'll have to have CloudAccess.net run a restore for your site. But, if you make a backup prior to inserting this code, you can just paste the file right back into your site using FTP.
In the index.php window, scroll all the way to the bottom. Locate the final </body> tag. Before the final </body> tag, insert the code that you received when you established your Google Analytics account.
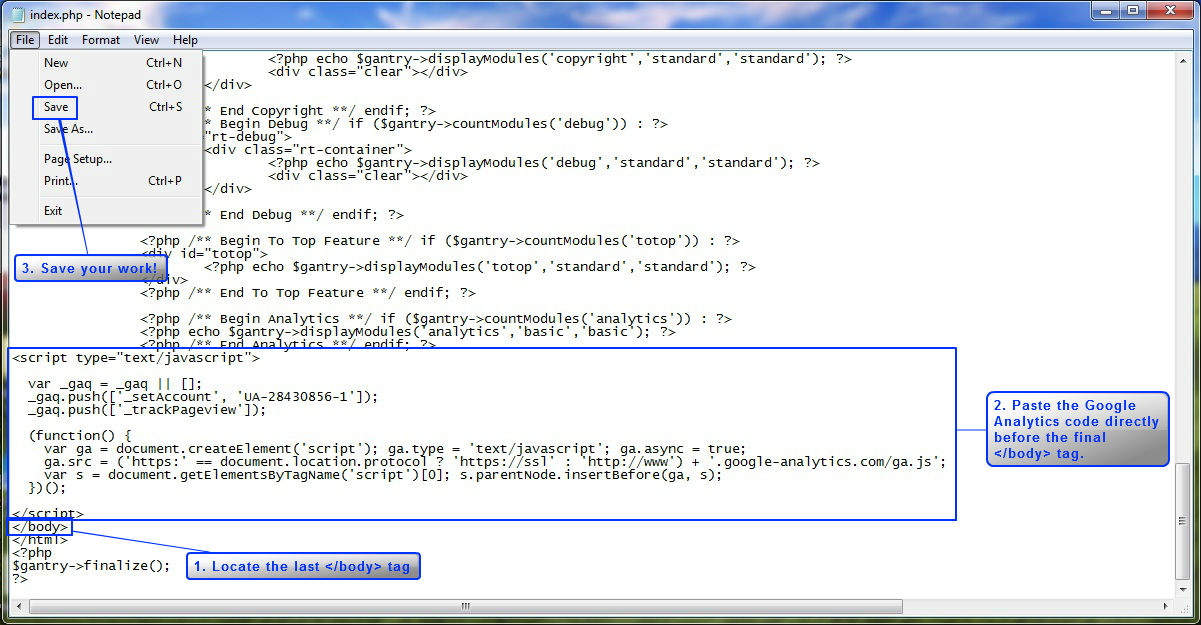
Don't forget to save your work. If you added the Google Analytics code in to a backup file that you made (you didn t make the changes live using FTP), you can upload the new file and overwrite the existing file in FTP.
Back to top
Knowledgebase

100% FREE
Joomla & WordPress
Hosting
- Launch Instantly
- Free Subdomain
- Free Training
- Free SSL
- 500MB Space
- 1CPU/1GB RAM
- FTP Access
- MySQL Access

Do you have suggestions for improving this article?
We take a great deal of pride in our knowledgebase and making sure that our content is complete, accurate and useable. If you have a suggestion for improving anything in this content, please let us know by filling out this form. Be sure to include the link to the article that you'd like to see improved. Thank you!