- You are here:
-
Additional Resources

-
FTP - SFTP - SSH
- Creating Cron Jobs from an SSH Terminal
Importing an Akeeba Backup into the CloudAccess.net Platform using FTP
If you're a paying CloudAccess.net client, our support team will happily import the .jpa file you created using Akeeba Backup. This article offers instructions for importing your own .jpa file in case you want to do it yourself.
Before you Start
Protecting Current Site Files
Uploading Akeeba Backup (.jpa) and Kickstart (.php) Files
Running Akeeba Kickstart
Completing the Process
Before you Start
Before you start you'll want to install the free Akeeba Backup component into your Joomla sInstance and then create the backup. The backup that will be created will be in the form of a .jpa file. You'll also want to visit this site to download the Akeeba Kickstart.php file. Save both the .jpa file and the .php file to your computer. We also highly recommend that you take a backup of your Joomla Instance in your Cloud Control Panel™(CCP). Learn how to create and manage your backups. You can also check to see if you have enough disk space for the backup and the jpa restoration in your CCP.
Protecting Current Site Files
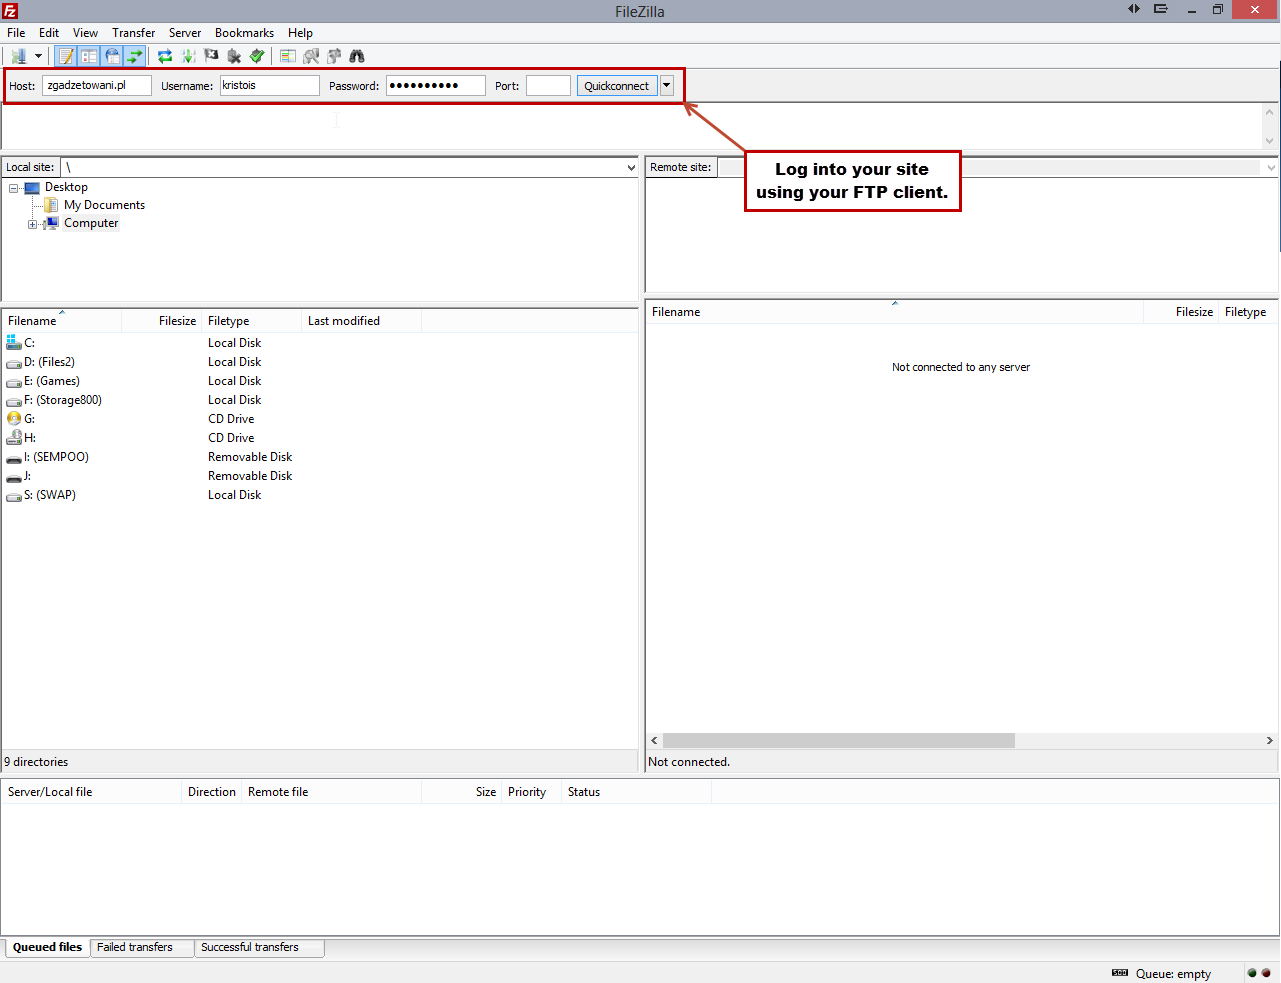
Next, you'll need to log into your Joomla Instance using FTP. Learn how to access your FTP login details.
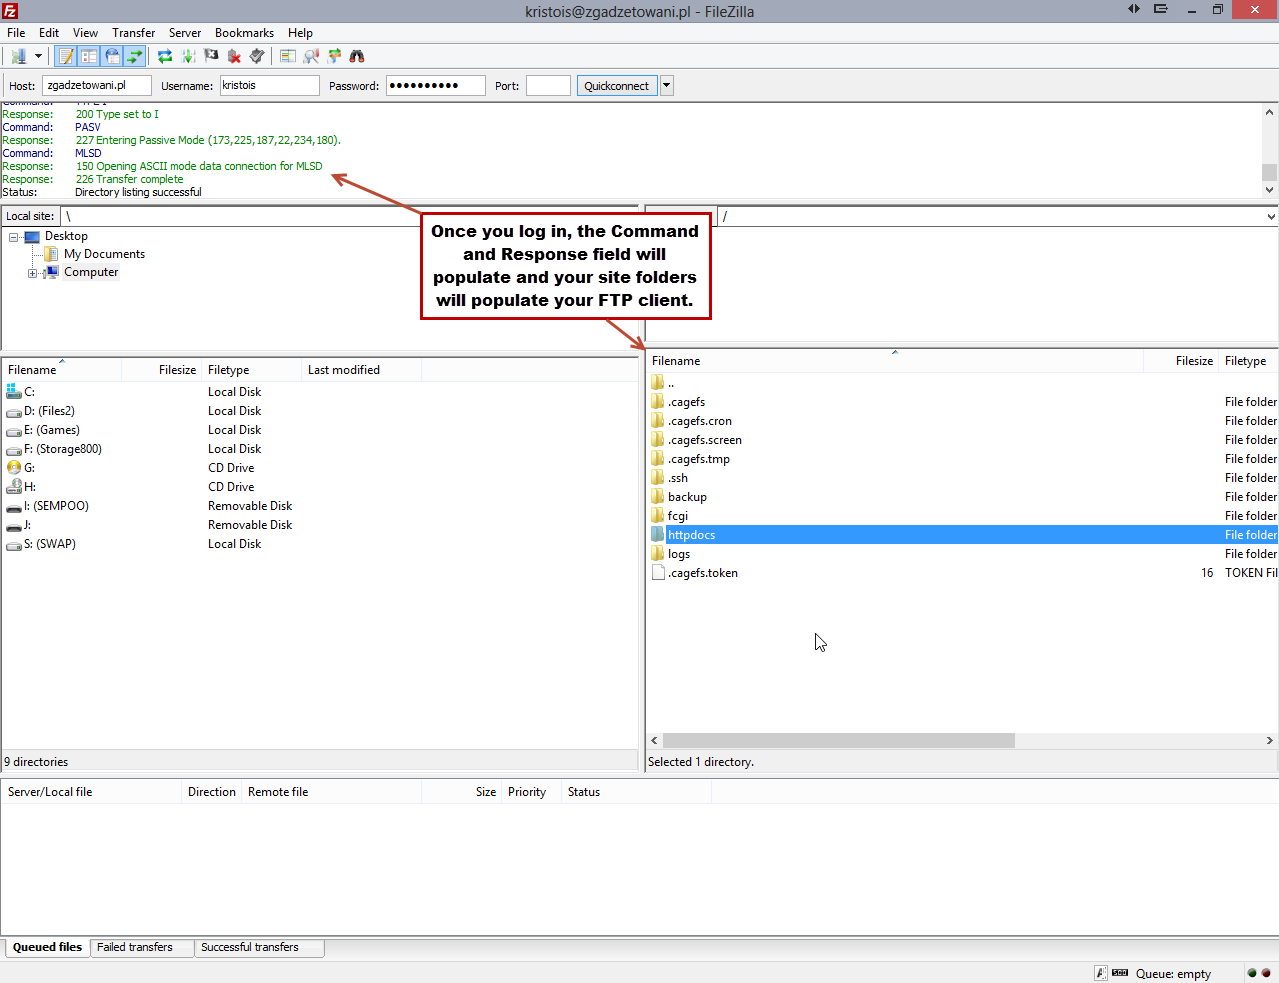
After logging in you’ll see the Command & Response field populate and your Joomla Instance folders populate within the FTP client.
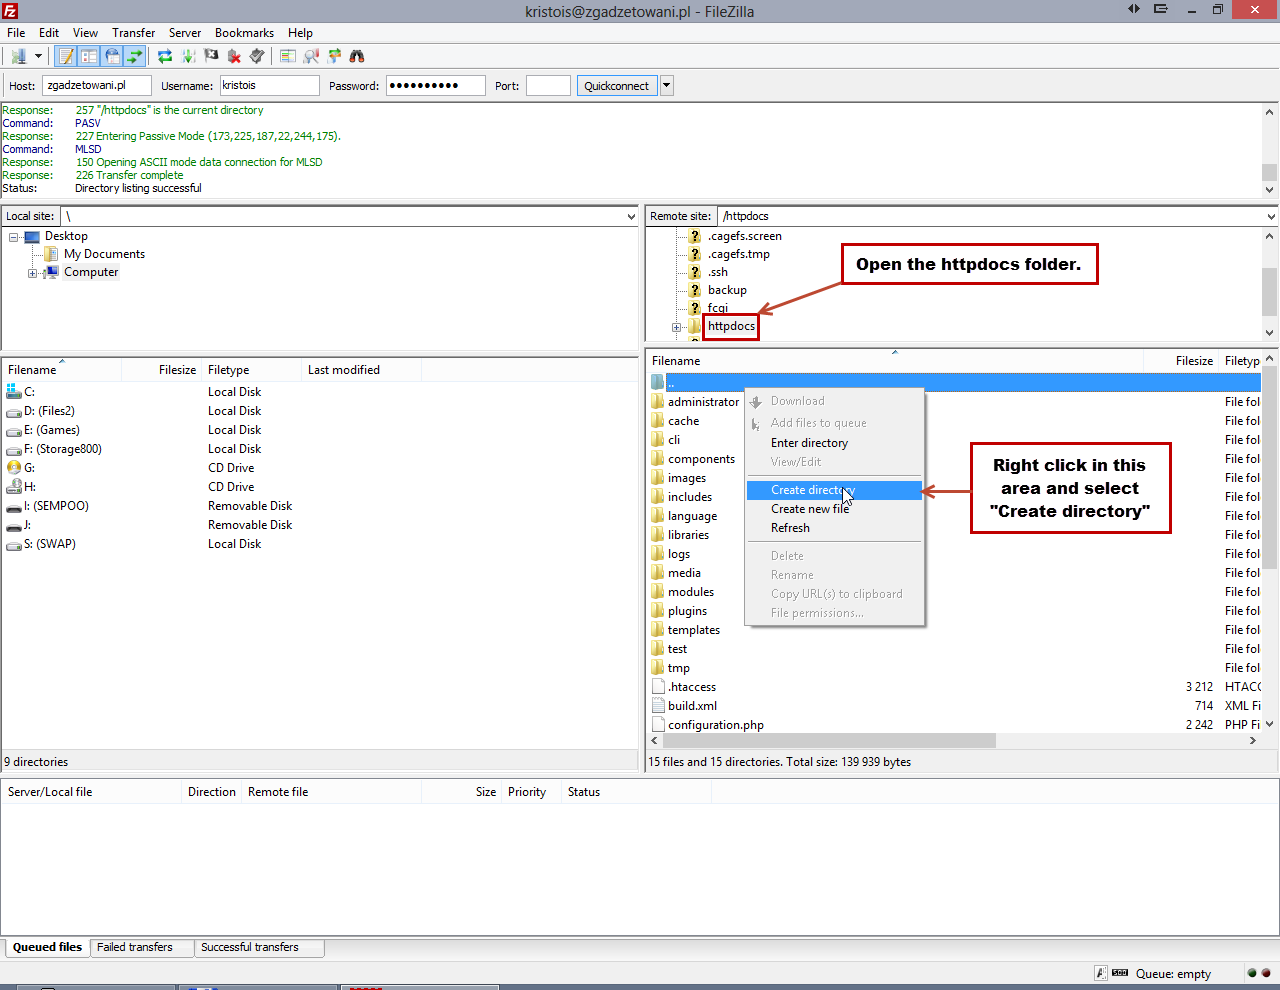
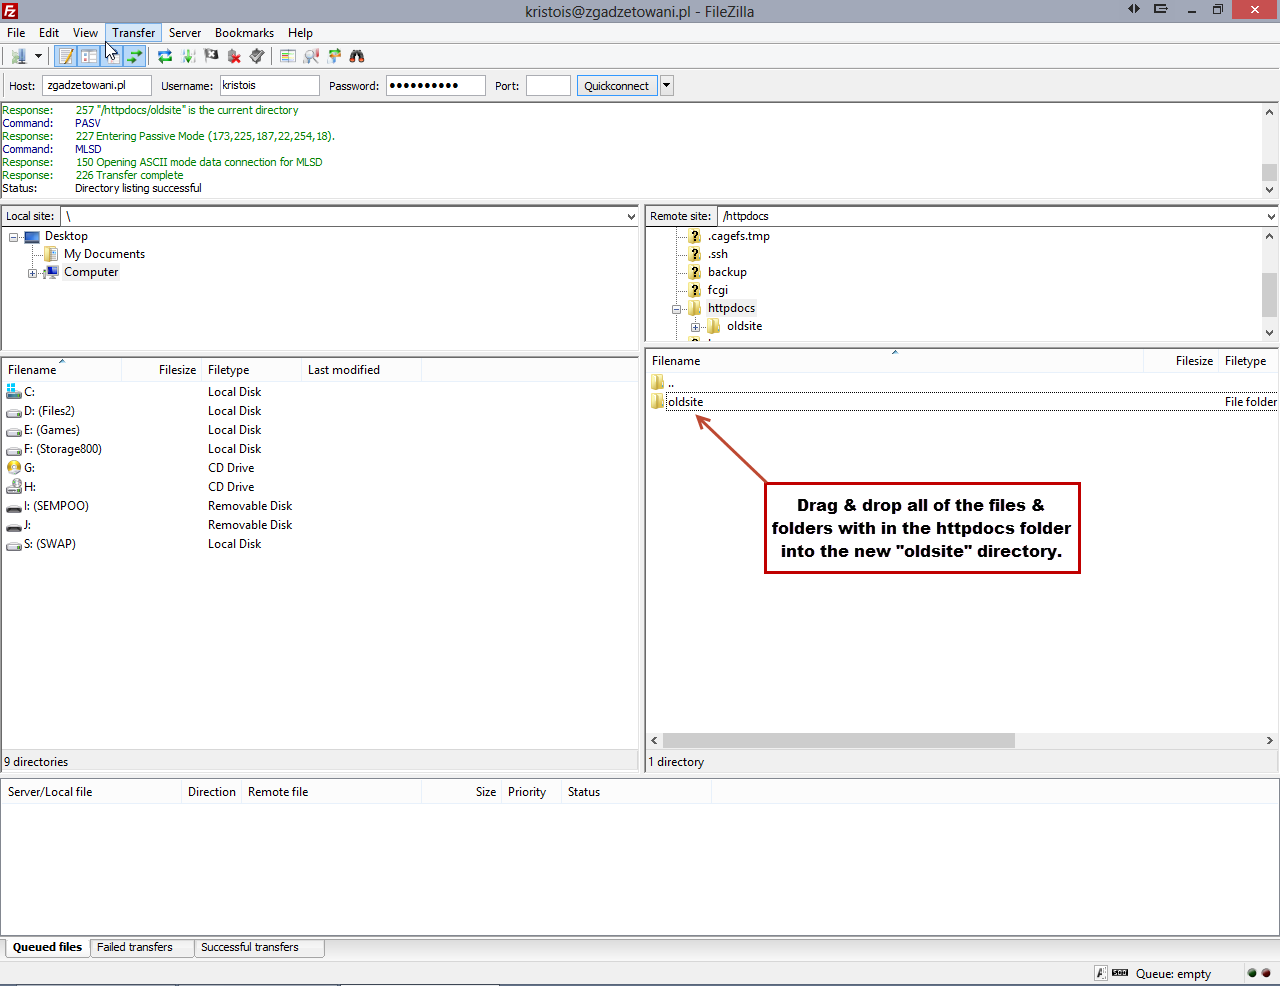
In the httpdocs folder, create a new directory.
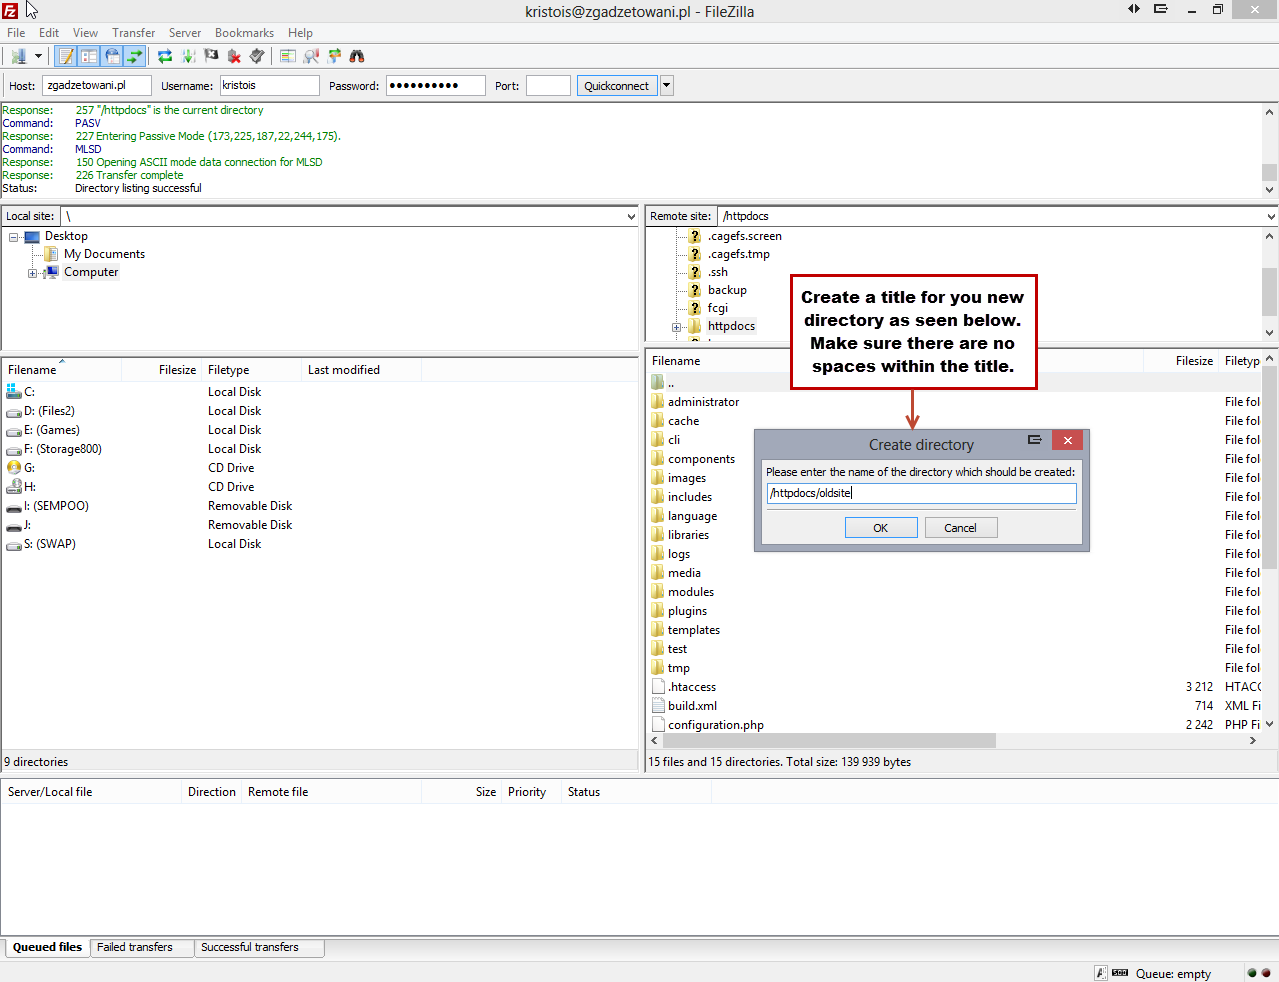
Title the new folder “oldsite”. Be sure there are no capital letters and no spaces within the directory name.
Then, you'll move all off the current files from the httpdocs folder into the "oldsite" directory. This is faster than deleting the files and it keeps all of the files safe in case they need to restore or revert. Simply highlight and drag and drop all files and folders into “oldsite” directory in the FTP client.
Back to Top
Uploading Akeeba Backup (.jpa) and Kickstart (.php) Files
Next, using the FTP client, navigate to the location on your computer where you saved the .jpa and kickstart.php files. Upload both the .jpa and the kickstart.php file to the httpdocs folder. It's important to note that when you download the Kickstart.php file it comes in a .zip file with two other Java Script files. You should also upload these to your site as seen in the screenshot below.
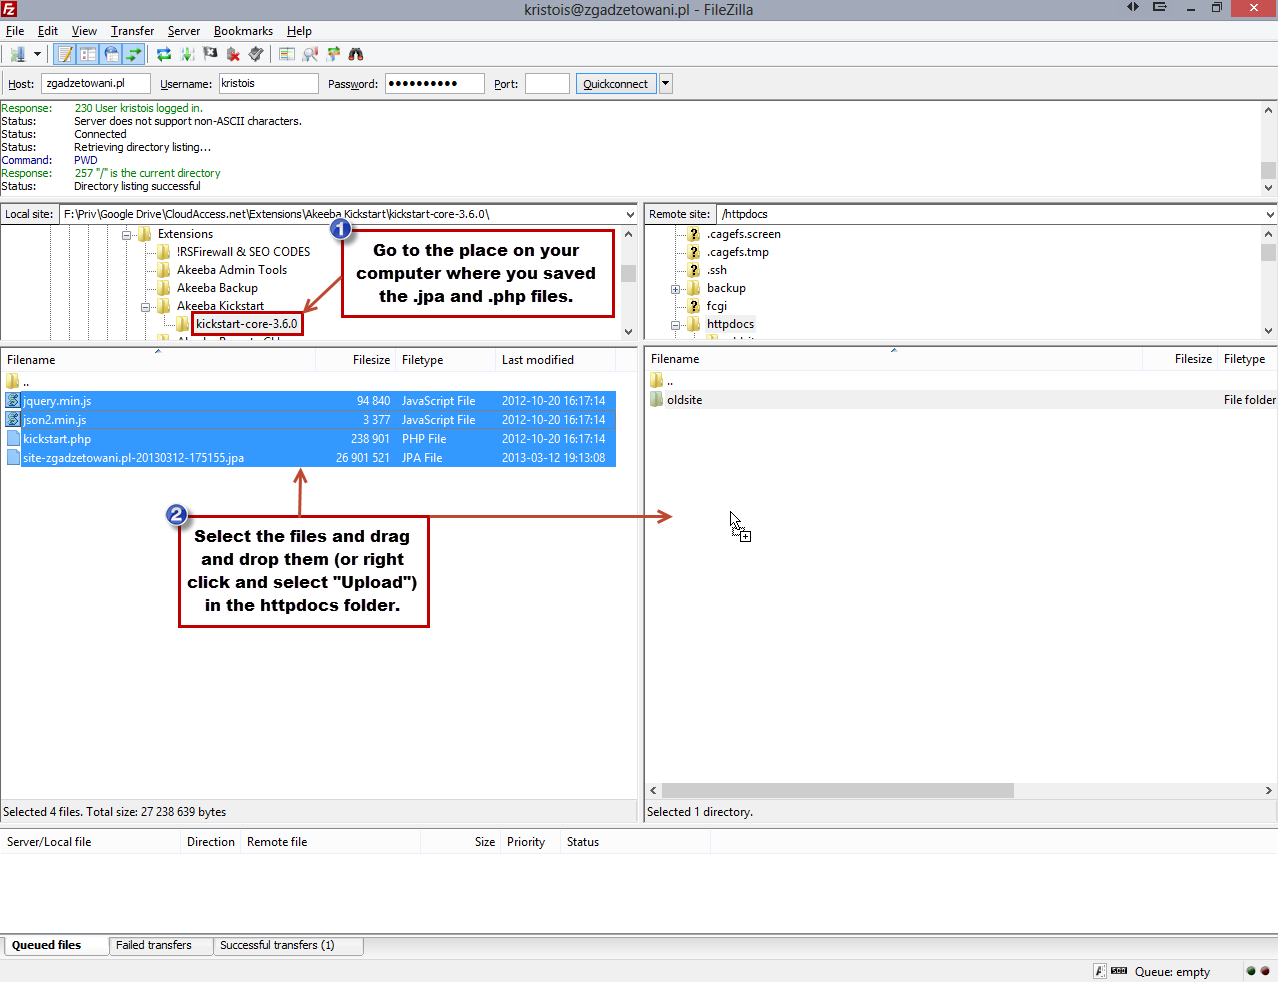
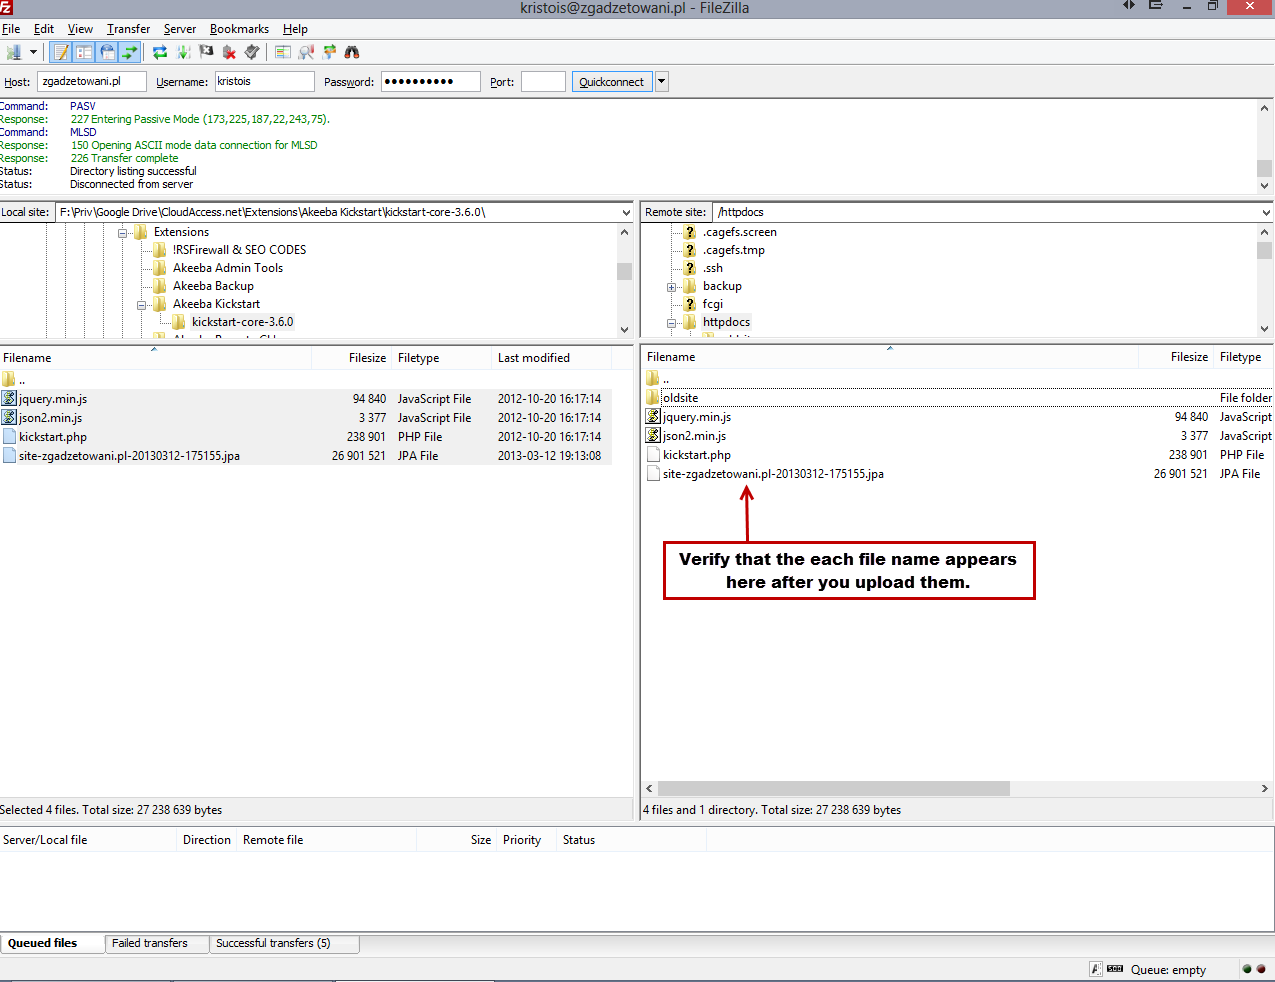
Once they are uploaded, the folders will appear as sub-files in the httpdocs folder.
Back to Top
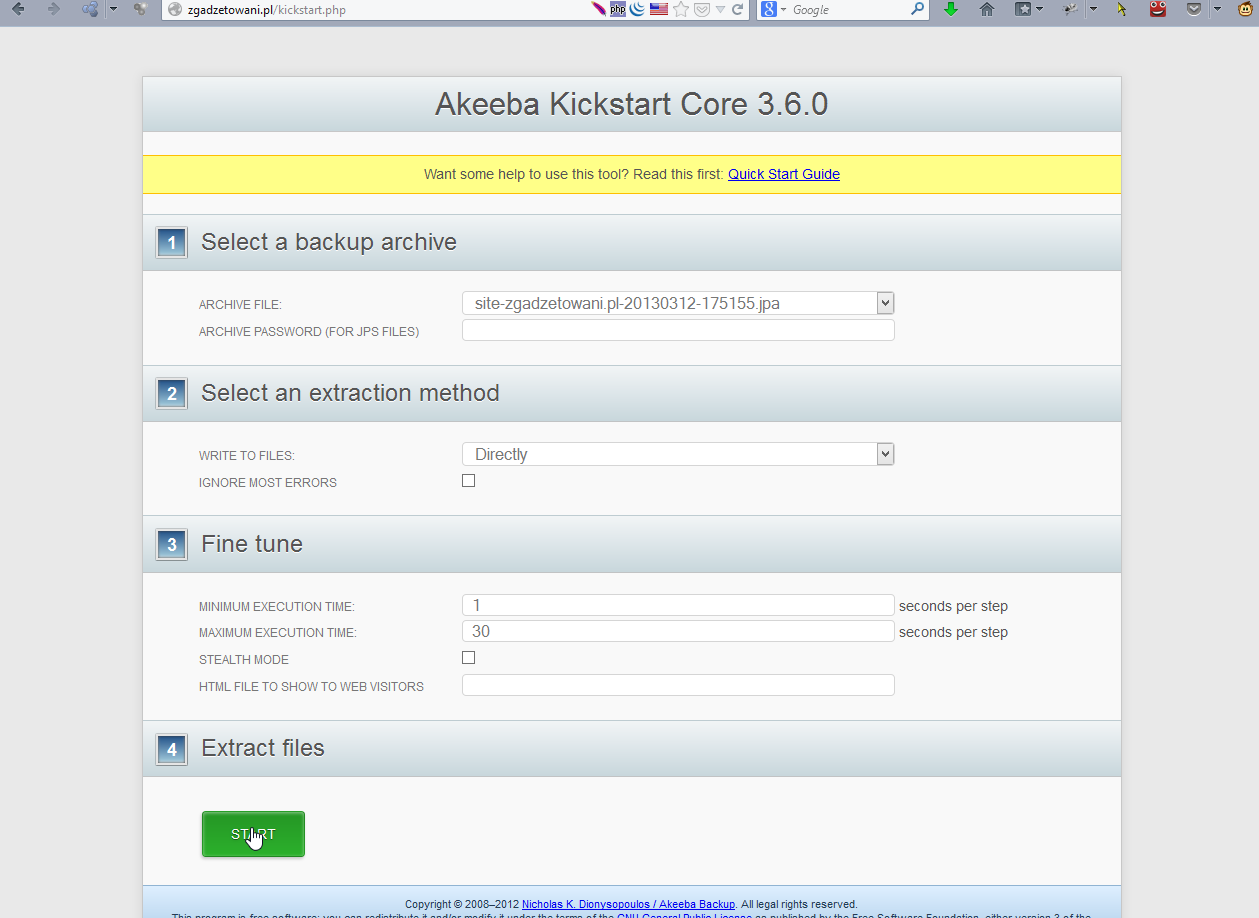
Running Akeeba Kickstart
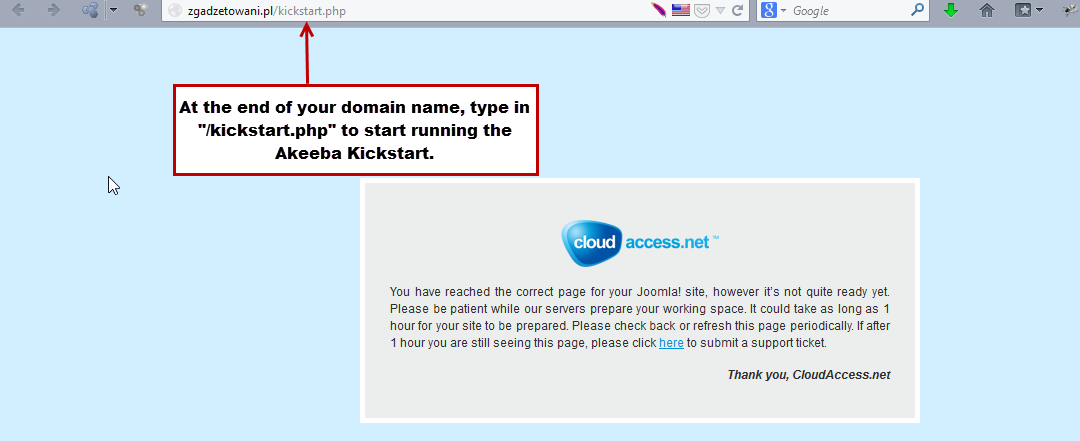
Next, go to the front end of the site and run the Akeeba Kickstart.php to extract the files on the CloudAccess.net server. Because you've already uploaded the kickstart.php file to your site using FTP, simply browse to the file by typing in "/kickstart.php" at the end of your domain name.
Run through the Akeeba Kickstart process as it's outlined for you. See the screenshot below for help.
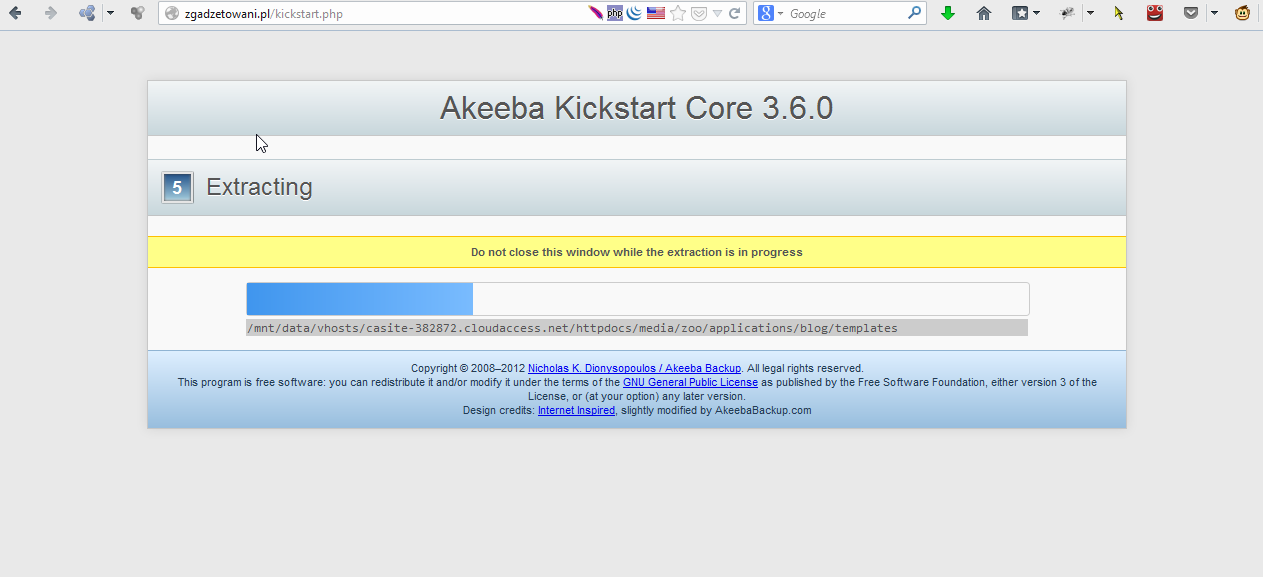
Akeeba Kickstart will start extracting the site files. Don't close the window while this happens
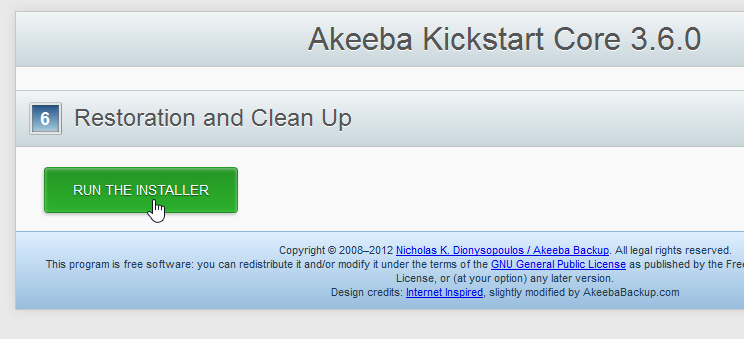
Once the site files are extracted, click on the "Run the Installer" button.
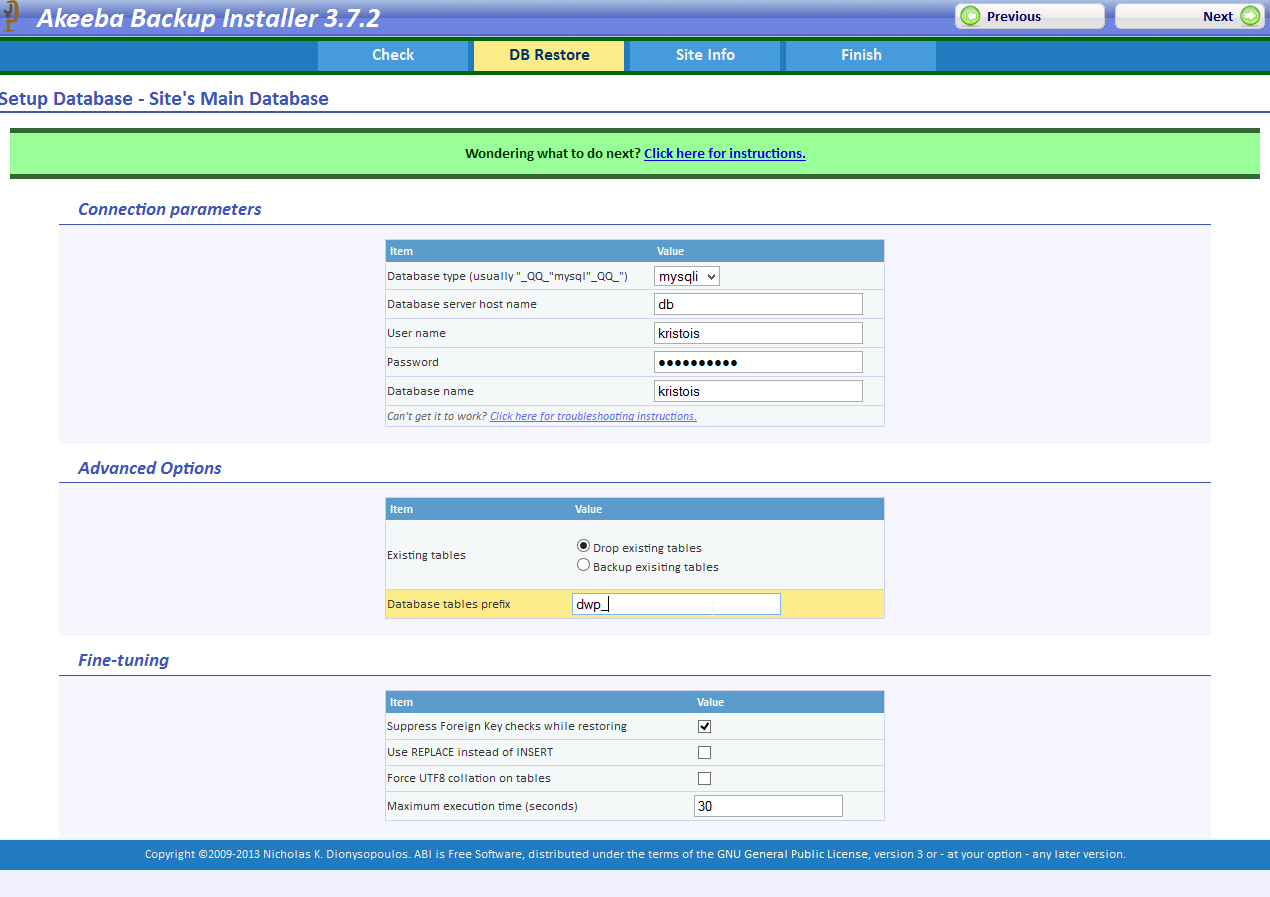
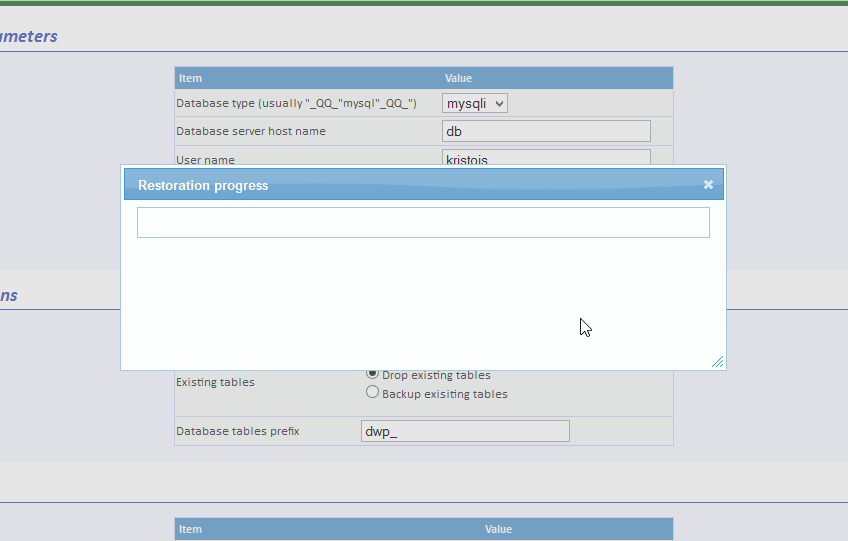
You'll be asked to enter the database type, database server host name, user name, password, database name and a database tables prefix. You'll also usually be asked to provide a contact email.
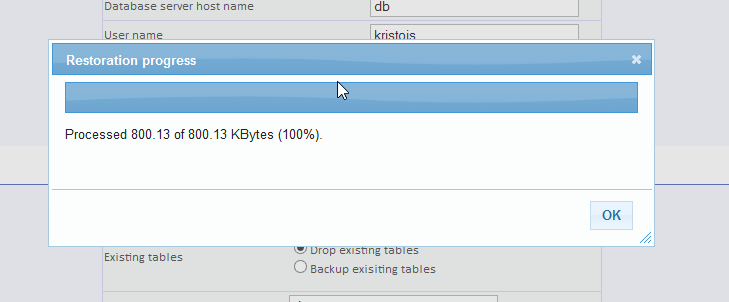
You'll see a Restoration Progress bar.
Once the restoration is complete, click "OK".
Then click on the "Clean Up" button to wrap up the process.

Back to Top
Completing the Process
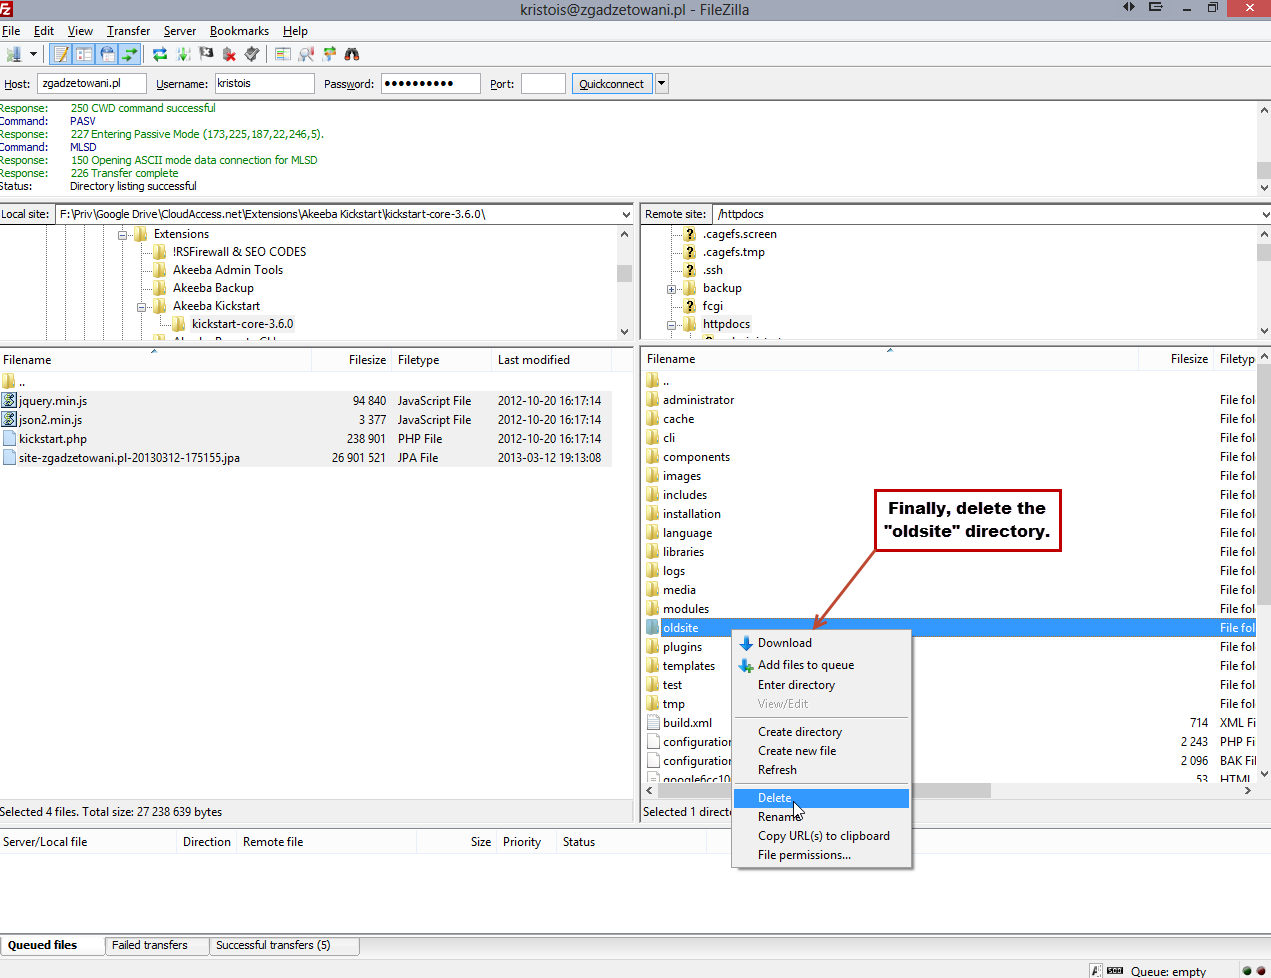
After the process is complete it will be confirmed. Navigate through the entire Joomla Instance to be sure it's working properly. Once you confirm that everything is working as it should, they delete the "oldsite" directory using FTP.
Back to Top
Knowledgebase

100% FREE
Joomla & WordPress
Hosting
- Launch Instantly
- Free Subdomain
- Free Training
- Free SSL
- 500MB Space
- 1CPU/1GB RAM
- FTP Access
- MySQL Access

Do you have suggestions for improving this article?
We take a great deal of pride in our knowledgebase and making sure that our content is complete, accurate and useable. If you have a suggestion for improving anything in this content, please let us know by filling out this form. Be sure to include the link to the article that you'd like to see improved. Thank you!