Setting up Autodiscover with CloudMail
Autodiscover allows users to easily configure their email client by automatically determining mail server specifications. Without Autodiscover, users have to manually configure their email client, which is tedious and leaves a lot of room for error. To enable Autodiscover, you’ll want to contact your DNS hosting provider, but if your domain is registered through us, we give you access to your DNS control panel where you can easily make these changes yourself.
To enable Autodiscover for CloudMail, our integrated email service provided free of charge for any domain name purchased through CloudAccess.net, you’ll need to create two DNS records - a CNAME record and an SRV record.
Adding a CNAME Record
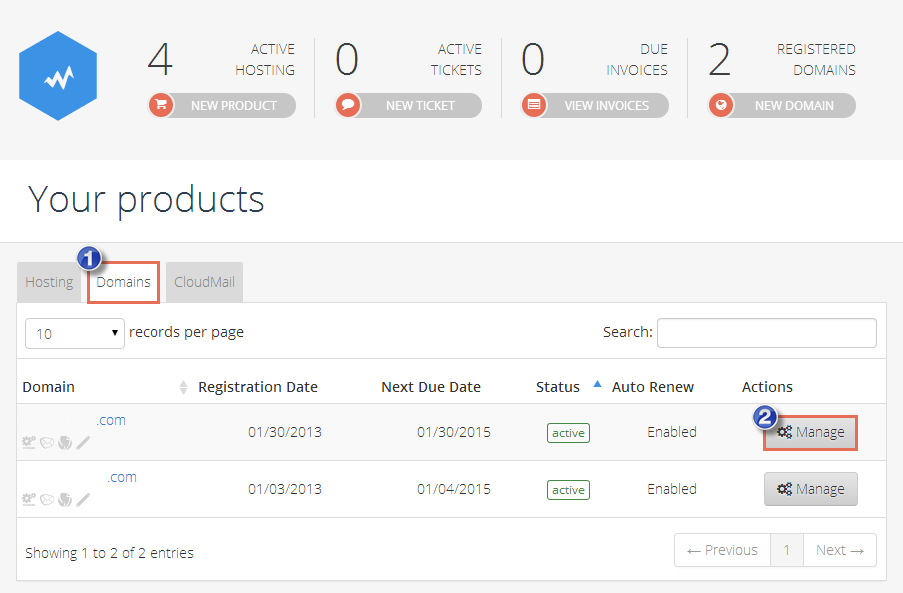
First, add a CNAME (canonical name) record for the domain. The CNAME record functions as a shortcut. In fact, you can think of it as a shortcut to a file on your desktop. It’s an alias for the Address (A) record that maps an IP address to a target server, which is our CloudMail server in this case. To add the CNAME record, log into the CCP, click on the “Domains” tab below “Your products” and click on the “Manage” button for the domain name that you’d like to work with.
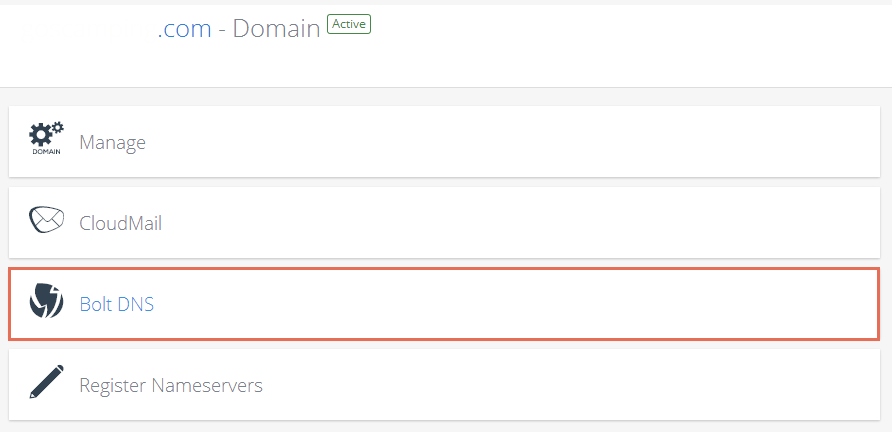
In the next window, click on the “Bolt DNS” option.
When adding a CNAME record, use the following information before clicking on the “Add this record” button:
Name: autodiscover.domain.com (replacing “domain.com” with your domain).
TTL (Time To Live): 3600
Type: CNAME
Content: mail.cloudaccess.net

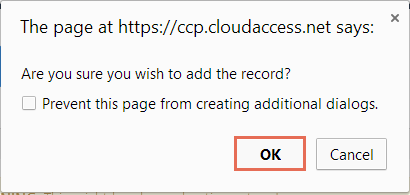
You’ll be asked to verify that you’d like to add the record. Select “Ok”.
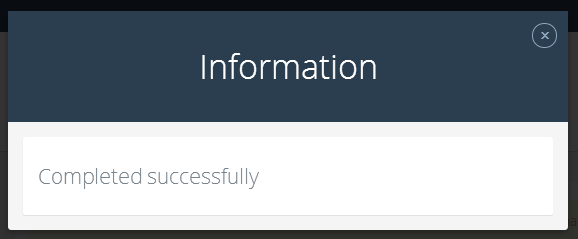
You’ll receive a message letting you know that you successfully added the record.
Adding an SRV Record
Next, add an SRV (Service) record, which provides data like the hostname and the port number of servers for specific services. Use the following information when creating the SRV record:
Name: _autodiscover._tcp.domain.com (replacing “domain.com” with your domain).
TTL (Time To Live): 3600
Type: SRV
Content: 0 443 mail.cloudaccess.net
Priority: 1
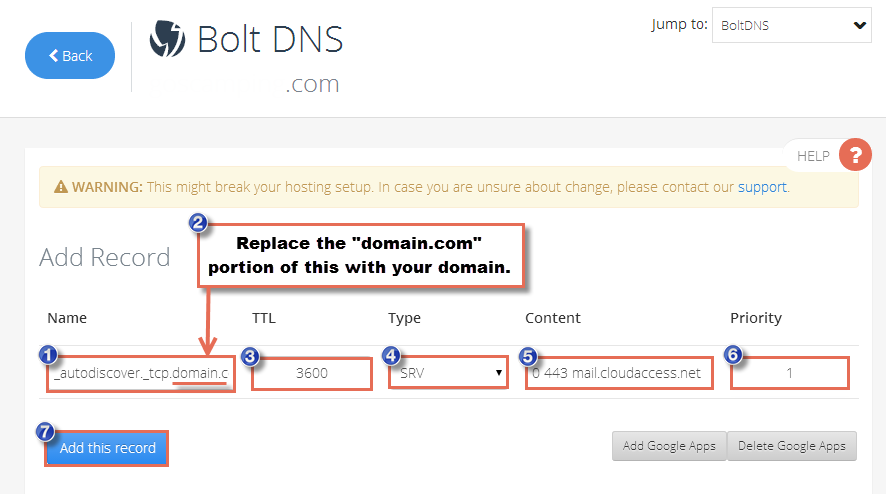
In the content window, you’re specifying the weight (0), the port # (443), and the server name (mail.cloudaccess.net), each separated by a space. Once the information is entered correctly, click on the “Add this record” button. Verify that you’d like to add the record and you’ll receive a message letting you know it was added successfully.
Verifying the SRV Record
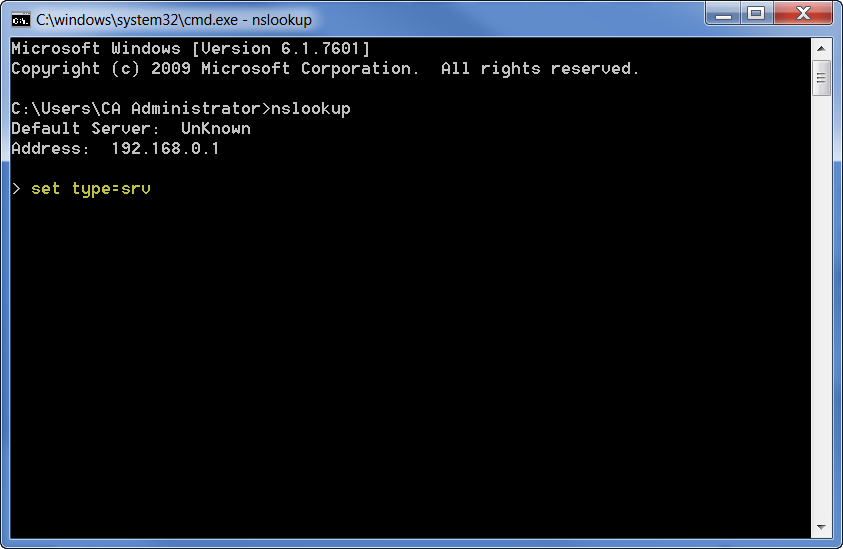
If you’d like to verify that your SRV record is working correctly, you can use cmd.exe, a command prompt interpreter supplied by Microsoft for the Windows operating system. Search your programs for cmd.exe and open it.
Once cmd.exe is open, type in “nslookup” as the first prompt and then click “Enter” on your keyboard.

Next, type “set type=srv” and press “Enter” on your keyboard.
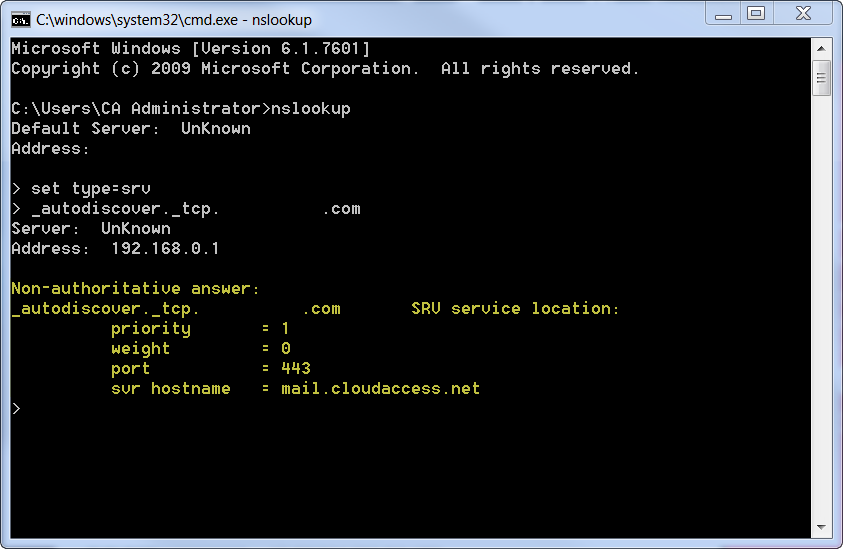
Next, type “_autodiscover._tcp.domain.com” (replacing “domain.com” with your domain), and press “Enter” on your keyboard.

You should get a response that looks something like the following screenshot.
Autodiscover is a really cool tool that can help you save time configuring your email services. If you have any questions about autodiscover, CloudMail, or questions about our platform, feel free to reach out to us by submitting a support ticket. If you’ve purchased a domain with us, we’d love to help you activate your free CloudMail service, add users and enable autodiscover.
Thank you for choosing CloudAccess.net!
About the author